 Kia Sorento: Rear Differential Carrier Removal
Second Generation XM (2011-2026) / Kia Sorento XM 2011-2026 Service Manual / Driveshaft and axle / Differential Carrier Assembly / Rear Differential Carrier Removal
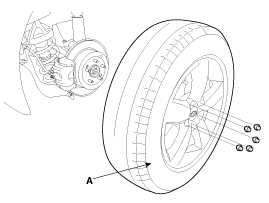
| 1. |
Remove the rear wheel and tire (A) from rear hub.
|

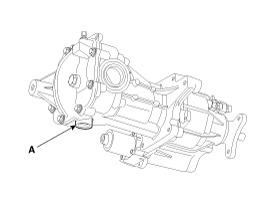
| 2. |
Loosen the drain plug (A) and pull out the differential gear oil.
|
| 3. |
Remove the rear driveshaft.
(Refer to Rear Driveshaft Assembly - "Rear DriveShaft")
|
| 4. |
Remove the propeller shaft.
(Refer to Propeller Shaft Assembly - "Propeller Shaft")
|
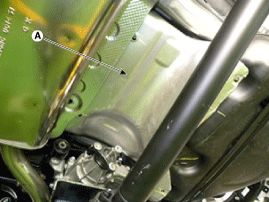
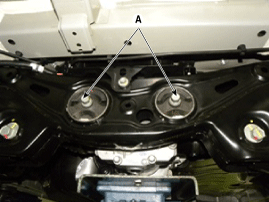
| 5. |
Remove cover (B) as loosen screw (A-4ea).
|
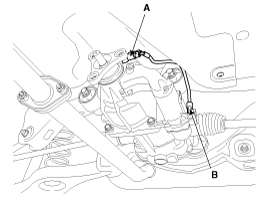
| 6. |
Disconnect the pressure sensor connector (A) and oil hydraulic
motor connector (B).
|
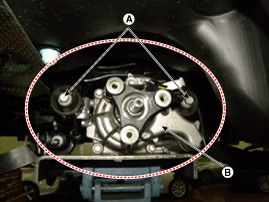
| 7. |
Remove rear differential assembly (B) as loosen mounting (A-4ea)
after install jack.
|
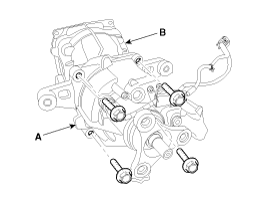
| 8. |
After loosen the bolt and then remove the differential carrier
(B) from the coupling (A).
|
| 9. |
Install in the reverse order of removal.
|
| 10. |
Gear oil is injected.
|
| 11. |
Check the wheel alignment.
(Refer to Suspension System - "Alignment")
|
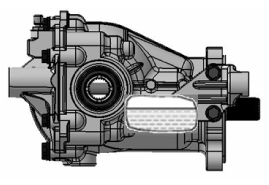
 Rear Differential Carrier Component
1. Rear Differential Carrier
2. Coupling Assembly
...
 Rear Differential Carrier Disassembly
Rear differential carrier disassembly
1.
Drain oil by removing the drain plug (A) and filler plug (B) before
disassembling the rear differential carrier.
...
See also:
Components Location
1. Front axle
2. Front lower arm
3. Drive shaft
4. Sub frame
5. Stabilizer bar
6. Steering gearbox
7. Stabilizer link
8. Front strut assembly
...
IPM Installation
1.
Install IPM(Intelligent intergrated Platform Module).
2.
Connect the IPM connector.
3.
Install the crash pad ...
Cylinder Head Installation
ŌĆó
Thoroughly clean all parts to be assembled.
ŌĆó
...
Categories
- Home
- First Generation
- Second Generation
- Kia Sorento XM 2011-2026 Owners Manual
- Kia Sorento XM 2011-2026 Service Manual

Copyright ® www.ksmanual.com 2014-2026