
 Kia Sorento: TJ Joint Removal
Second Generation XM (2011-2026) / Kia Sorento XM 2011-2026 Service Manual / Driveshaft and axle / Driveshaft Assembly / TJ Joint Removal
|

| 1. |
Remove the Front Driveshaft.
(Refer to Driveshaft Assembly - “Front Driveshaft”)
|
| 2. |
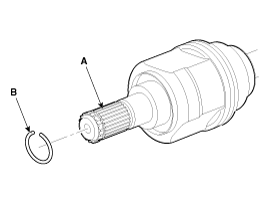
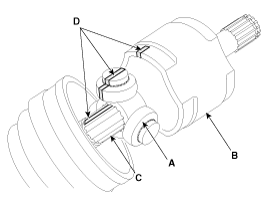
Remove the housing circlip (B) from the driveshaft spline (A).
|
| 3. |
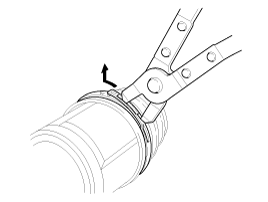
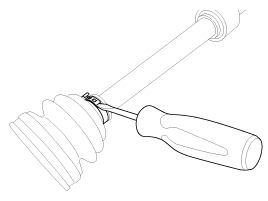
Remove both boot bands from the TJ housing.
|
| 4. |
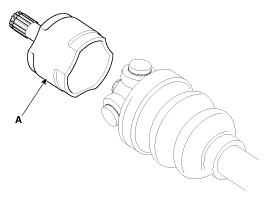
Remove the TJ housing (A).
|
| 5. |
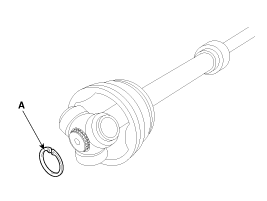
Remove the retainer ring (A) from the shaft.
|
| 6. |
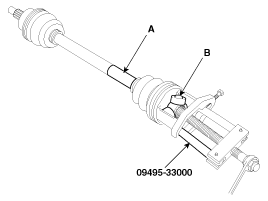
Remove the spider assembly (B) from the driveshaft (A) using the
special tool (09495-33000).
|
| 7. |
Clean the spider assembly.
|
| 8. |
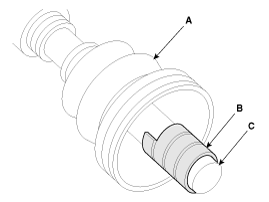
Remove the TJ boot (A).
|
 TJ Joint Components
[LH]
1. BJ assembly
2. BJ circlip
3. BJ boot band
4. BJ boot
5. Shaft
6. TJ boot band
7. TJ boot
8. Spider assembly
9. Retainer ring
10. ...
 TJ Joint Inspection
1.
Check the spider assembly for roller rotation, wear or corrosion.
2.
Check the groove inside the joint case for wear or corrosion
...
See also:
Seat Heater Inspection
Front seat
1.
Operate the seat warmer after connecting the connector, and then
check the thermostat by measuring the temperature of seat surface.
...
Rear Driveshaft Disassembly
•
Do not disassemble the BJ assembly.
•
...
Telemetics Unit (TMU) Installation
1.
Install the TMU unit.
2.
Install the AVN head unit and center fascia panel.
3.
Connect the negative (-) batt ...
Categories
- Home
- First Generation
- Second Generation
- Kia Sorento XM 2011-2026 Owners Manual
- Kia Sorento XM 2011-2026 Service Manual

Copyright © www.ksmanual.com 2014-2026