 Kia Sorento: Front Seat Replaccement
Second Generation XM (2011-2026) / Kia Sorento XM 2011-2026 Service Manual / Body (Interior and Exterior) / Seat & Power Seat / Front Seat Replaccement
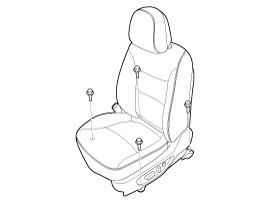
Seat Assembly Replacement
| 1. |
Remove the seat assembly mounting cover.
|
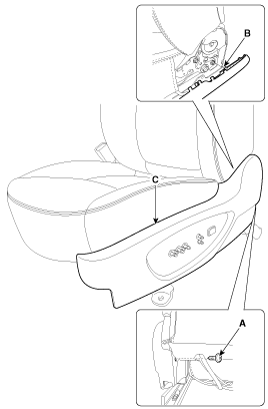
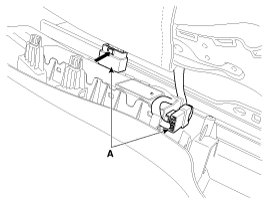
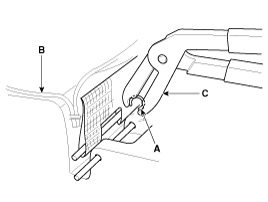
| 2. |
After loosening the seat assembly mounting bolts, remove the seat
assembly (A).
|
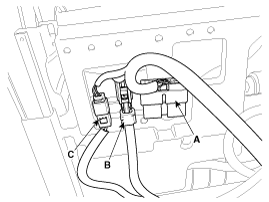
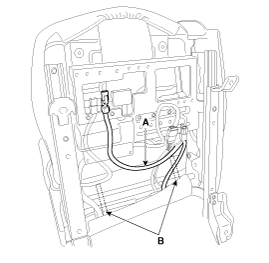
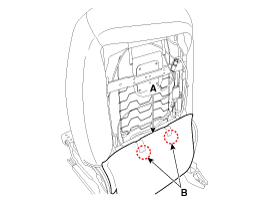
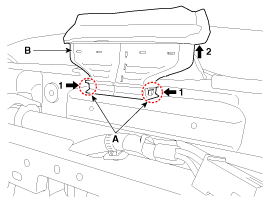
| 3. |
Disconnect the power seat connector (A), airbag connector (B),
seat belt buckle connector (C).
[Driver's]
[Passenger's]
|
| 4. |
Install in the reverse order of removal.
|

Recliner Cover Replacement
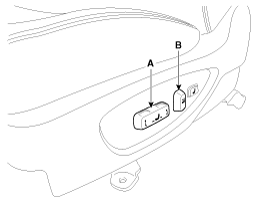
| 1. |
Remove the recliner switch (A) and height switch (B).
|
| 2. |
Loosen the seat recliner mounting screw (A).
|
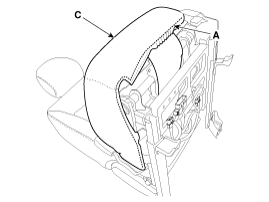
| 3. |
Using the screw driver or remover.
|
| 4. |
Push the hook (B) and then remove the recliner cover (C).
|
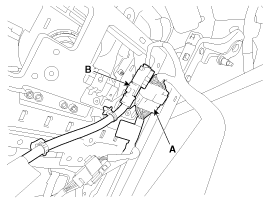
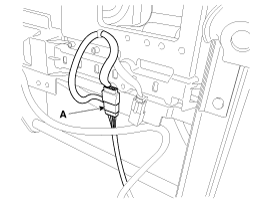
| 5. |
Push the lock pin, disconnect the connector (A).
|
| 6. |
Install in the reverse order of removal.
|
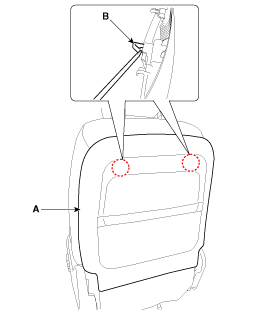
Seat Back Replacement
|

| 1. |
Remove front seat assembly.
|
| 2. |
Remove the recliner cover.
|
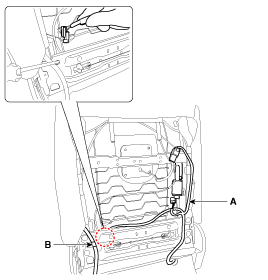
| 3. |
Disconnect the air back wire-ring (A).
|
| 4. |
Disconnect the protector (B).
|
| 5. |
Push the clips (B), from the front seat back board (A).
|
| 6. |
Disconnect the clip (B), from the back frame and then remove the
cover (A).
|
| 7. |
Disconnect the connector and then wirering (A).
|
| 8. |
Remove the air back mounting clip (B).
|
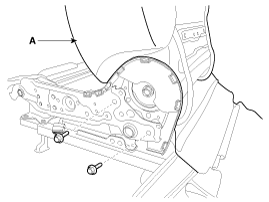
| 9. |
After loosening the mounting bolts, then remove the seat cushion
assembly and seat back assembly (A).
|
| 10. |
Install in the reverse order of removal.
|
Seat Cushion Cover Replacement
| 1. |
Remove front seat assembly.
|
| 2. |
Remove the recliner cover.
|
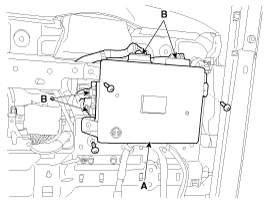
| 3. |
After loosening the mounting screws, then remove the memory seat
unit (A).
|
| 4. |
Disconnect the memory seat unit connecters (B).
|
| 5. |
To remove the seat cushion air ventilation duct (B), push both
sides of the lock clips (A) as the direction of the arrow and then pull
up the upper seat cushion air ventilation duct.
|
| 6. |
After disconnect the protector (A), remove the seat cushion (C).
|
| 7. |
Disconnect the heated seat connector (A).
|
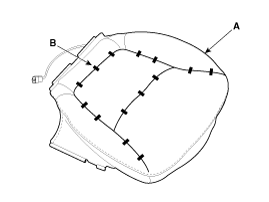
| 8. |
After removing the hog-ring clip (B) on the front of seat cushion
and remove the seat cushion cover (A).
|
| 9. |
Install in the reverse order of removal.
|

 Rear Seat Replacement
Rear Seat Assembly Replacement
[Second row seat assembly]
1.
Push the second row seat assembly [RH] (A) towards the front of
the vehicle as far as possibl ...
See also:
Front Door Components
1. Door grip handle cover
2. Door inside handle cap
3. Door trim
4. Door belt inner weatherstrip
5. Door module
6. Quadrant inner cover
7. Door belt weatherstrip
8. ...
Removal
1.
Disconnect the negative (-) battery terminal.
2.
Remove the steering column upper and lower shrouds (A) after removing
3 screws.
...
Description
EPS (Electric power steering, Column assist type) system uses an electric
motor to assist the steering force and it is an engine operation independent
steering system.
EPS control module ...
Categories
- Home
- First Generation
- Second Generation
- Kia Sorento XM 2011-2026 Owners Manual
- Kia Sorento XM 2011-2026 Service Manual

Copyright ® www.ksmanual.com 2014-2026