 Kia Sorento: Rear Seat Replacement
| Rear Seat Assembly Replacement |
| 1. |
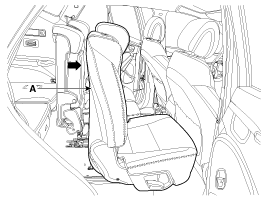
Push the second row seat assembly [RH] (A) towards the front of
the vehicle as far as possible.
|
| 2. |
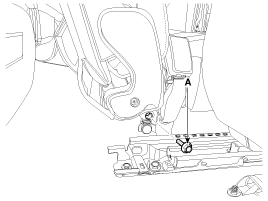
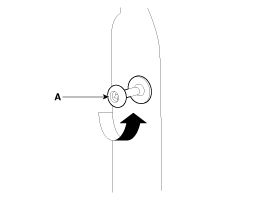
Loosen the second center seat belt buckle mounting bolt (A).
|
| 3. |
Push the second row seat assembly towards the front of the vehicle
as far as possible.
|
| 4. |
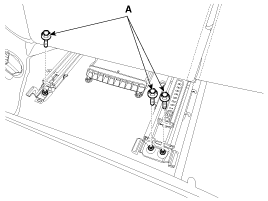
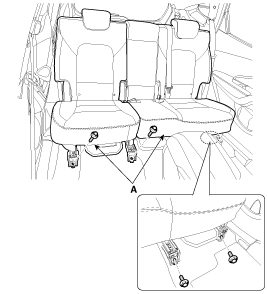
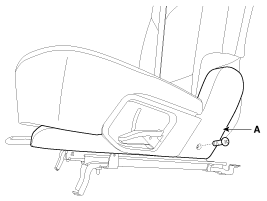
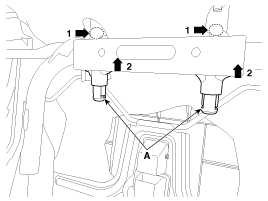
Loosen the second row seat assembly rear mounting bolts (A).
[LH]
[RH]
|
| 5. |
Push the second row seat assembly towards the rear of the vehicle
as far as possible.
|
| 6. |
After loosening the mounting bolts, then remove the second row
seat assembly (A).
|
| 7. |
Install in the reverse order of removal.
|
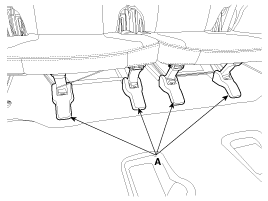
| 1. |
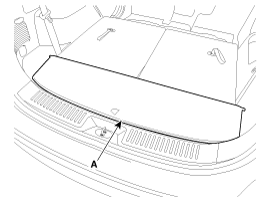
Remove the luggage box trim (A).
|
| 2. |
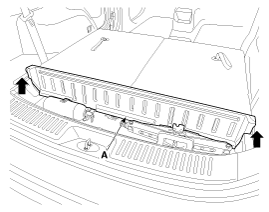
Remove the luggage box partition trim (A).
|
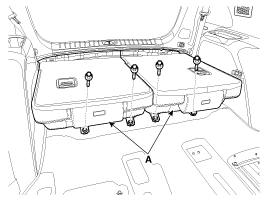
| 3. |
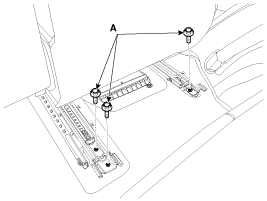
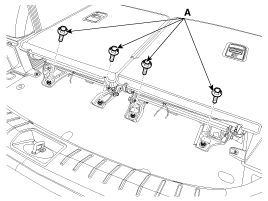
Loosen the third row seat assembly rear mounting bolts (A).
|
| 4. |
Remove the third row seat track mounting cover (A).
|
| 5. |
After loosening the mounting bolts, then remove the third row
seat assembly (A).
|
| 6. |
Install in the reverse order of removal.
|
| Rear Seat Back Cover Replacement |
| (LH) |
|
|
| 1. |
Remove the second row seat assembly [LH].
(Refer to Rear Seat - "Rear Seat Assembly")
|
| 2. |
Tilt the rear back armrest towards the front of the vehicle as
far as possible.
|
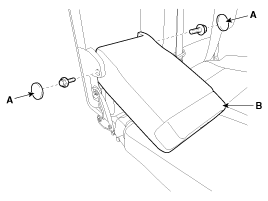
| 3. |
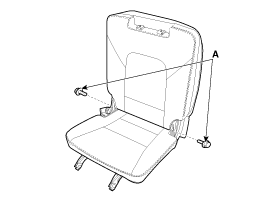
To remove the rear back armrest (B), loosen the mounting bolts
after removing the caps (A).
|
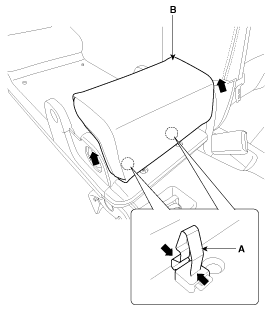
| 4. |
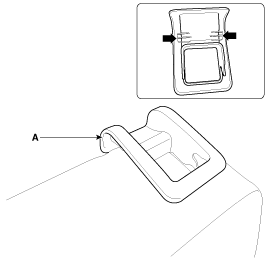
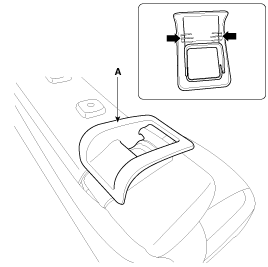
Remove the rear back armrest pad (B) by pulling it out while pressing
the both sides of the lock pin (A).
|
| 5. |
After loosening the mounting bolt and nuts, then remove the rear
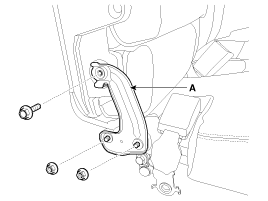
back armrest bracket (A).
|
| 6. |
After loosening the mounting bolt, then remove the rear back armrest
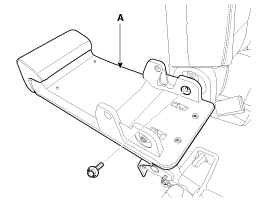
panel (A).
|
| 7. |
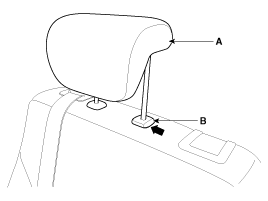
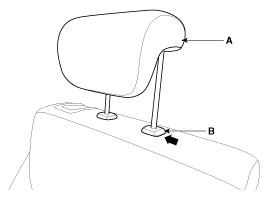
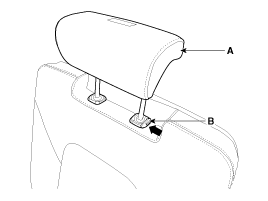
Push the lock pin (B), remove the rear seat headrest (A).
|
| 8. |
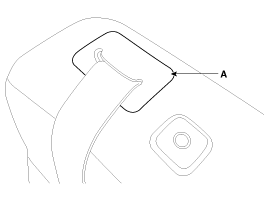
Using a screwdriver or remover, remove the rear center seat belt
upper anchor cover (A).
|
| 9. |
Remove the rear seat latch mounting support (A) after turning
it counter clockwise.
|
| 10. |
Using a screwdriver or remover, remove the rear seat folding cover
(A).
|
| 11. |
After loosening the mounting screw, then remove the rear seat
shield outer cover (A).
|
| 12. |
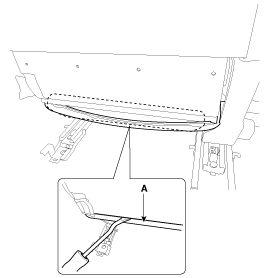
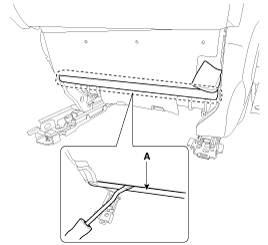
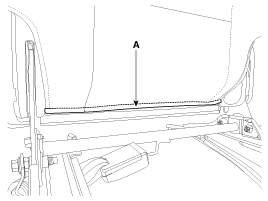
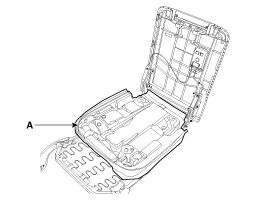
Remove the protector (A) located in the bottom side of the rear
seat cushion.
|
| 13. |
Remove the protector (A) located in the bottom side of the rear
seat back.
|
| 14. |
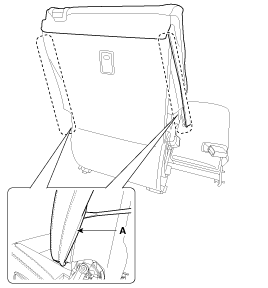
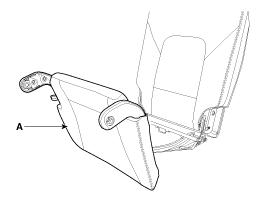
Remove the protector (A) located in the side part of the rear
seat back.
|
| 15. |
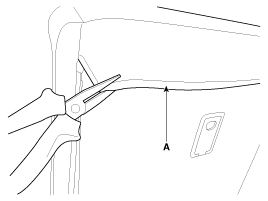
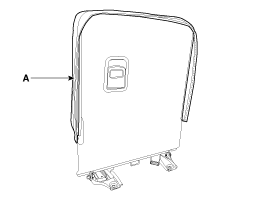
Remove the protector (A) located in the upper side of the rear
seat back.
|
| 16. |
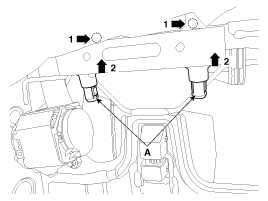
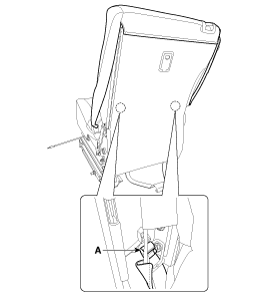
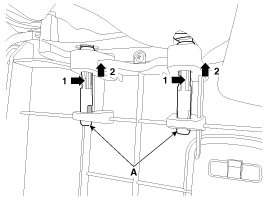
Turn the rear seat back cover inside out. Then pull out the headrest
guides (A) while pinching the upper part of the guides, and remove them.
|
| 17. |
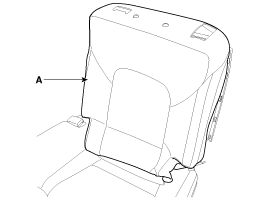
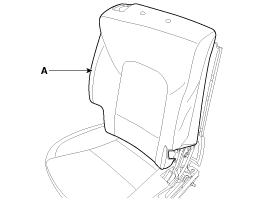
Remove the rear seat back cover (A) from the rear seat back frame.
|
| 18. |
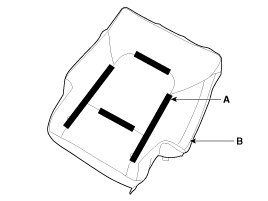
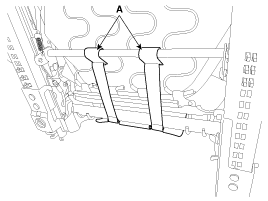
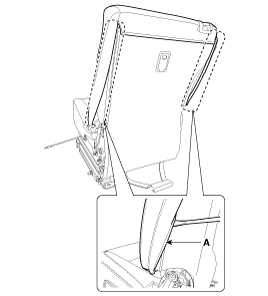
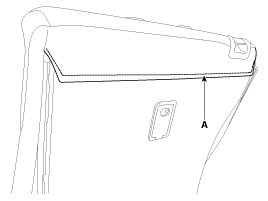
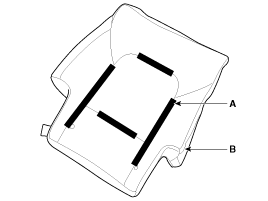
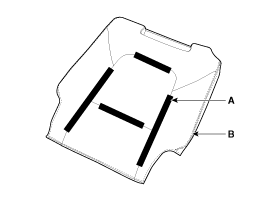
After removing the velcro tape (A) on the rear of seat back and
remove the rear seat back cover (B).
|
| 19. |
Install in the reverse order of removal.
|
| (RH) |
|
|
| 1. |
Remove the second row seat assembly [RH].
(Refer to Rear Seat - "Rear Seat Assembly")
|
| 2. |
Push the lock pin (B), remove the rear seat headrest (A).
|
| 3. |
Using a screwdriver or remover, remove the rear seat folding cover
(A).
|
| 4. |
After loosening the mounting screw, then remove the rear seat
shield outer cover (A).
|
| 5. |
After loosening the mounting screw, then remove the rear seat
shield inner cover (A).
|
| 6. |
Remove the protector (A) located in the bottom side of the rear
seat cushion.
|
| 7. |
Remove the protector (A) located in the bottom side of the rear
seat back.
|
| 8. |
Remove the protector (A) located in the side part of the rear
seat back.
|
| 9. |
Remove the protector (A) located in the side of the inner part
of the rear seat back.
|
| 10. |
Remove the protector (A) located in the upper side of the rear
seat back.
|
| 11. |
Turn the rear seat back cover inside out. Then pull out the headrest
guides (A) while pinching the upper part of the guides, and remove them.
|
| 12. |
Remove the rear seat back cover (A) from the rear seat back frame.
|
| 13. |
After removing the velcro tape (A) on the rear of seat back and
remove the rear seat back cover (B).
|
| 14. |
Install in the reverse order of removal.
|
|
|
| 1. |
Remove the third row seat assembly.
(Refer to Rear Seat - "Rear Seat Assembly")
|
| 2. |
Push the lock pin (B), remove the rear seat headrest (A).
|
| 3. |
Loosen the rear seat frame mounting bolts (A).
|
| 4. |
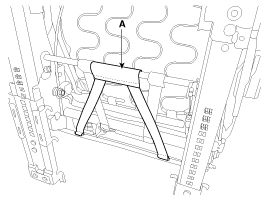
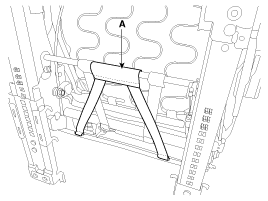
Push the rear seat cushion frame (A) to the front of the vehicle
as far as possible.
|
| 5. |
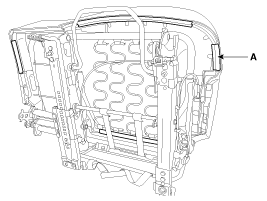
Remove the protector (A) located in the side part of the rear
seat back.
|
| 6. |
Remove the protector (A) located in the bottom side of the rear
seat back.
|
| 7. |
Turn the rear seat back cover inside out. Then pull out the headrest
guides (A) while pinching the upper part of the guides, and remove them.
|
| 8. |
Remove the rear seat back cover (A) from the rear seat back frame.
|
| 9. |
After removing the velcro tape (A) on the rear of seat back and
remove the rear seat back cover (B).
|
| 10. |
Install in the reverse order of removal.
|
| Rear Seat Cushion Cover Replacement |
| (LH) |
|
|
| 1. |
Remove the second row seat assembly [LH].
(Refer to Rear Seat - "Rear Seat Assembly")
|
| 2. |
Remove the protector (A) located in the bottom side of the rear
seat cushion.
|
| 3. |
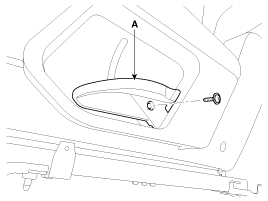
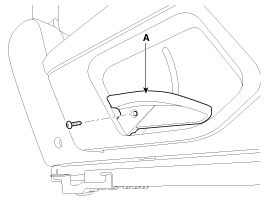
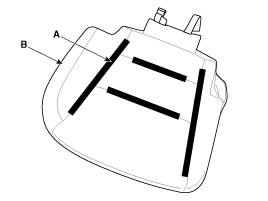
After loosening the mounting screw, then remove the rear seat
slide knob (A).
|
| 4. |
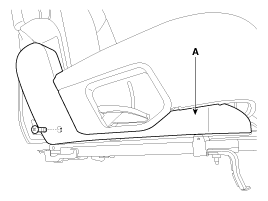
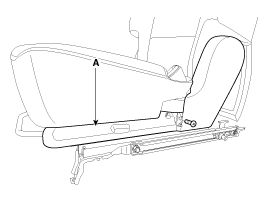
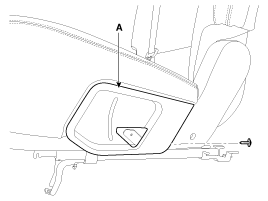
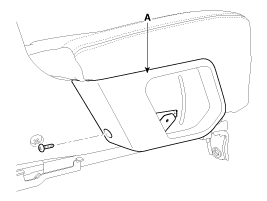
After loosening the mounting screw, then remove the rear seat
slide outer cover (A).
|
| 5. |
Remove the protector (A) located in the side part of the rear
seat cushion.
|
| 6. |
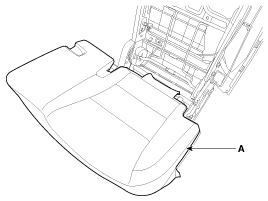
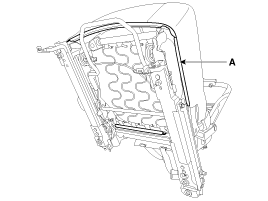
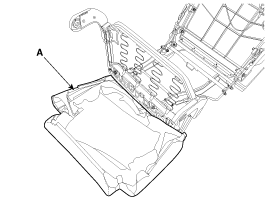
Remove the rear seat cushion cover (A) from the rear seat cushion
frame.
|
| 7. |
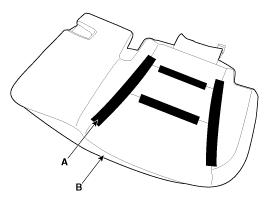
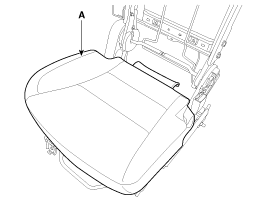
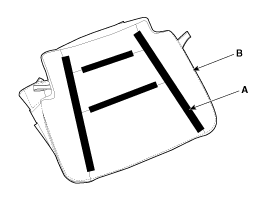
After removing the velcro tape (A) on the rear of seat cushion
and remove the rear seat cushion cover (B).
|
| 8. |
Install in the reverse order of removal.
|
| (RH) |
|
|
| 1. |
Remove the second row seat assembly [RH].
(Refer to Rear Seat - "Rear Seat Assembly")
|
| 2. |
Remove the protector (A) located in the bottom side of the rear
seat cushion.
|
| 3. |
After loosening the mounting screw, then remove the rear seat
slide knob (A).
|
| 4. |
After loosening the mounting screw, then remove the rear seat
slide outer cover (A).
|
| 5. |
Remove the protector (A) located in the side part of the rear
seat cushion.
|
| 6. |
Remove the rear seat cushion cover (A) from the rear seat cushion
frame.
|
| 7. |
After removing the velcro tape (A) on the rear of seat cushion
and remove the rear seat cushion cover (B).
|
| 8. |
Install in the reverse order of removal.
|
|
|
| 1. |
Remove the third row seat assembly.
(Refer to Rear Seat - "Rear Seat Assembly")
|
| 2. |
Loosen the rear seat frame mounting bolts (A).
|
| 3. |
Push the rear seat cushion frame (A) to the front of the vehicle
as far as possible.
|
| 4. |
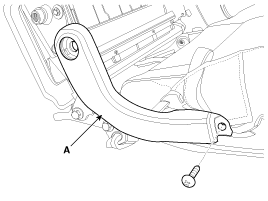
After loosening the mounting screw, then remove the rear seat
outer link cover (A).
|
| 5. |
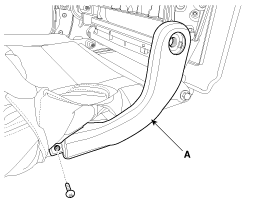
After loosening the mounting screw, then remove the rear seat
inner link cover (A).
|
| 6. |
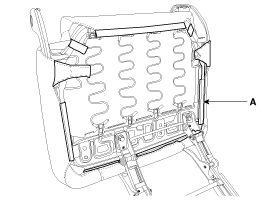
Remove the protector (A) located in the side part of the rear
seat cushion.
|
| 7. |
Remove the rear seat cushion cover (A) from the rear seat cushion
frame.
|
| 8. |
After removing the velcro tape (A) on the rear of seat cushion
and remove the rear seat cushion cover (B).
|
| 9. |
Install in the reverse order of removal.
|
| Rear Seat Latch Replacement |
|

