 Kia Sorento: Auto Defogging Actuator Replacement
Second Generation XM (2011-2026) / Kia Sorento XM 2011-2026 Service Manual / Heating,Ventilation And Air Conditioning / Heater / Auto Defogging Actuator Replacement
| 1. |
Disconnect the negative (-) battery terminal.
|
| 2. |
Remove the cowl side trim.
(Refer to Body - "Crash Pad")
|
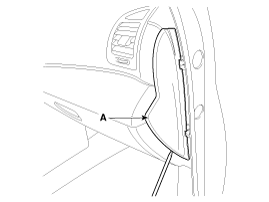
| 3. |
Using a screwdriver or remover, remove the crash pad side cover
(A).
|
| 4. |
Disconnect the stopper (B) from the glove box (A).
|
| 5. |
Disconnect the air damper (A) from the glove box (B).
|
| 6. |
Disconnect the pins (A) and then remove the glove box (B).
|
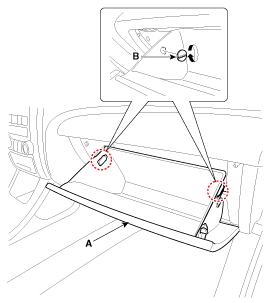
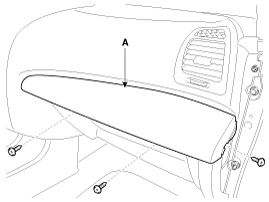
| 7. |
After loosening the mounting screws, then remove the crash pad
side garnish [RH] (A).
|
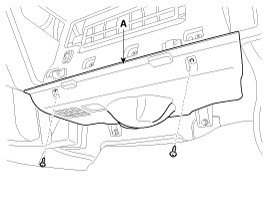
| 8. |
After loosening the mounting screws, then remove the crash pad
under cover (A).
|
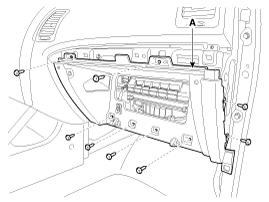
| 9. |
After loosening the mounting screws, then remove the glove box
housing (A).
|
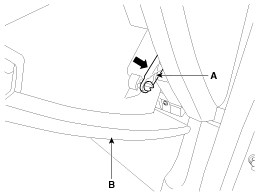
| 10. |
Disconnect the glove box lamp connector (A).
|
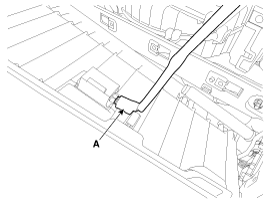
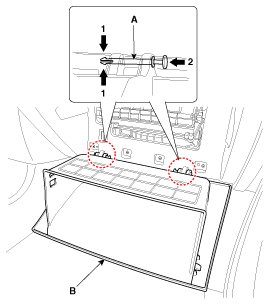
| 11. |
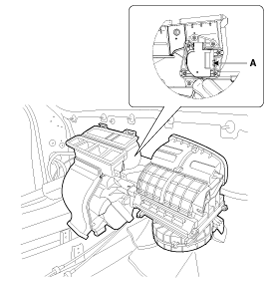
Disconnect the connector and then remove the auto defogging actuator
(A) after loosening the mounting screws.
|
| 12. |
Install in the reverse order of removal.
|
 Auto Defogging Actuator Inspection
1.
Turn the ignition switch OFF.
2.
Disconnect the auto defogging connector.
3.
Verify that the auto defoggin ...
 Blower
...
See also:
Rear Door Adjustment
Glass Adjustment
ŌĆó
Check the glass run channel for damage or deterioration,
and re ...
Piston and Connecting Rod Inspection
Connecting Rod
1.
Check the connecting rod end play.
Using a feeler gauge, measure the end play while moving the connecting
rod back and forth.
...
Fuel Filler Cap Description
A ratchet tightening device on the threaded fuel filler cap reduces the
chances of incorrect installation, which would seal the fuel filler. After the
gasket on the fuel filler cap and the fi ...
Categories
- Home
- First Generation
- Second Generation
- Kia Sorento XM 2011-2026 Owners Manual
- Kia Sorento XM 2011-2026 Service Manual

Copyright ® www.ksmanual.com 2014-2026