 Kia Sorento: Smart key unit Removal
Second Generation XM (2011-2025) / Kia Sorento XM 2011-2025 Service Manual / Body Electrical System / Smart key System / Smart key unit Removal
Smart Key Unit
| 1. |
Disconnect the negative (-) battery terminal.
|
| 2. |
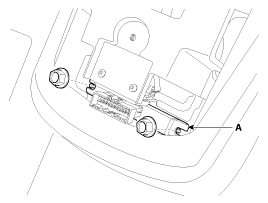
Remove the glove box housing (A).
(Refer to Body - "Crash pad")
|
| 3. |
Remove the smart key unit (A) after removing the bolts and connectors.
|
Interior 1 Antenna
| 1. |
Disconnect the negative (-) battery terminal.
|
| 2. |
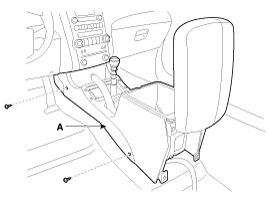
Remove the console assembly (A).
(Refer to Body - "Console")
|
| 3. |
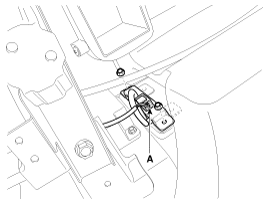
After loosening the antenna bolts (2EA) and connector, remove
the interior 1 antenna (A).
|
Interior 2 Antenna
| 1. |
Disconnect the negative (-) battery terminal.
|
| 2. |
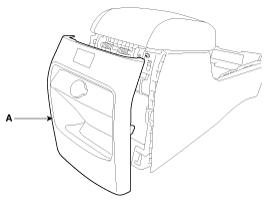
Remove the floor console rear cover (A).
(Refer to Body - "Console")
|
| 3. |
After loosening the antenna nuts (2EA) and connector, remove the
interior 2 antenna (A).
|
Interior 3 Antenna
| 1. |
Disconnect the negative (-) battery terminal.
|
| 2. |
After loosening the mounting bolts, then remove the third seat
assembly (A).
(Refer to Body - "Rear seat")
|
| 3. |
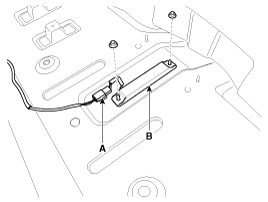
After loosening the antenna nuts (2EA) and connector (A), remove
the interior 3 antenna (B).
|
Exterior Bumper Antenna
| 1. |
Disconnect the negative (-) battery terminal.
|
| 2. |
Remove the rear bumper.
(Refer to Body - "Rear bumper")
|
| 3. |
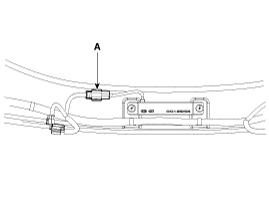
Disconnect the antenna connector (A) on the center of rear bumper.
|
| 4. |
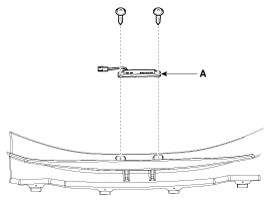
After loosening the screws (2EA), remove the exterior bumper antenna
(A).
|
Buzzer
| 1. |
Disconnect the negative (-) battery terminal.
|
| 2. |
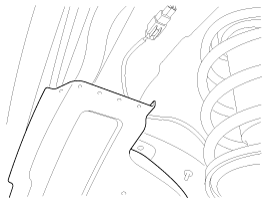
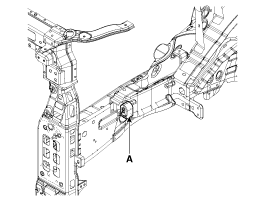
Remove the front left wheel guide.
|
| 3. |
Disconnect the connectors, then remove the buzzer (A).
|
Door Outside Handle
| 1. |
Disconnect the negative (-) battery terminal.
|
| 2. |
Disconnect the connector after removing the door trim.
(Refer to Body - "Front door")
|
| 3. |
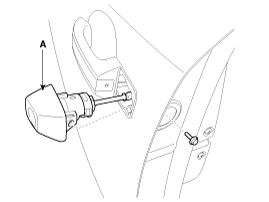
After loosening the mounting bolt, then remove the key holder
(A).
|
| 4. |
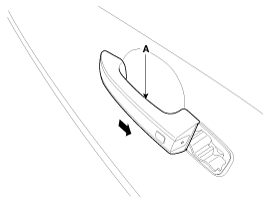
Remove the outside handle (A) by sliding it rearward.
|
Tailgate Switch
| 1. |
Disconnect the negative (-) battery terminal.
|
| 2. |
Remove the tailgate garnish.
(Refer to Body - "Body side molding")
|
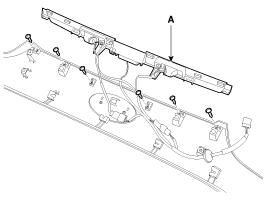
| 3. |
Remove the outside handle panel assembly (A) after removing the
screws and connectors.
|
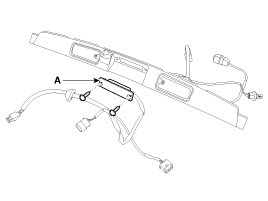
| 4. |
Remove the outside handle (A) after removing the screws.
|
 Smart key unit Inspection
Smart Key Unit
-
Refer to BE group - inspection / self diagnosis with scan tool.
Smart Key Switch
-
Refer to BE group - inspection / self diag ...
See also:
High Mounted stop lamp Installation
1.
Install the high mounted stop lamp.
2.
Install the tailgate trim.
...
Front Disc Brake Removal
1.
Remove the front wheel & tire.
Tightening torque:
88.3 ~107.9 N.m (9.0 ~11.0 kgf.m, 65.1 ~79.6 lb-ft)
...
Mode Control Actuator Description
The mode control actuator is located at the heater unit.
It adjusts the position of the mode door by operating the mode control
actuator based on the signal of the A/C control unit. Pressing ...
Copyright ® www.ksmanual.com 2014-2025

