 Kia Sorento: Front Wiper Motor Removal
Second Generation XM (2011-2026) / Kia Sorento XM 2011-2026 Service Manual / Body Electrical System / Windshield Wiper/Washer / Front Wiper Motor Removal
| 1. |
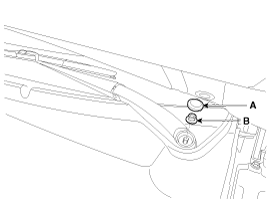
Remove the windshield wiper arm and blade after removing a nut
(B) and wiper cap (A).
|
| 2. |
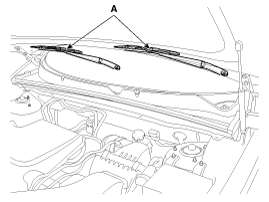
Remove the windshield wiper arm and blade (A) after removing a
nut.
|
| 3. |
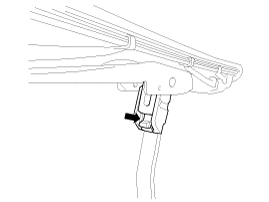
If necessary, release the wiper blade fixing clip by pulling up
and remove the wiper blade from the inside radius of wiper arm.
|
| 4. |
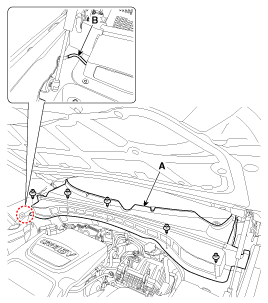
Remove the weather strip and the cowl top cover (A) after removing
retainers.
|
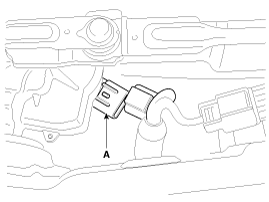
| 5. |
Disconnect the wiper motor connector (A) from the wiper motor
& linkage assembly.
|
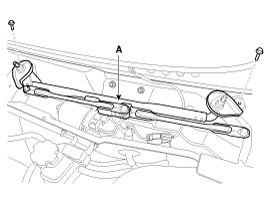
| 6. |
Remove the windshield wiper motor and linkage assembly (A) after
removing 2 bolts.
|
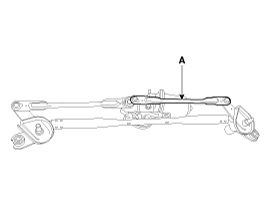
| 7. |
Hold the wiper motor crank arm and remove the upper linkage (A)
from the wiper motor crank arm.
|
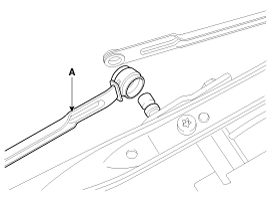
| 8. |
Remove the lower linkage (A) from the wiper motor crank arm.
|
| 9. |
Remove the crank arm (A) after loosening a nut.
|
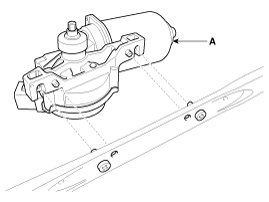
| 10. |
Remove the wiper motor (A) after loosening the screws.
|
 Front Wiper Motor Component Location
1. Cap
2. Nut
3. Wiper arm & blade
4. Retainer
5. Cowl top cover
6. Bolt
7. Wiper motor & linkage assembly
8. Wiper motor connector
...
 Front Wiper Motor Installation
1.
Install the wiper motor.
2.
Install the crank arm.
Torque :
12.7-17.6Nm (1.3-1.8, kgf.m, 9.4-13.0 lbf. ...
See also:
Battery Description
1.
The MF(Maintenance Free) battery is, as the name implies, totally
maintenance free and has no removable battery cell caps.
2.
The MF(Mai ...
Record your key number
The key code number is stamped on the key code tag attached to the key set. Should
you lose your keys, this number will enable an authorized Kia dealer to duplicate
the keys easily. Remove the key ...
Copyright ® www.ksmanual.com 2014-2026

