
 Kia Sorento: Washer Motor Repair Procedures
Kia Sorento (MQ4, 2021-2026) Service Manual / Body Electrical System / Wiper/Washer / Washer Motor Repair Procedures
| Inspection |
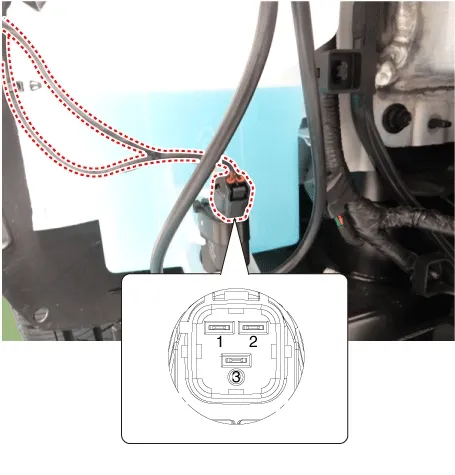
Washer Motor
| 1. |
Before filling the reservoir tank with water, check the filter for foreign material or contamination.
→ Clean the filter if necessary
|

| 2. |
Fill the washer fluid after installing the washer motor in the reservoir tank.
|
| 3. |
Connect positive ( + ) battery cables to terminal 2 and negative ( - ) battery cables to terminal 1
respectively.
|
| 4. |
Check that the motor operates and that the washer fluid is properly spraying from the front and rear
windshield.
|
| 5. |
If they are abnormal, replace the washer motor.
|
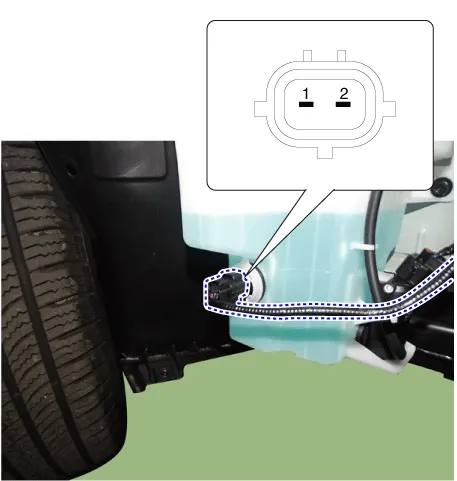
Washer Fluid Level Sensor
| 1. |
Disconnect the battery negative ( - ) terminal.
|
| 2. |
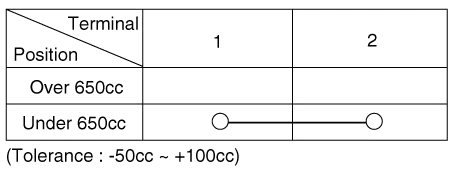
Drain the washer fluid less than 650 cc.
|
| 3. |
Check for continuity between the No. 1 and No.2 terminal in each float position.
|
| Removal |
Washer Motor
| 1. |
Disconnect the battery negative ( - ) terminal.
|
| 2. |
Remove the engine room under cover.
(Refer to Engine Mechanical System - "Engine Room Under
Cover")
|
| 3. |
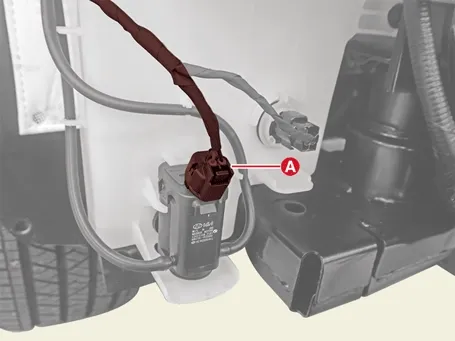
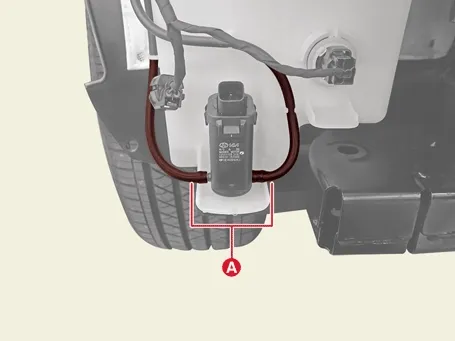
Disconnect the washer motor connector (A).
|
| 4. |
Separate the washer nozzle (A).
|
| 5. |
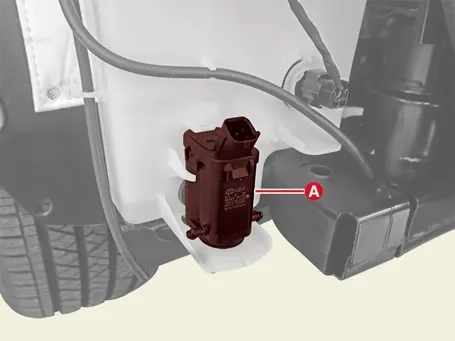
Remove the washer motor (A).
|
Washer Fluid Level Sensor
| 1. |
Disconnect the battery negative ( - ) terminal.
|
| 2. |
Remove the engine room under cover.
(Refer to Engine Mechanical System - "Engine Room Under
Cover")
|
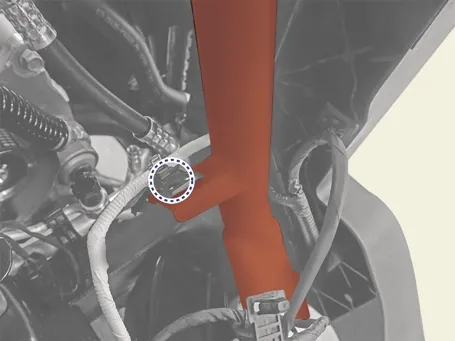
| 3. |
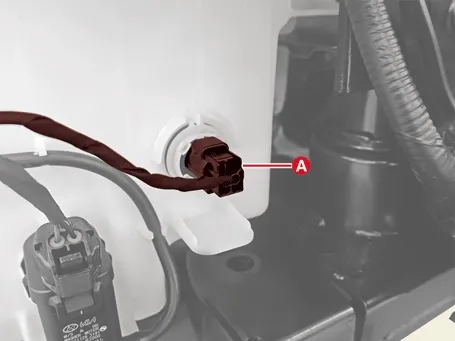
Disconnect the washer fluid level sensor connector (A).
|
| 4. |
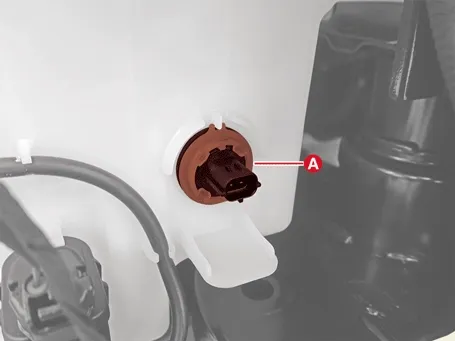
Remove the washer fluid level sensor (A).
|
Reservoir tank
| 1. |
Remove the right side front headlamp.
(Refer to Lighting System - "Headlamps")
|
| 2. |
Remove the front wheel guard [RH].
(Refer to Body - "Front Wheel Guard")
|
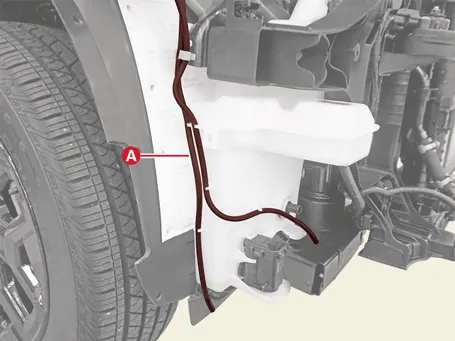
| 3. |
Separate the washer nozzle (A).
|
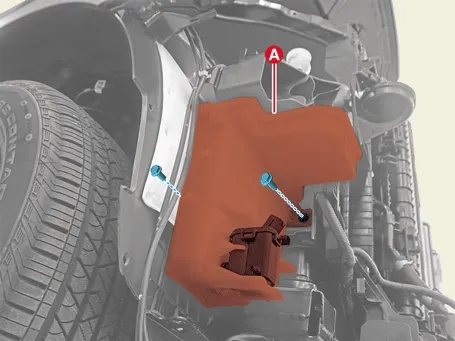
| 4. |
Remove the washer reservoir tank (A) after removing the bolts.
|


| Installation |
| 1. |
Install in the reverse order of removal.
|
Removal
...
 Rain Sensor Repair Procedures
Removal
Front Wiper Arm
...
 Wiper Arm Repair Procedures
See also:
Troubleshooting
Problem Symptoms Table
Before replacing or repairing air conditioning components, first determine
if the malfunction is due to the refrigerant charge, air flow or compressor.
Us ...
Auto Head lamp leveling Unit Installation
Height Sensor & Unit
1.
Install the height sensor.
2.
Connect the connector.
...
Console Components
[M/T]
1. Floor console assembly
2. Console upper cover
3. Console side cover [LH]
4. Console side cover [RH]
5. Rear console cover
6. Floor console mounting ...
Manuals list
- Kia Sorento MQ4 2021-2026 Owners Manual
- Kia Sorento XM 2011-2015 Owners Manual
- Kia Sorento XM 2011-2015 Service Manual

Copyright © www.ksmanual.com 2014-2026 - 0.0582