 Kia Sorento: Rain Sensor Repair Procedures
|
•
|
Do not damage or touch the silicone.
|
|
•
|
Be careful so that the silicon is not contaminated by foreign substances, dust, etc.
|
|
•
|
Use caution, as the silicon may be damaged if you try to separate the rain sensor forcibly.
|
|
|
•
|
The dust or foreign substance on the rain sensor may have bad influence on the performance of the
rain sensor. In order to ensure accurate function of the rain sensor, protect the sensor surface with
the protection cover until the sensor is installed on the bracket.
|
|
•
|
The coupling pad on the rain sensor surface is adhesive and the coupling pad may stick to the
windshield during the use depending on the environment condition.
Therefore, it may be damaged when you try to remove the rain sensor from the windshield if using
force. Use caution when separating it from the windshield.
|
|
| 1. |
Disconnect the battery negative ( - ) terminal.
|
| 2. |
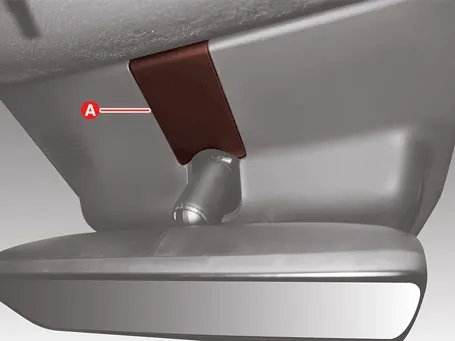
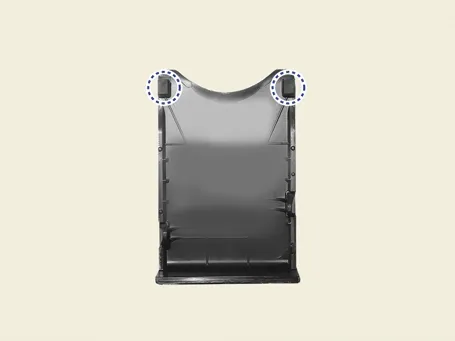
Remove the multi-sensor blanking cover (A).
|
Clip position :

|
|
| 3. |
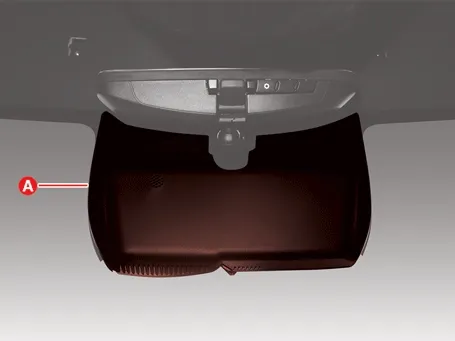
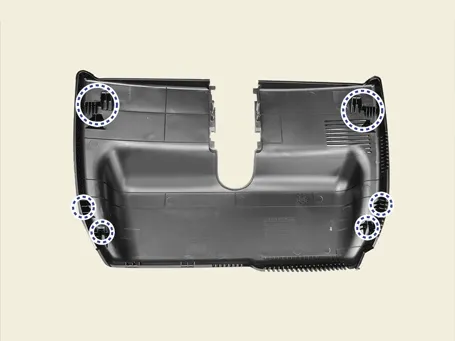
Remove the multi sensor cover (A).
|
Clip position :
|
|
| 4. |
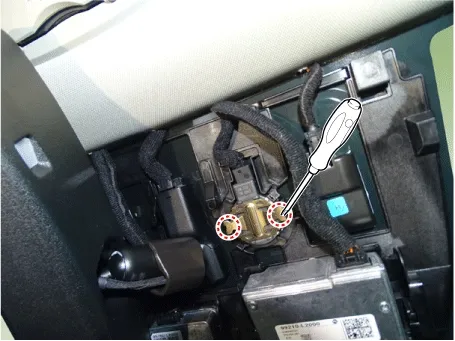
To remove the latch, pull aside the latch using the cover hole with a small flat-head screwdriver.

Silicone Pad Reuse Criteria After Rain Sensor Removal and Installation Precautions (Play ▶) 
Notes When Refering Video
This video provides guidance for understanding complex or hard-to-follow procedures by showing each step
clearly.
As needed, the video also provides clear guidance on essential procedural steps, including adjustment and
diagnostic processes, the use of SSTs, and precautions to avoid component damage.
|
•
|
This video is created using common specifications and may differ from the actual vehicle.
|
|
•
|
The location and repair procedures of the parts may vary depending on vehicle model, model year,
region, and specifications.
|
|
•
|
Check the KDS guide for detailed information on how to use the KDS.
|
|
•
|
Check the manual for detailed maintenance procedures.
|
|
•
|
Unauthorized reproduction, distribution, or sharing of this video is prohibited.
|
|
| 5. |
Remove the rain sensor.
| 1) |
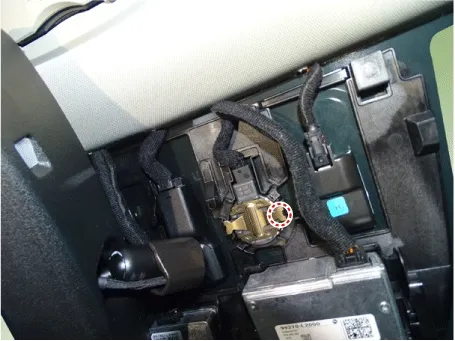
Insert a small flat-head screwdriver ( - ) into a space at the bottom or top, between the rain
sensor and bracket.
|
| 2) |
Pull the rain sensor slowly up and down in the vertical direction of the glass, then disassemble
the rain sensor slowly from windshield without damaging the silicone on the sensor.
|
|
•
|
When attempting to separate the rain sensor, avoid using excessive force, as it may result
in damage. Gently detach the rain sensor from the front windshield.
|
|
•
|
When detaching the silicone under a high temperature, it may be easily damaged because of
the adhesive strength of the silicone. Remove the silicone in a cool environment.
|
|
|
| 6. |
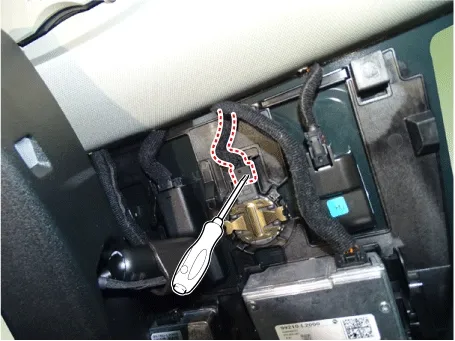
Insert a small ( - ) screwdriver into the rain sensor connector and disconnect the wiring connector from
the rain sensor.
|
|
•
|
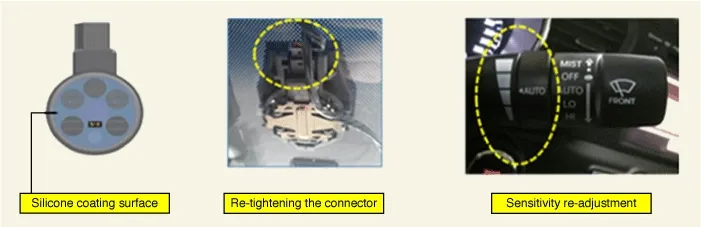
Check the operation of the rain sensor before mounting.
|
|
–
|
Check the sensor for silicon damage.
|
|
–
|
Check whether the rain sensor connector is tightened.
|
|
–
|
Check whether the rain sensor and bracket are properly tightened.
|
|
–
|
Check whether the sensor mounted area is free from foreign matters.
|
|
–
|
Recalibrate sensitivity of the switch if the auto-wiping operation is insensitivity or too much
sensitive.
|
|
•
|
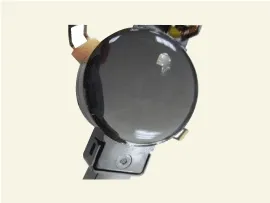
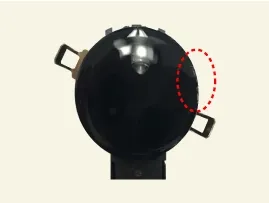
In case the silicone of the rain sensor is normal or slightly damaged as shown in the images below,
it can be reused.
Normal
|
Damage within 1.5 mm of outer part
|
|
|
|
|
|
•
|
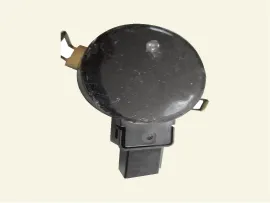
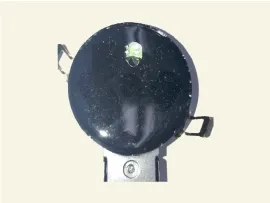
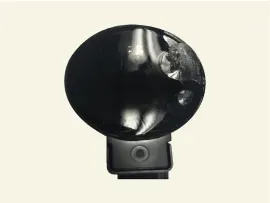
In case the silicone of the rain sensor is damaged as shown in the below images, it should be
replaced with a new silicone.
Foreign substances
|
Fingerprint
|
Damage
|
|
|
|
|
|
|
•
|
The rain sensor silicone is damaged, replace it as follows.
|
| 1) |
Remove the damaged silicone gel pad from the lens plate completely.
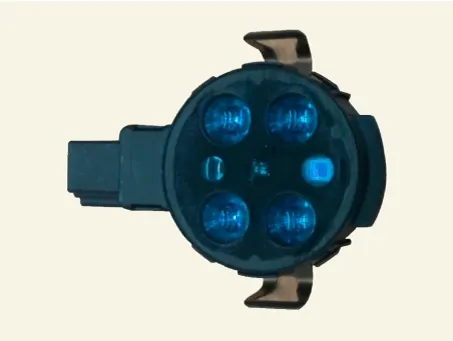
|
•
|
Be careful not to damage or contaminate the surface of the lens plate during
removal.
|
|
|
| 2) |
Attach the new silicone gel pad after removing the silicone paper then remove the transparent film.
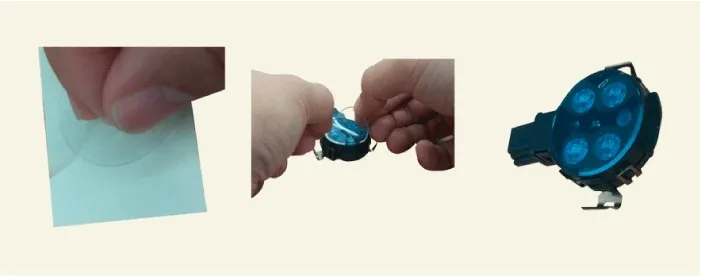
|
•
|
When attaching the silicone gel pad to the sensor, be careful not to contaminate.
|
|
|
|
•
|
It is very important that the silicon (coupling pad) is completely pushed against the windshield
and stuck without any air bubble.
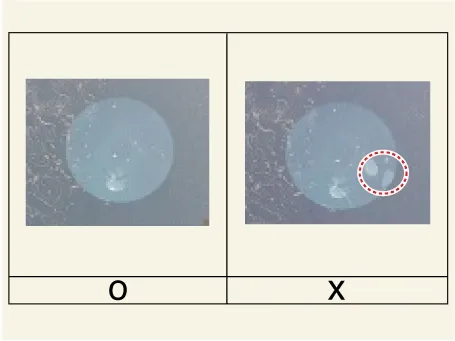
|
|
•
|
In case of replacing the windshield glass only, the existing integrated rain sensor is reusable.
|
|
•
|
The windshield glass has to be clean and free of contamination or foreign substances.
|
|
Inspection
Washer Motor
1.
Before filling the reservoir tank with water, check the filter for foreign material or contamination.
→ Clean th...
See also:
ETC (Electronic Throttle Control) System Cleaning
Cleaning
1.
Remove the Electronic Throttle Control (ETC).
(Refer to ETC (Electronic Throttle Control) System - "Removal ...
Operation
Evaporative System Monitoring
Evaporative And ORVR Emission Control System
This system consists of below items;
-
Fill vent valve
-
F ...
A/C Pressure Transducer Description
The A/C Pressure Transducer (APT) converts the pressure value of high
pressure line into voltage value after measuring it. By converted voltage value,
engine ECU controls the cooling fan by o ...



 Wiper/Washer
 Washer Motor Repair Procedures
