 Kia Sorento: Valve Body Removal
Second Generation XM (2011-2026) / Kia Sorento XM 2011-2026 Service Manual / Automatic Transaxle System / Hydraulic System / Valve Body Removal
| 1. |
Remove the air duct.
(Refer to Engine Mechanical System - "Air cleaner")
|
| 2. |
Remove the battery and the battery tray.
(Refer to Engine Electrical System - "Battery")
|
| 3. |
Remove the under cover.
(Refer to Engine Mechanical System - "Engine Room Under Cover")
|
| 4. |
Drain the coolant.
(Refer to Engine Mechanical System - "Coolant")
|
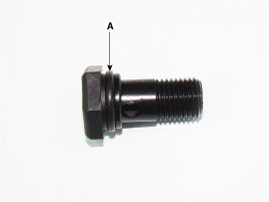
| 5. |
Remove the drain plug (A) and reinstall the drain plug after draining
ATF totally.
|


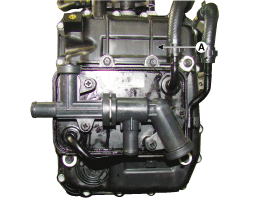
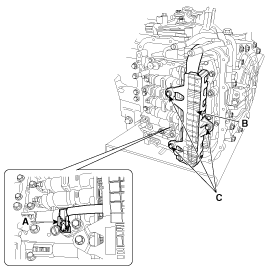
| 6. |
Remove the wiring bracket installation bolt (A).
|
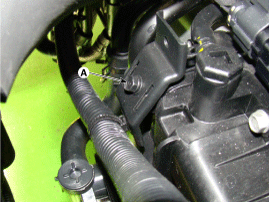
| 7. |
Remove the ATF Injection hole(eyebolt) (A).
|
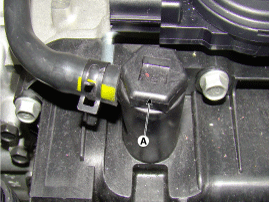
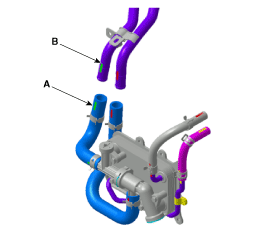
| 8. |
Disconnect the coolant hose (B) after removing the coolant hose
clamp (A).
|
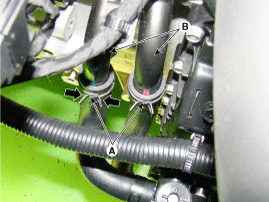
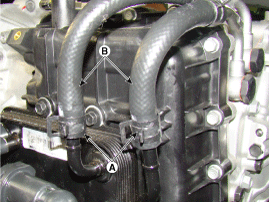
| 9. |
Disconnect the hose (B) after removing the automatic transaxle
fluid cooler hose clamp (A).
|
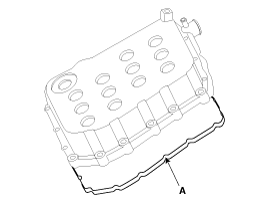
| 10. |
Remove the valve body cover (A).
|
| 11. |
Remove the bolts (C) after disconnecting the solenoid valve connector
(B) and the oil temperature sensor connector (A).
|
| 12. |
Remove the valve body assembly (A).
|
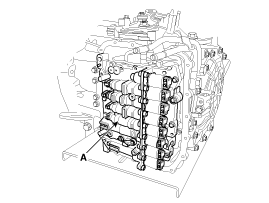
 Valve Body Component Location
1. Automatic transaxle
2. Valve body assembly
1. Pressure Control Valve(PCV) adjust screw
2. Solenoid valve bracket
3. Oil temperature sensor
...
 Valve Body Installation
1.
Install in the reverse order of removal.
ŌĆó
...
See also:
Components Location
Supplemental Restraint System Control
Module (SRSCM)
Driver Airbag (DAB) / Passenger Airbag
(PAB)
Side Airbag (SAB)
Curtain Airbag (CA ...
Panorama Sunroof Components
1. Roof side moulding [LH]
2. Roof side moulding [RH]
3. Movable glass
4. Slide
5. Cover base
6. Wind deflector
7. Panorama sunroof frame assembly
8. Mechanism rai ...
SRS Control Module (SRSCM) Removal
1.
Remove the ignition key from the vehicle.
2.
Disconnect the battery negative cable and wait for at least three
minutes before beginning ...
Categories
- Home
- First Generation
- Second Generation
- Kia Sorento XM 2011-2026 Owners Manual
- Kia Sorento XM 2011-2026 Service Manual

Copyright ® www.ksmanual.com 2014-2026