
 Kia Sorento: Tailgate Glass
Repair Procedures
| Removal |
| 1. |
Remove the tailgate lower trim.
(Refer to Tailgate - "Tailgate Trim")
|
| 2. |
Remove the rear spoiler.
(Refer to Body Side Molding - "Rear Spoiler")
|
| 3. |
Remove the rear wiper motor.
(Refer to Body Electrical System - "Wiper Motor")
|
| 4. |
Disconnect the tailgate heated wire connector (A).
|
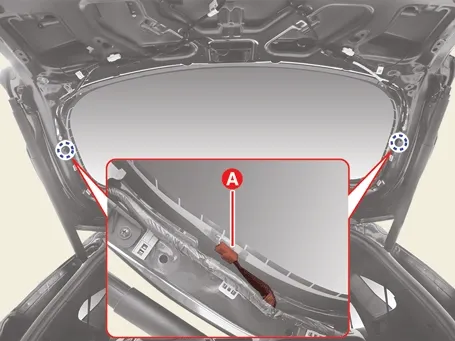
| 5. |
Insert the piano wire (A) in the corner side.
|
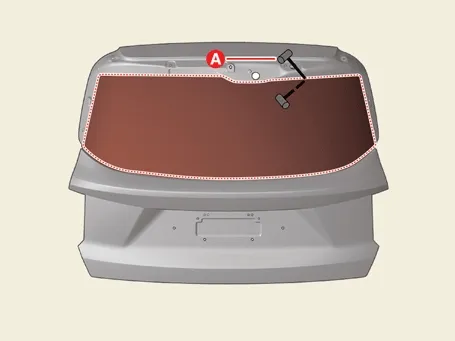
| 6. |
Cut the sealant of forward edge side (B) by pulling the piano wire (A) left and right.
|
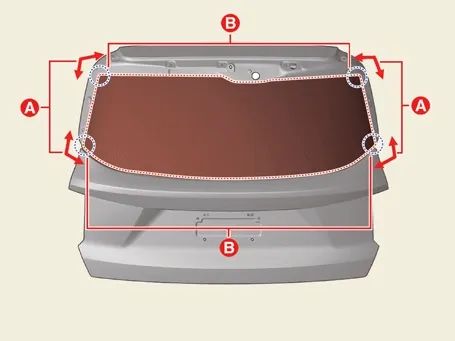

| 7. |
Cut the sealant in the sections (A-A), (B-B), and (C-C) by pulling the piano wire left and right.
|
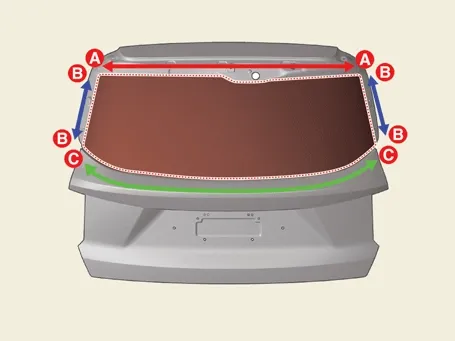
| 8. |
Remove the tailgate glass (A) carefully using a glass holder (B).
|
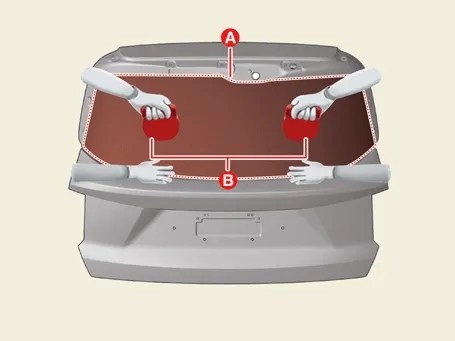
| Installation |
| 1. |
Clean the edges of the body panel and the tailgate glass with alcohol, etc.
|
| 2. |
Apply the body primer to the edge of the body panel (A).
|
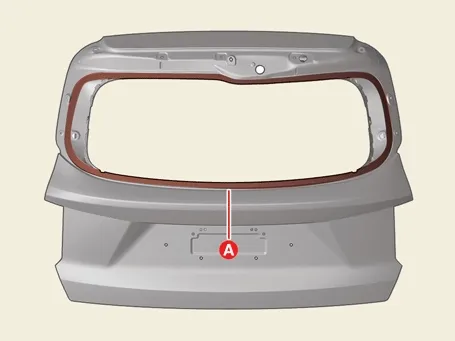

| 3. |
Apply the glass primer to the edge of tailgate glass.
|
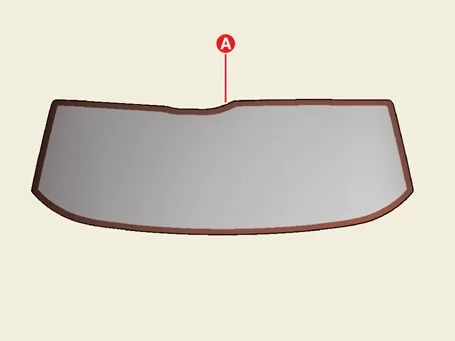
| 4. |
Apply the sealant (B) around the tailgate glass (A) using the sealant gun.
|
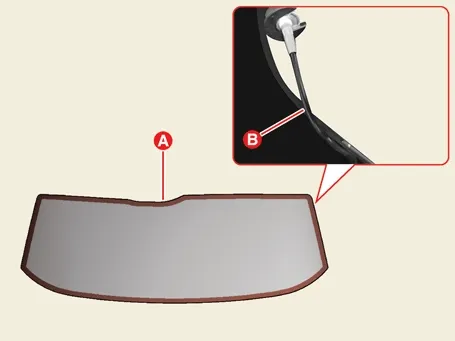
| 5. |
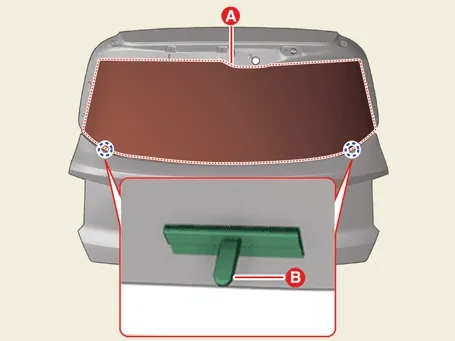
Using the glass holder, adjust the tailgate glass (A) to stopper hole (B) on the body and carefully tap the
tailgate glass to make the edges fully seated on the bonding surface of body.
|
| 6. |
Connect the tailgate heated wire connector (A).
|
| 7. |
Perform a water leak test at least 3 to 4 hours later after installing the tailgate glass.
|
| 8. |
If a water leak occurs, apply sealant to the water leak area.
|
| 9. |
Install the rear wiper motor.
(Refer to Body Electrical System - "Wiper Motor")
|
| 10. |
Install the rear spoiler.
(Refer to Body Side Molding - "Rear Spoiler")
|
| 11. |
Install the tailgate trim.
(Refer to Tailgate - "Tailgate Trim")
|
 Power Tailgate Buzzer Repair Procedures
 Windshield Glass
See also:
Torque Converter Control Solenoid Valve (T/CON_VFS) Specifications. Torque Converter Control Solenoid Valve (T/CON_VFS) Components and Components Location
Torque Converter Control Solenoid Valve (T/CON_VFS) Specifications
Specification
Item
Specification
Control type
N/L ...
ESC Control Unit Repair procedures
Removal
1.
Disconnect the (-) battery terminal.
2.
Pull up the lock of the ESC ...
Speakers Replacement
Front Speaker
1.
Remove the front door trim.
(Refer to Body - "Front door")
2.
Remove the front speaker (A) after removing ...
Manuals list
- Kia Sorento MQ4 2021-2026 Owners Manual
- Kia Sorento XM 2011-2015 Owners Manual
- Kia Sorento XM 2011-2015 Service Manual
