
 Kia Sorento: Windshield Glass
Kia Sorento (MQ4, 2021-2026) Service Manual / Body (Interior and Exterior) / Windshield Glass
Repair Procedures
| Removal |
| 1. |
Remove the front pillar trim.
(Refer to Interior Trim - "Front Pillar Trim")
|
| 2. |
Remove the inside mirror assembly.
(Refer to Mirror - "Inside Mirror")
|
| 3. |
Remove the auto defogging sensor.
(Refer to Heater and Air Conditioning - "Auto Defogging
Sensor")
|
| 4. |
Remove the rain sensor.
(Refer to Body Electrical System - "Rain Sensor")
|
| 5. |
Remove the front view camera unit.
(Refer to Advanced Driver Assistance Systems (ADAS) - "Front
Camera")
|
| 6. |
Remove the cowl top cover.
(Refer to Cowl Top Cover - "Repair Procedures")
|
| 7. |
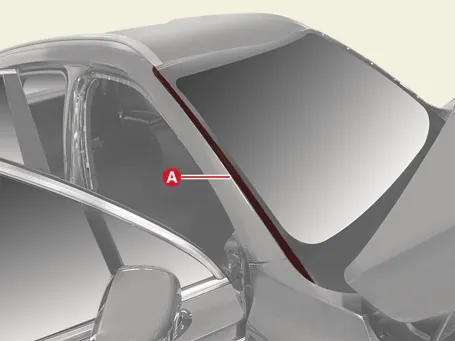
Remove the A pillar garnish(A).
|
| 8. |
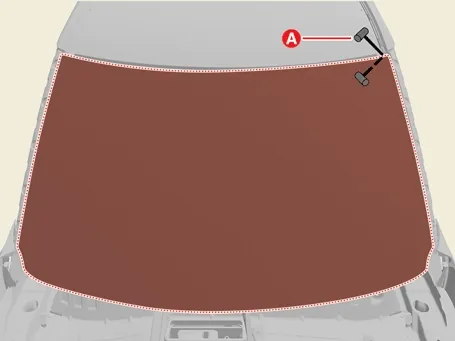
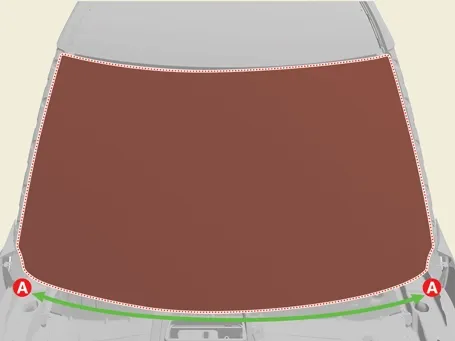
Insert the piano wire (A) in the corner side.
|
| 9. |
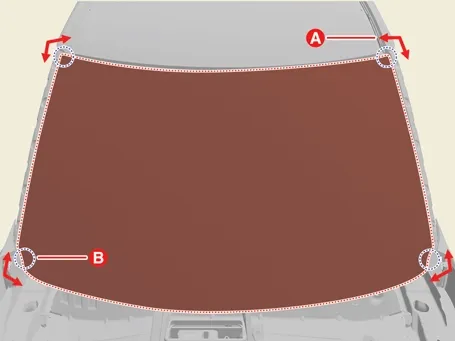
While pulling the piano wire (A) in the direction of the arrow, cut out the sealant on the front edge side
(B).
|

| 10. |
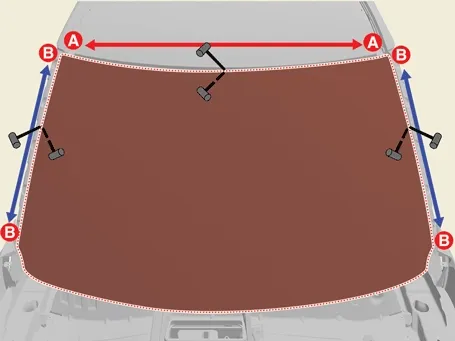
Cut the sealant in sections (A-A) and (B-B) while pulling the piano wire left and right.
|
| 11. |
Cut the sealant in section (A-A) using a cutter knife.
|


| 12. |
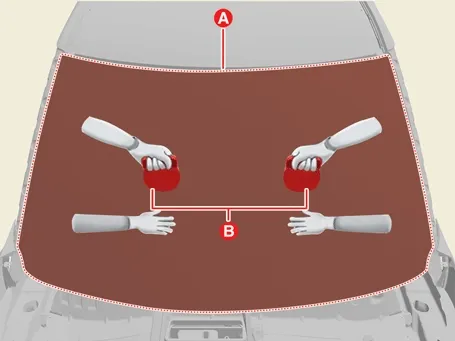
Remove the windshield glass (A) carefully by using a glass holder (B).
|
| 13. |
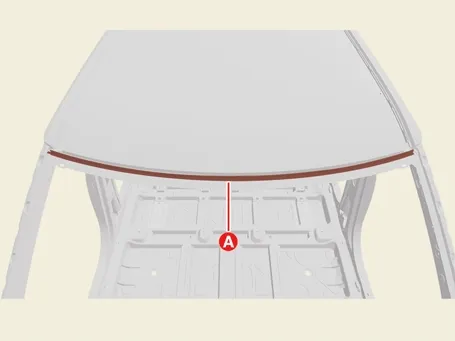
Remove the glass molding (A) using a cutter knife.
|
| Installation |
When replacing with the windshield glass of the front camera type, be sure to replace with the type
equipped with the coupler. If the coupler is attached to the windshield glass type that is not equipped with
the coupler, the front camera may not work properly.
|
| 1. |
Cut off leaving about 2 mm (0.079 in.) thick sealant at the bonding surface around the body panel by using
a cutter knife. Marking the glass and body if a new windshield glass is used.
|
| 2. |
Clean the edges of the body panel and the windshield glass with alcohol, etc.
|
| 3. |
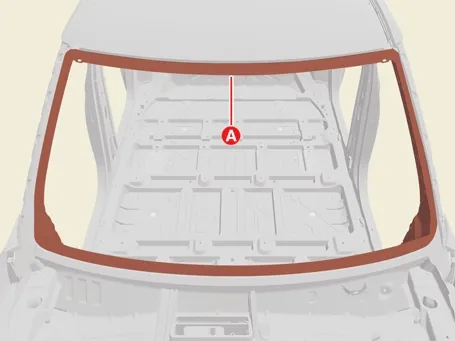
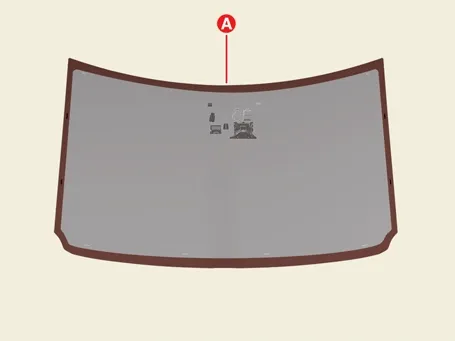
Apply the body primer to the edge of the body panel (A).
|
| 4. |
Apply the glass primer to the edge of windshield glass.
|
| 5. |
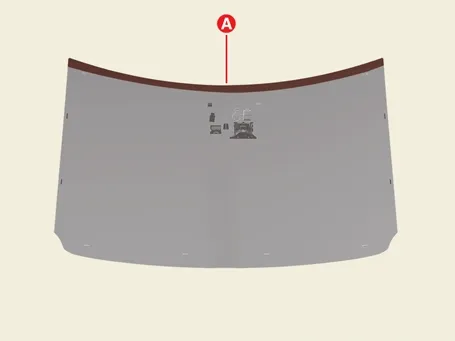
Attach the glass molding (A) to the windshield glass.
|
| 6. |
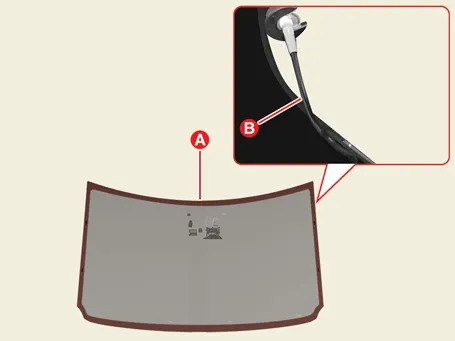
Apply the sealant (B) around the windshield glass (A) using the sealant.
|
| 7. |
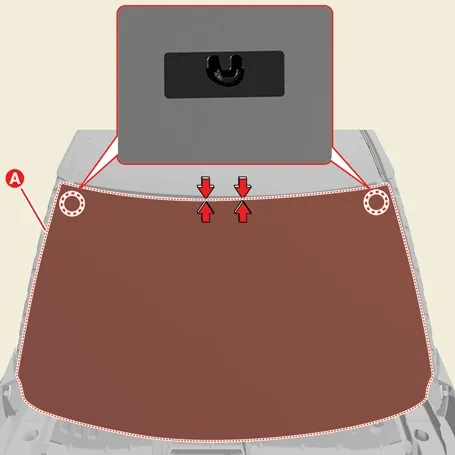
Adjust the windshield glass (A) to stopper hole (B) of the body by using glass holder and carefully tap the
windshield glass and press it against the body flange surface.
|
| 8. |
Test for water leakage.
|
| 9. |
If water leak occurs, apply sealant to the leak area.
|
| 10. |
Install the A pillar garnish(A).
|
| 11. |
Install the cowl top cover.
(Refer to Cowl Top Cover - "Repair Procedures")
|
| 12. |
Install the front view camera.
(Refer to Advanced Driver Assistance Systems (ADAS) - "Front
Camera")
|
| 13. |
Install the rain sensor.
(Refer to Body Electrical System - "Rain Sensor")
|
| 14. |
Install the auto defogging sensor.
(Refer to Heater and Air Conditioning Unit - "Auto Defogging
Sensor")
|
| 15. |
Install the inside mirror assembly.
(Refer to Mirror - "Inside Mirror")
|
| 16. |
Install the front pillar trim.
(Refer to Interior Trim - "Front Pillar Trim")
|
Repair Procedures
Removal
1.
Remove the tailgate lower trim.
(Refer to Tailgate - "Tailgate Trim")
...
 Tailgate Glass
 Body Electrical System
See also:
Kia Sorento Warning Lights and Indicators Overview
The dashboard warning lights on your Kia Sorento are designed to alert the driver to critical vehicle situations that
require immediate attention and heightened situational awareness.
TIP
...
Temperature Control Actuator Replacement
[Driver's side]
1.
Disconnect the negative (-) battery terminal.
2.
Using a screwdriver or remover, remove the driver's si ...
Front Wheel Transfer Assembly Installation
1.
Install in the reverse order of removal.
1.
...
Manuals list
- Kia Sorento MQ4 2021-2026 Owners Manual
- Kia Sorento XM 2011-2015 Owners Manual
- Kia Sorento XM 2011-2015 Service Manual

Copyright © www.ksmanual.com 2014-2026 - 0.0574