 Kia Sorento: Rear Driveshaft Removal and Installation
Second Generation XM (2011-2026) / Kia Sorento XM 2011-2026 Service Manual / Driveshaft and axle / Rear Driveshaft Assembly / Rear Driveshaft Removal and Installation
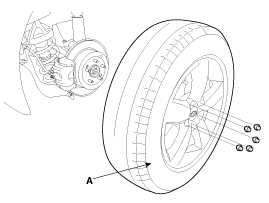
| 1. |
Remove the rear wheel and tire (A) from rear hub.
|

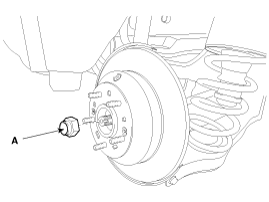
| 2. |
Remove the coking nut (A).
|
| 3. |
Remove the rear shock absorber.
(Refer to Suspension System - "Rear Shock Absorber")
|
| 4. |
Remove the parking brake cable.
(Refer to Brake System - "Parking Brake Cable")
|
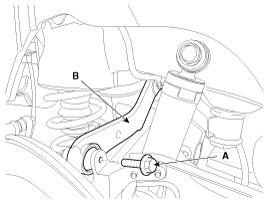
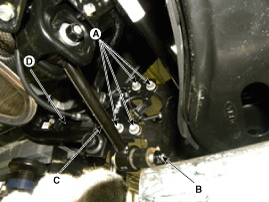
| 5. |
Remove the rear upper arm (A) after loosen the bolt (B).
|
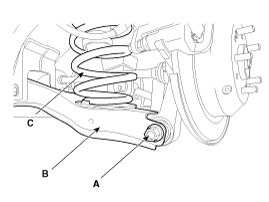
| 6. |
Remove the rear lower arm (B), spring (C) as loosening bolt (A)
after supporting rear lower arm (B) with jack.
|
| 7. |
Remove the rear assist arm (C), trailing arm (D) as loosening
bolt (A), nut (B).
|
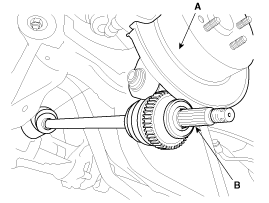
| 8. |
Separate the end (B) of rear driveshaft on rear axle assembly
(A).
|
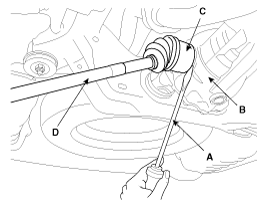
| 9. |
Insert a pry bar (A) between the differential case (B) and joint
case (C), and separate the driveshaft (D) from the differential case.
|

| 10. |
Install in the reverse order of removal.
|
| 11. |
Check the wheel alignment.
(Refer to Suspension System - "Alignment")
|
 Rear Driveshaft Components
1. Tone wheel
2. BJ joint
3. BJ boot
4. BJ boot big part band
5. BJ boot small part band
6. Shaft
7. TJ boot small part band
8. TJ boot big part band
9. TJ boot
...
 Rear Driveshaft Inspection
1.
Check the driveshaft boots for damage and deterioration.
2.
Check the ball joint for wear and damage.
3.
Che ...
See also:
Flex Steering Inspection
1.
Check the audio flex streeing switch (A) for resistance between
terminals in each switch position.
Switch
Resistance (┬▒5%)
...
Rear Cross Member
* These dimensions indicated in this figure are actual-measurement
dimensions. [ Unit : mm (inch) ]
...
Mirror Replacement
Outside Rear View Mirror Assembly Replacement
ŌĆó
When prying with a flat-up screwdriver, w ...
Categories
- Home
- First Generation
- Second Generation
- Kia Sorento XM 2011-2026 Owners Manual
- Kia Sorento XM 2011-2026 Service Manual

Copyright ® www.ksmanual.com 2014-2026