 Kia Sorento: Manual heating and air conditioning
The heating and cooling system can be controlled manually by pressing buttons or turning knob(s) other than the AUTO button. In this case, the system works sequentially according to the order of buttons or knob(s) selected.
1. Start the engine.
2. Set the mode to the desired position. For improving the effectiveness of heating and cooling;
- Heating: 
- Cooling: 
3. Set the temperature control to the desired position.
4. Set the air intake control to the outside (fresh) air position.
5. Set the fan speed control to the desired speed.
6. If air conditioning is desired, turn the air conditioning system on.
Press the AUTO button in order to convert to full automatic control of the system.
Mode selection
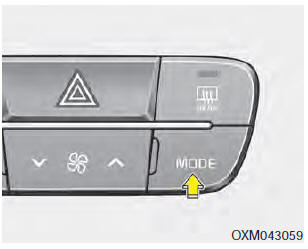
The mode selection button controls the direction of the air flow through the ventilation system.
The air flow outlet port is converted as follows:

Refer to the illustration in the âManual climate control systemâ.
Face-Level

Air flow is directed toward the upper body and face. Additionally, each outlet can be controlled to direct the air discharged from the outlet.
Bi-Level

Air flow is directed towards the face and the floor.
Floor-Level

Most of the air flow is directed to the floor, with a small amount of the air being directed to the windshield and side window defrosters.
Floor/Defrost-Level

Most of the air flow is directed to the floor and the windshield with a small amount directed to the side window defrosters.
Defrost-Level
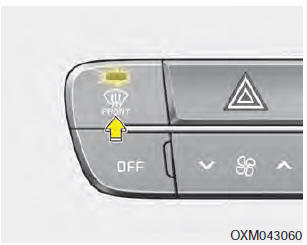
Most of the air flow is directed to the windshield with a small amount of air directed to the side window defrosters.
Instrument panel vents
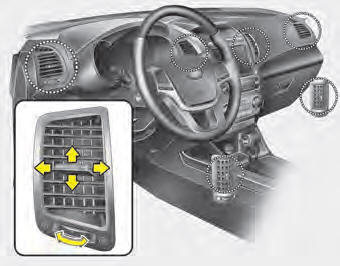
The outlet vents can be opened or closed separately using the thumbwheel (if equipped).
Also, you can adjust the direction of air delivery from these vents using the vent control lever as shown.
Temperature control
The temperature will increase to the maximum (HI) by turning the knob to the extreme right.
The temperature will decrease to the minimum (Lo) by turning the knob to the extreme left.
When turning the knob, the temperature will increase or decrease by 1ÂḞF/0.5ÂḞC. When set to the lowest temperature setting, the air conditioning will operate continuously.
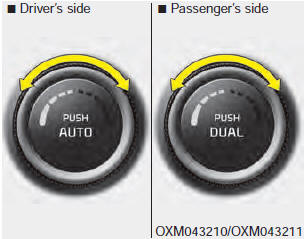
Adjusting the driver and passenger side temperature individually
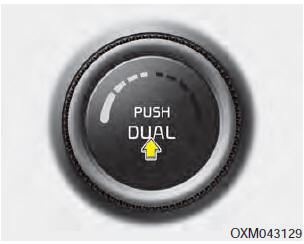
1. Press the DUAL button to operate the driver and passenger side temperature individually. Also, if the passenger side temperature control knob is operated, it will automatically change to the DUAL mode as well.
2. Operate the left temperature control to adjust the driver side temperature. Operate the right temperature control to adjust the passenger side temperature.
When the driver side temperature is set to the highest (HI) or lowest (Lo) temperature setting, the DUAL mode is deactivated for maximum heating or cooling.
Adjusting the driver and passenger side temperature equally
1. Press the DUAL button again to deactivate DUAL mode. The passenger side temperature will be set to the same temperature as the driver side.
2. Operate the driver side temperature control switch. The driver and passenger side temperature will be adjusted equally.
Temperature conversion
You can switch the temperature mode from Centigrade to Fahrenheit as follows:
While pressing the OFF button, press the AUTO button for 3 seconds or more.
The display will change from Centigrade to Fahrenheit, or from Fahrenheit to Centigrade.
If the battery has been discharged or disconnected, the temperature mode display will reset to Fahrenheit.
 Automatic climate control system (If equipped)
1. A/C display
2. Driver's temperature control knob
3. AUTO (automatic control) button
4. Front blower OFF button
5. Front fan speed control switch
6. Mode selection button
7. Dual tempera ...
 Outside thermometer
The current outside temperature is displayed in 1ÂḞF (1ÂḞC) increments. The temperature
range is between - 40ÂḞF ~ 140ÂḞF (-40ÂḞC ~ 60ÂḞC).
The outside temperature on the display may not change im ...
See also:
Relay Box (Engine Compartment) Inspection
1.
Disconnect the negative (-) battery terminal.
2.
Pull out the relay from the engine compartment relay box.
Power Relay (Type A)
...
Schematic Diagram
Canister
Canister is filled with charcoal and absorbs evaporated vapor in fuel
tank. The gathered fuel vapor in canister is drawn into the intake manifold
by the ECM/PCM when appropri ...
Components Operations
PCM (Power Train Control Module)
1.
The PCM(ECM)(A) carries out a check of the ignition key using
a special encryption algorithm, which is programmed into the transpond ...
Categories
- Home
- First Generation
- Second Generation
- Kia Sorento XM 2011-2026 Owners Manual
- Kia Sorento XM 2011-2026 Service Manual
