 Kia Sorento: Engine Oil and Filter Replacement
| Engine Oil And Filter Replacement |
|
Never use any additives to engine oil, as they can change the properties of engine oil which can cause
serious engine failure.
|
|
•
|
Prolonged and repeated contact with mineral oil will result in the removal of natural fats from the
skin, leading to dryness, irritation and dermatitis. In addition, used engine oil contains potentially
harmful contaminants which may cause skin cancer.
|
|
•
|
Exercise caution in order to minimize the length and frequency of contact of your skin to used oil.
Wear protective clothing and gloves. Wash your skin thoroughly with soap and water, or use water-less
hand cleaner, to remove any used engine oil. Do not use gasoline, thinners, or solvents.
|
|
•
|
In order to preserve the environment, used oil and used oil filter must be disposed of only at
designated disposal sites.
|
|
| 1. |
Drain the engine oil.
| (1)
|
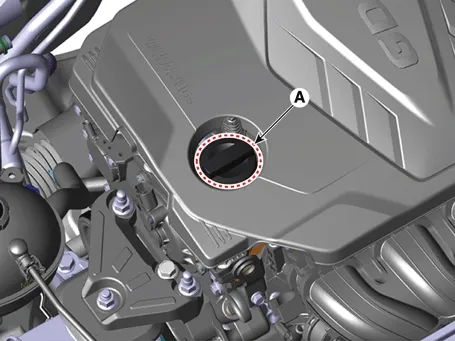
Remove the oil filler cap (A).
|
| (2)
|
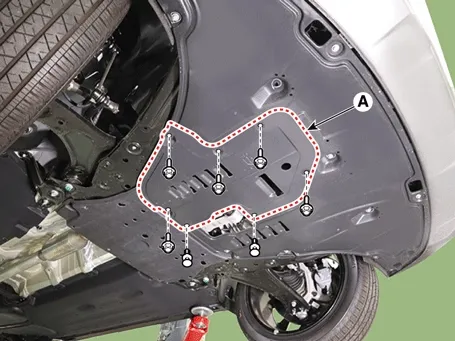
Remove the oil drain survice cover (A).
|
| (3)
|
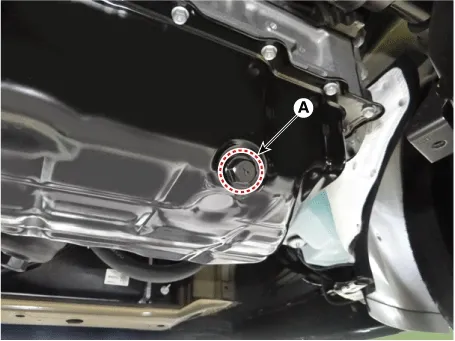
Removing the drain plug (A) and then drain oil.
|
|
| 2. |
Replace the oil filter.
| (1)
|
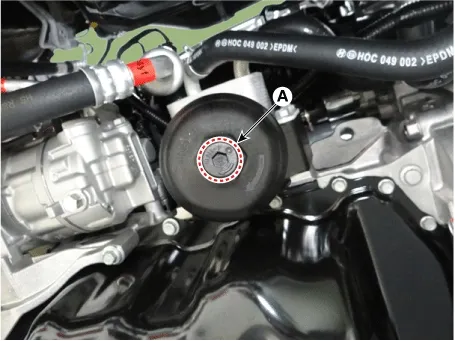
Drain oil in the oil filter by removing the drain bolt (A) located at the bottom of oil filter cap.
|
| (2)
|
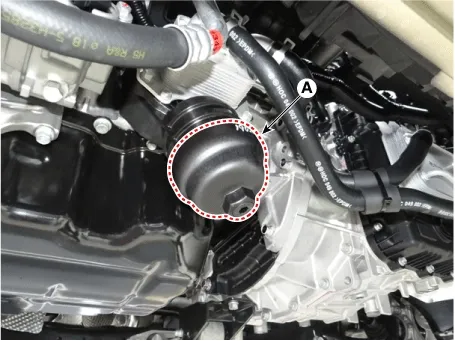
Remove the oil filter cap (A) using a socket wrench.
|
| (3)
|
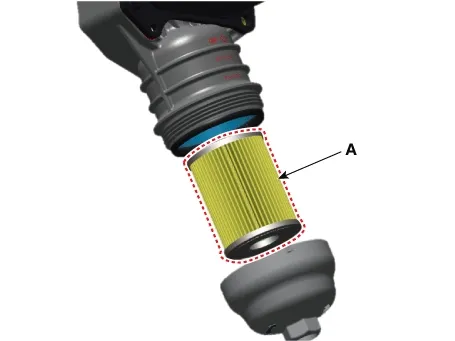
Install the new oil filter (A).
|
| (4)
|
Install the oil filler cap (A) using a socket wrench.
Lightly tighten the oil filter cap into place, and tighten it until the O-ring contacts the seating
surface.
Tightening torque :
25.5 - 29.4 N·m (2.6 - 3.0 kgf·m , 18.8 - 21.7 lb·ft)
|
|
•
|
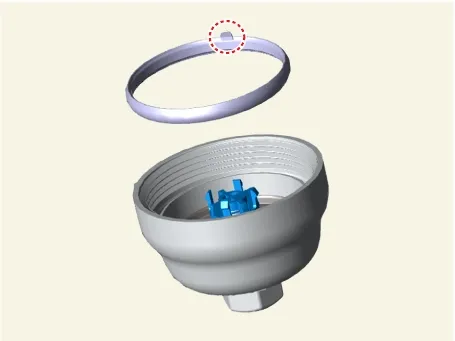
When installing the O-ring, make sure that the protrusion of the O-ring faces
upward.
|
|
•
|
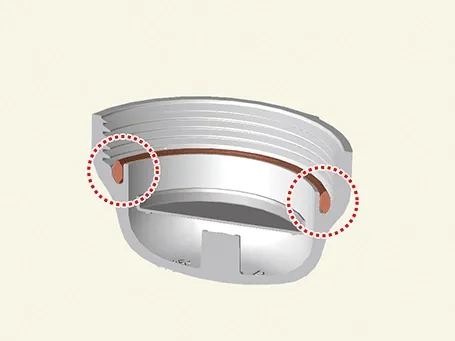
When attaching the O-ring to the oil filter cap, press it down enough to seat the
entire O-ring mounting part.
|
|
•
|
When installing the oil filter cap, check that the new O-ring is seated in place of
the cap.
|
|
•
|
When installing the oil filter cap, apply engine oil to a new O-ring.
|
|
•
|
Wipe off the oil remaining on the threads of oil filter cap and then install the
oil filter cap.
|
|
|
| (5)
|
Replace the drain bolt (A) with a new one and then tighten it to the specified torque.
Tightening torque :
3.9 - 4.9 N·m (0.4 - 0.5 kgf·m , 2.9 - 3.6 lb·ft, 34.7 - 43.4 lb·in)
|
|
Always use a new drain plug.
|
|
|
| 3. |
Fill engine oil.
| (1)
|
Install the oil drain plug (A) with the new gasket.
Tightening torque :
34.3 - 44.1 N·m (3.5 - 4.5 kgf·m , 25.3 - 32.5 lb·ft)
|
|
| (2)
|
Fill new engine oil through the oil inlet.
Before filling engine oil, remove the oil level gauge.
Capacity
Total: 6.8ℓ (1.8 U.S.gal., 7.2 U.S.qt., 6.0 lmp.qt.)
Oil pan: 5.5ℓ (1.45 U.S.gal., 5.81 U.S.qt., 4.83 lmp.qt.)
Drain and refill including oil filter : 5.8 ℓ (1.53 U.S.gal., 6.13 U.S.qt., 5.10 lmp.qt.)
|
|
First fill the half of total capacity and then fill the other half after approximate 1
minute has elapsed.
|
|
| (3)
|
Install the oil drain survice cover (A).
Tightening torque :
7.8 - 11.8 N·m (0.8 - 1.2 kgf·m , 5.8 - 8.7 lb·ft)
|
|
| (4)
|
Install the oil filler cap and oil level gauge.
|
|
| 4. |
Start engine and check for oil leaks.
|
| 5. |
Recheck the engine oil level.
|
•
|
Before rechecking the engine oil level, sufficiently warm up the engine.
|
|
•
|
If engine is not sufficiently warmed up, engine oil level could be checked below the
specified value.
|
|
•
|
After starting the engine, check the oil filter cap and drain plug for leaks.
|
|
|
|
•
|
Prolonged and repeated contact with mineral oil will result in the removal of natural fats from the
skin, leading to dryness, irritation and dermatitis. In addition, used engine oil contains potentially
harmful contaminants which may cause skin cancer.
|
|
•
|
Exercise caution in order to minimize the length and frequency of contact of your skin to used oil.
Wear protective clothing and gloves. Wash your skin thoroughly with soap and water, or use water-less
hand cleaner, to remove any used engine oil. Do not use gasoline, thinners, or solvents.
|
|
•
|
In order to preserve the environment, used oil and used oil filter must be disposed of only at
designated disposal sites.
|
|
| 1. |
Drain the engine oil.
| (1)
|
Remove the oil filler cap (A).
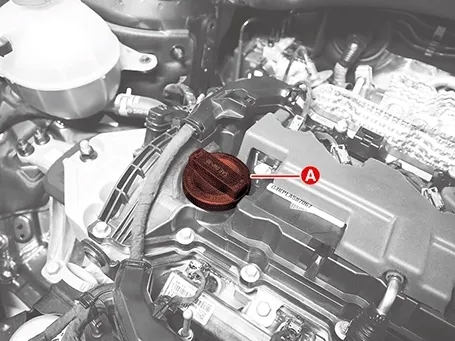
|
| (2)
|
Remove the oil drain survice cover (A).
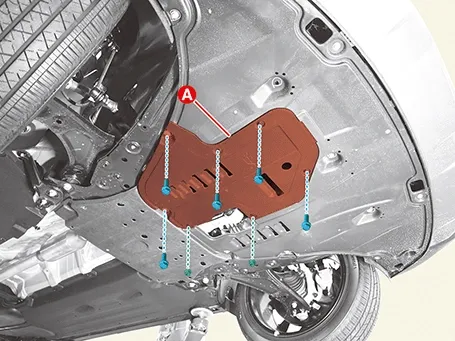
|
| (3)
|
Remove the drain plug (A) and then drain oil.
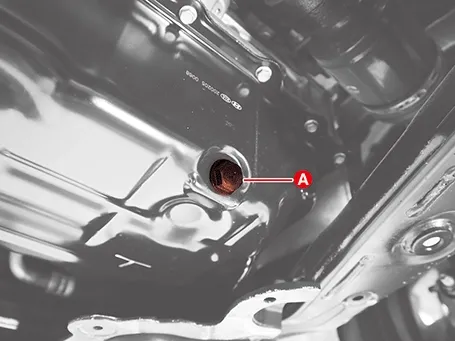
|
|
| 2. |
Replace the oil filter.
| (1)
|
Drain oil in the oil filter by removeing the drain bolt (A) located at the bottom of oil filter
cap.
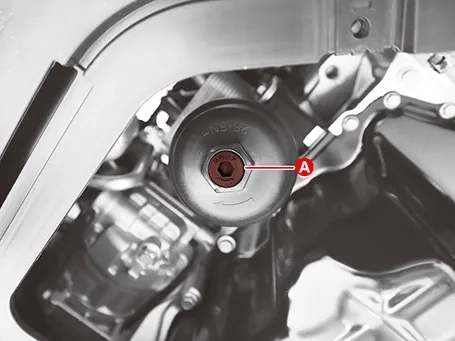
|
| (2)
|
Remove the oil filter cap (A) using a socket wrench.
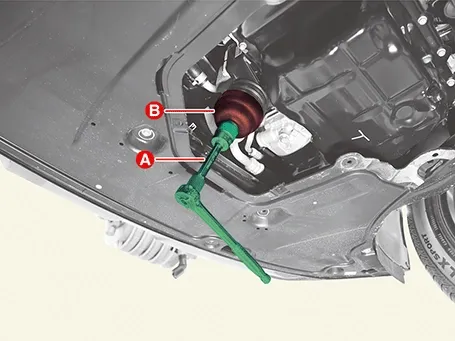
|
| (3)
|
Remove the oil filter (A).
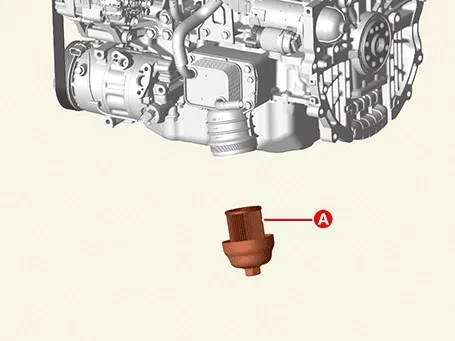
|
| (4)
|
Remove the O-ring (A).
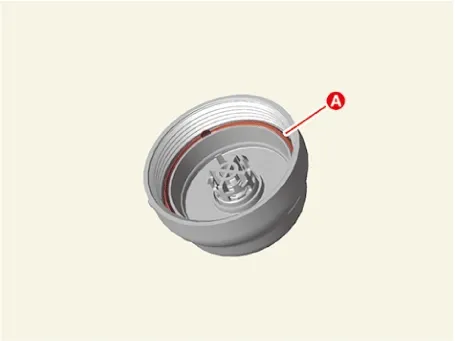
|
| (5)
|
Install a new O-ring (A) to the oil filter cap.
|
•
|
When installing the O-ring, make sure that the protrusion of the O-ring faces
upward.
|
|
•
|
When attaching the O-ring to the oil filter cap, press it down enough to seat the
entire O-ring mounting part.
|
|
|
| (6)
|
Install the new oil filter.
|
| (7)
|
Install the oil filler cap (A) using a socket wrench.
Lightly tighten the oil filter cap into place, and tighten it until the O-ring contacts the seating
surface.
Tightening torque :
25.5 - 29.4 N·m (2.6 - 3.0 kgf·m , 18.8 - 21.7 lbㆍft)
|
|
•
|
When installing the oil filter cap, check that the new O-ring is seated in place of
the cap.
|
|
•
|
When installing the oil filter cap, apply engine oil to a new O-ring.
|
|
•
|
Wipe off the oil remaining on the threads of oil filter cap and then install the
oil filter cap.
|
|
|
| (8)
|
Replace the drain bolt (A) with a new one and then tighten it to the specified torque.
Tightening torque :
3.9 - 4.9 N·m (0.4 - 0.5 kgf·m , 2.9 - 3.6 lbㆍft, 34.7 - 43.4 lbㆍin)
|
|
Always use a new drain plug.
|
|
|
| 3. |
Fill engine oil.
| (1)
|
Install the oil drain plug (A) with the new gasket.
Tightening torque :
34.3 - 44.1 N·m (3.5 - 4.5 kgf·m , 25.3 - 32.5 lbㆍft)
|
|
| (2)
|
Fill new engine oil through the oil inlet.
Before filling engine oil, remove the oil level gauge.
Capacity
Total: 6.8ℓ (1.8 U.S.gal., 7.2 U.S.qt., 6.0 lmp.qt.)
Oil pan: 5.5ℓ (1.5 U.S.gal., 5.8 U.S.qt., 4.8 lmp.qt.)
Drain and refill including oil filter : 5.8ℓ (1.5 U.S.gal., 6.1 U.S.qt., 5.1 lmp.qt.)
|
|
First fill the half of total capacity and then fill the other half after approximate 1
minute has elapsed.
|
|
| (3)
|
Install the oil drain cover (A).
Tightening torque :
7.8 - 11.8 N·m (0.8 - 1.2 kgf·m , 5.8 - 8.7 lbㆍft)
|
|
| (4)
|
Install the oil filler cap and oil level gauge.
|
|
| 4. |
Start engine and check for oil leaks.
|
| 5. |
Recheck the engine oil level.
|
•
|
Before rechecking the engine oil level, sufficiently warm up the engine.
|
|
•
|
If engine is not sufficiently warmed up, engine oil level could be checked below the
specified value.
|
|
•
|
After starting the engine, check the oil filter cap and drain plug for leaks.
|
|
|
| 1. |
Check the engine oil quality.
Check the oil deterioration, entry of water, discoloring of thinning. If the quality is visibly poor,
replace the oil.
|
| 2. |
Check the engine oil level.
After engine warm up stop the engine wait 5 minutes then check the oil level. Oil level should be between
the "L" and "F" marks on the dipstick. If low check for leakage and add oil up to the
"F" mark.
|
•
|
Do not fill with engine oil above the "F" mark.
|
|
•
|
Check the oil level gauge when the engine oil is on normal tempeature (20°C ~ 25°C).
|
|
•
|
The tire pressure should be in the specification range.
|
|
•
|
Make sure the road surface is flat when measuring engine oil.
|
|
•
|
When draining engine oil, check the total amount of drained oil and refill.
|
|
|
Inspection
1.
Check belt for maintenance and abnormal wear of V-ribbed part. Replace if necessary.
...
Exhaust System Inspection
Inspection
1.
Visually check the pipes, hangers and connections for severe corrosion, leaks or damage.
...



 Drive Belt Removal and Installation
 Exhaust System Inspection. Fuel Lines, Hoses and Connections Inspection
