
 Kia Sorento: Drive Belt Removal and Installation
Kia Sorento (MQ4, 2021-2026) Service Manual / Maintenance / Power Train / Drive Belt Removal and Installation
| Inspection |
| 1. |
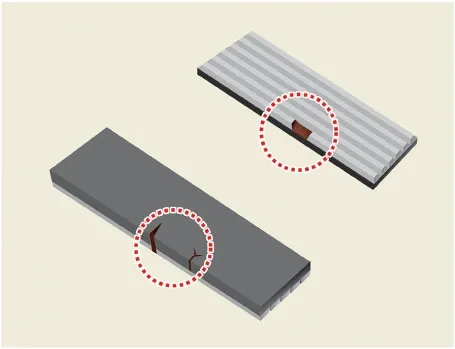
Check belt for maintenance and abnormal wear of V-ribbed part. Replace if necessary.
|

| 2. |
Visually check the belt for excessive wear, frayed cords etc.
If any defect has been found, replace the drive belt.
|
| Removal and Installation |
| [THETA-Ⅲ 2.5 GDI] |
| 1. |
Remove the engine room under cover.
(Refer to Engine and Transaxle Assembly - "Engine Room Under
Cover")
|
| 2. |
Remove the RH front wheel guard.
(Refer to Body(Interior and Exterior) - " Front Wheel Guard")
|
| 3. |
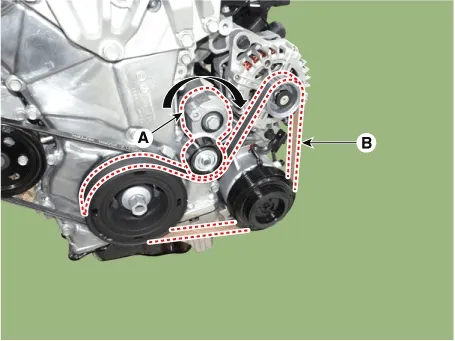
For release the tension, turn the drive belt tensioner (A) clockwise then remove the drive belt (B).
|
| 4. |
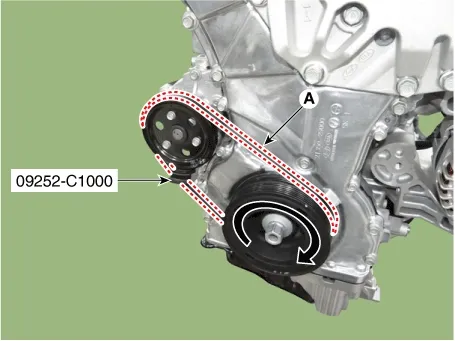
Remove the water pump belt.
|
| 5. |
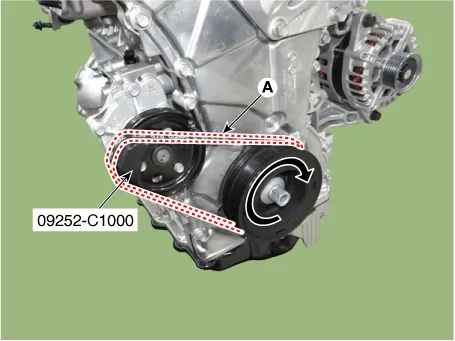
Install the water pump belt.
|
| 6. |
For release the tension, turn the drive belt tensioner (A) clockwise then install the drive belt (B).
|
| 7. |
Install in the reverse order of removal.
|
| [THETA-Ⅲ 2.5 T-GDI] |
| 1. |
Remove the engine room under cover.
(Refer to Engine and Transaxle Assembly - "Engine Room Under
Cover")
|
| 2. |
Remove the RH front wheel guard.
(Refer to Body (Interior and Exterior) - "Front Wheel
Guard")
|
| 3. |
For release the tension, turn the drive belt tensioner (A) clockwise then remove the drive belt (B).
|
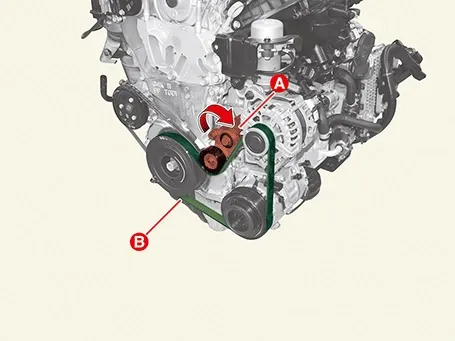
| 4. |
Remove the water pump belt.
|
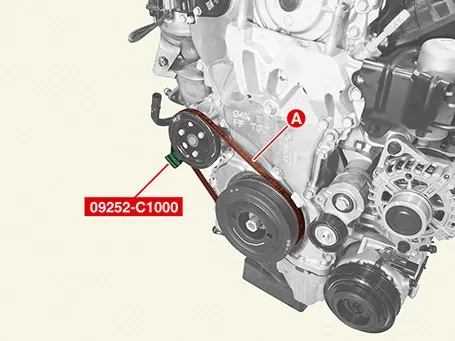
| 5. |
Install the water pump belt.
|
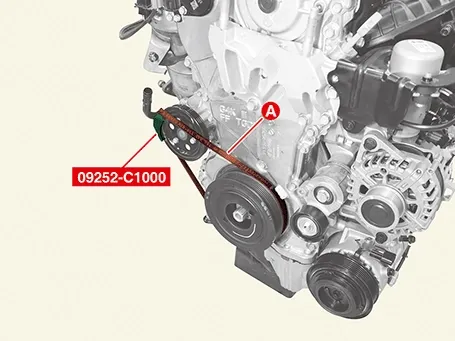
| 6. |
For release the tension, turn the drive belt tensioner (A) clockwise then install the drive belt (B).
|
| 7. |
Install in the reverse order of removal.
|
Replacement and Air Bleeding
[THETA-Ⅲ 2.5 GDI]
...
 Cooling System Replacement
Engine Oil And Filter Replacement
...
 Engine Oil and Filter Replacement
See also:
Components
1. TPMS sensor (RR)
2. TPMS sensor (FR)
3. TPMS sensor (FL)
4. TPMS sensor (RL)
5. Receiver
...
Ultrasonic Sensor Specification
Specification
Item
Specification
Rated voltage (V)
12.0
Operation vol ...
Manual heating and air conditioning
The heating and cooling system can be controlled manually by pressing buttons
or turning knob(s) other than the AUTO button. In this case, the system works sequentially
according to the order of but ...
Manuals list
- Kia Sorento MQ4 2021-2026 Owners Manual
- Kia Sorento XM 2011-2015 Owners Manual
- Kia Sorento XM 2011-2015 Service Manual

Copyright © www.ksmanual.com 2014-2026 - 0.0533