
 Kia Sorento: Brake Line Repair procedures
Kia Sorento (MQ4, 2021-2026) Service Manual / Brake System / Brake System / Brake Line Repair procedures
| Removal |
Be careful not to damage the parts located under the vehicle (floor under cover, fuel filter, fuel tank and
canister) when raising the vehicle using the lift.
|

Brake Tube [Engine Room]
| 1. |
Disconnect the brake fiuid level switch connector, and remove the reservoir cap.
|
| 2. |
Remove the brake fluid from the master cylinder reservior with a syringe.
|
| 3. |
Remove the brake tube after removing the flare nuts from the ESC, master cylinder and brake tube connector.
|
Brake Hose
| 1. |
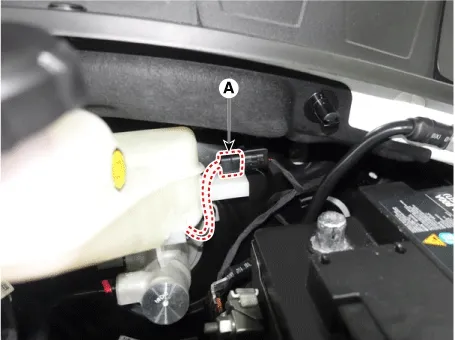
Disconnect the brake fluid level sensor connector (A).
|

| 2. |
Remove the brake fluid from the master cylinder reservoir with a syringe.
|
| 3. |
Remove the wheel and tire.
(Refer to Tires/Wheels - "Wheel")
|
| 4. |
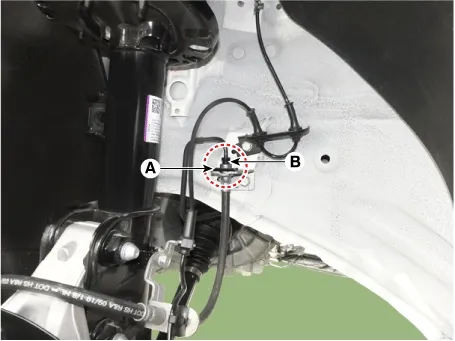
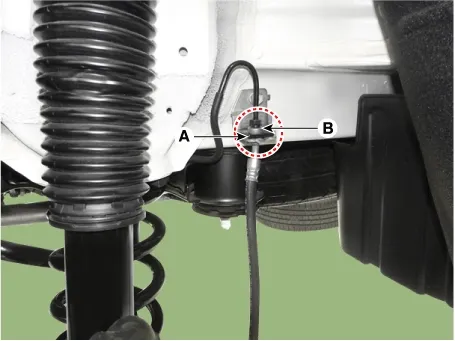
Remove the tube flare nut (B) and remove the hose clip (A) to separate the tube.
[Front]
[Rear]
|
| 5. |
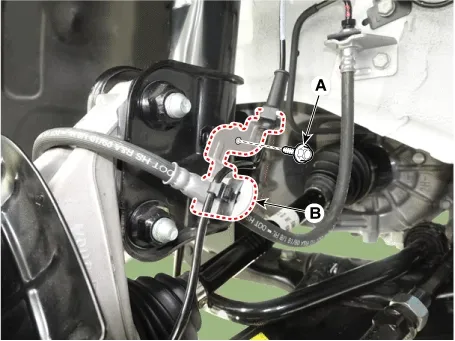
Remove the mounting bolt (A) and then remove the brake hose bracket (B) from the strut assembly.
|
| 6. |
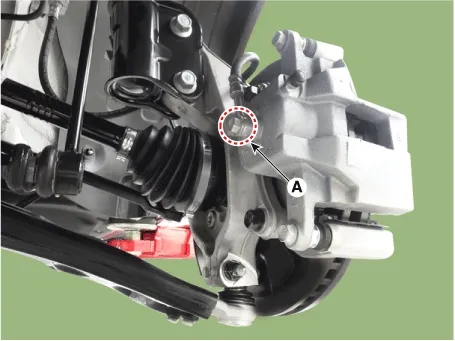
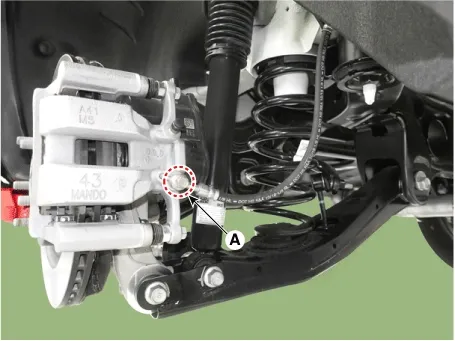
Remove the hose after removing the brake hose bolt (A) from the caliper.
[Front]
[Rear]
|
| Inspection |
| 1. |
Check the brake tubes for cracks, crimps and corrosion.
|
| 2. |
Check the brake tube flare nuts for damage and fluid leakage.
|
| Installation |
| 1. |
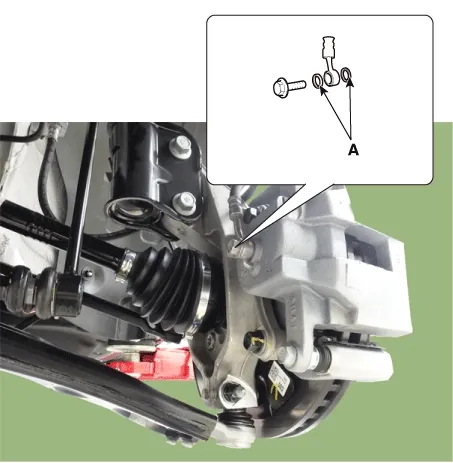
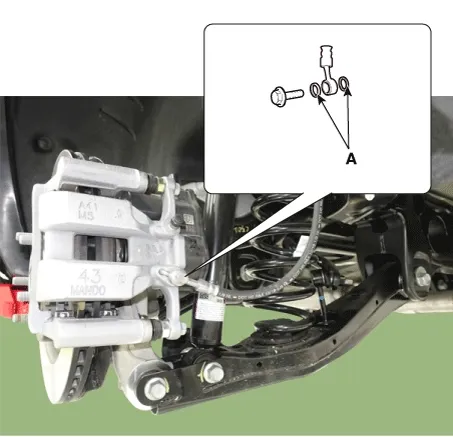
Install in the reverse order of removal.
|
| 2. |
After installation, bleed the brake system.
(Refer to Brake System - "Brake Bleeding Procedures")
|
Vacuum Pump Repair procedures
Removal
[THETA lll 2.5 T-GDI]
1.
Disconnect the battery negative ( - ) ca...
 Vacuum Pump Repair procedures. Brake Line Components and Components Location
Components
1. Brake member assembly2. Stop lamp switch3.
Brake pedal pad
4. Pedal stroke sensor5. Brake pedal arm...
 Brake Pedal Components and Components Location
See also:
Removal
1.
Turn the ignition switch OFF and disconnect the negative (-) battery
cable.
2.
Disconnect the accelerator position sensor connector (A). ...
Circuit Diagram
...
12 V Lithium Auxiliary Battery Description and Operation
Description and Operation Principle
•
The P-LBM (Parking Lithium Battery Module) is an additional 12 V auxiliary b ...
Manuals list
- Kia Sorento MQ4 2021-2026 Owners Manual
- Kia Sorento XM 2011-2015 Owners Manual
- Kia Sorento XM 2011-2015 Service Manual

Copyright © www.ksmanual.com 2014-2026 - 0.0801