 Kia Sorento: Removal
| 1. |
Remove the air duct.
(Refer to Engine Mechanical System - "Air cleaner")
|
| 2. |
Remove the battery and the battery tray.
(Refer to Engine Electrical System - "Battery")
|
| 3. |
Remove the under cover.
(Refer to Engine Mechanical System - "Engine Room Under Cover")
|
| 4. |
Drain the coolant.
(Refer to Engine Mechanical System - "Coolant")
|
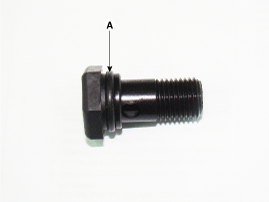
| 5. |
Remove the drain plug (A) and reinstall the drain plug after draining
ATF totally.
|


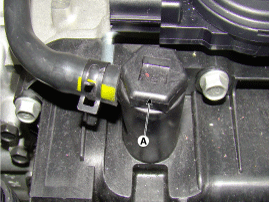
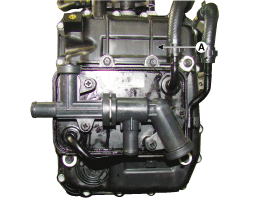
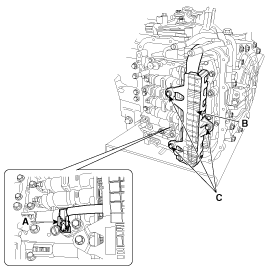
| 6. |
Remove the wiring bracket installation bolt (A).
|
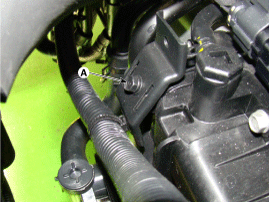
| 7. |
Remove the ATF Injection hole(eyebolt) (A).
|
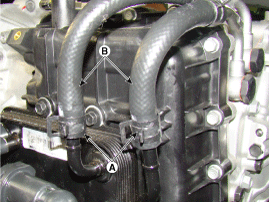
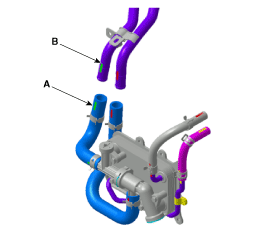
| 8. |
Disconnect the coolant hose (B) after removing the coolant hose
clamp (A).
|
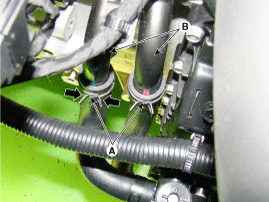
| 9. |
Disconnect the hose (B) after removing the automatic transaxle
fluid cooler hose clamp (A).
|
| 10. |
Remove the valve body cover (A).
|
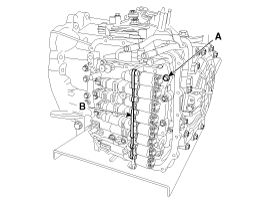
| 11. |
Remove the bolts (C) after disconnecting the solenoid valve connector
(B) and the oil temperature sensor connector (A).
|
| 12. |
Remove the solenoid valve support bracket (B) and the valve body
mounting bolt (A-1ea).
|
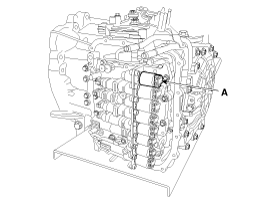
| 13. |
Remove the torque converter control solenoid valve (A).
|
 Inspection
1.
Turn ignition switch OFF.
2.
Remove the air duct.
(Refer to Engine Mechanical System - "Air cleaner")
...
 Installation
1.
Install in the reverse order of removal.
ŌĆó
...
See also:
IMS Power Seat Control Removal
1.
Disconnect the negative (-) battery terminal.
2.
Remove the power seat control switch connectors (A).
(Refer to Body - "Front se ...
Start/Stop Button Component
...
Bluetooth® Wireless Technology Audio
What is Bluetooth® Wireless Technology?
Bluetooth® Wireless Technology allows devices to be connected
in a short distance, including hands-free devices, stereo headsets, wireless remote
controlle ...
Categories
- Home
- First Generation
- Second Generation
- Kia Sorento XM 2011-2025 Owners Manual
- Kia Sorento XM 2011-2025 Service Manual

Copyright ® www.ksmanual.com 2014-2025