 Kia Sorento: Side repeater lamp replacement
If the light bulb does not operate, we recommend that you check with an authorized Kia dealer.
Rear combination lamp bulb replacement
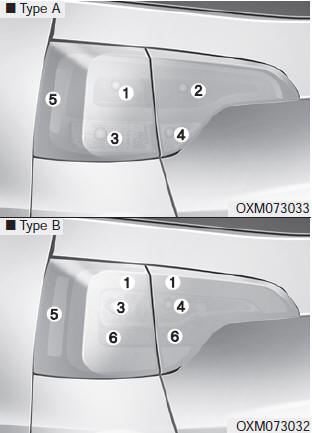
(1) Stop and tail light
(2) Tail light
(3) Rear turn signal light
(4) Back-up light
(5) Rear side marker
(6) Stop light
Outside lamp
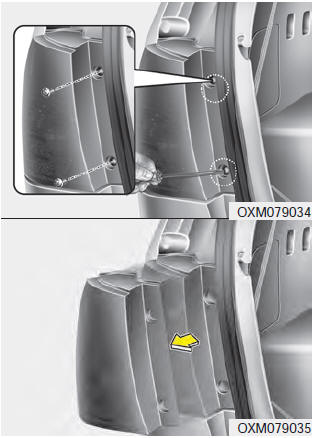
1. Open the tailgate.
2. Loosen the lamp assembly retaining screws with a philips head screwdriver.
3. Remove the rear combination lamp assembly from the body of the vehicle.
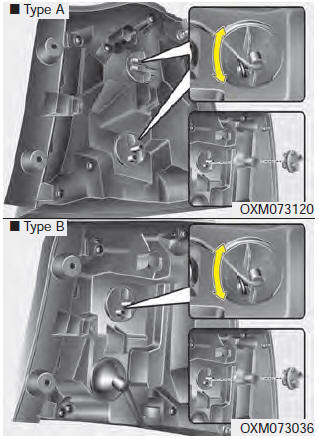
4. Remove the socket from the assembly by turning the socket counterclockwise until the tabs on the socket align with the slots on the assembly.
5. Remove the bulb from the socket by pressing it in and rotating it counterclockwise until the tabs on the bulb align with the slots in the socket. Pull the bulb out of the socket.
6. Insert a new bulb by inserting it into the socket and rotating it until it locks into place.
7. Install the socket in the assembly by aligning the tabs on the socket with the slots in the assembly.
Push the socket into the assembly and turn the socket clockwise.
8. Reinstall the light assembly to the body of the vehicle.
* If your vehicle is equipped with LED type stop and tail lights replace with LED assembled units. Please contact an authorized Kia dealer.
Type B (Stop and tail lamp)
If the lamp bulb does not operate, have the vehicle checked by an authorized Kia dealer.
Inside lamp
1. Open the tailgate.
2. Remove the service cover.
3. Remove the socket from the assembly by turning the socket counterclockwise until the tabs on the socket align with the slots on the assembly.
4. Remove the bulb from the socket by pressing it in and rotating it counterclockwise until the tabs on the bulb align with the slots in the socket. Pull the bulb out of the socket.

5. Insert a new bulb by inserting it into the socket and rotating it until it locks into place.
6. Install the socket in the assembly by aligning the tabs on the socket with the slots in the assembly.
Push the socket into the assembly and turn the socket clockwise.
7. Install the service cover by putting it into the service hole.
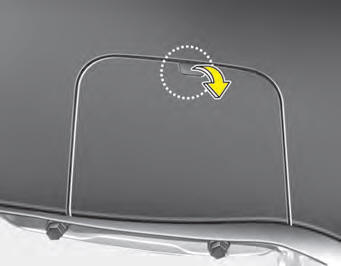
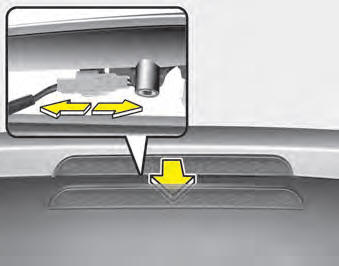
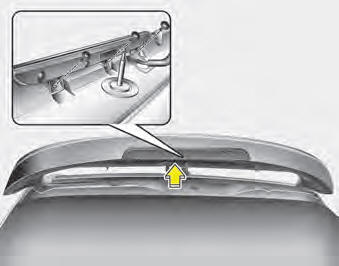
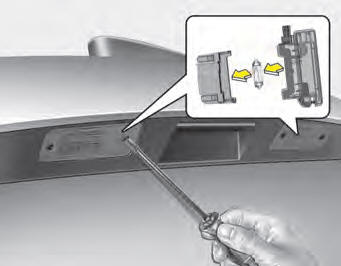
High mounted stop lamp replacement
Type A
1. Open Tailgate
2. Remove the center cover of rear upper trim.
3. Remove the retaining bolts.
4. Disconnect the connector.
5. Replace the new LED assembled unit.
6. Reconnect the connector.
7. Apply retaining bolts and nuts and tighten.
8. Replace the center cover of rear upper trim.
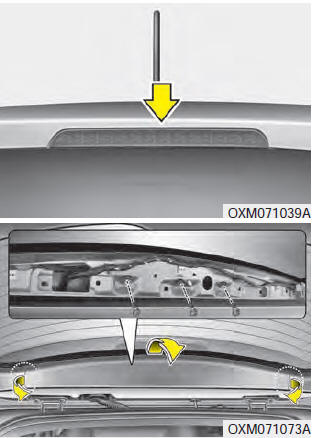
Type B (with Spoiler)
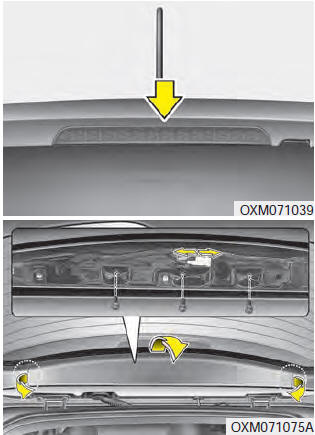
1.Open the tailgate.
2.Gently remove the center cover of the rear tailgate trim.
3.Disconnect the electrical connector.
4.Loosen the retaining nuts and remove the spoiler.
5.Remove the high mounted stop light assembly after loosening the screws.
6.Reinstall a new light assembly in the reverse order of removal.
License plate light bulb replacement
1. Loosen the lens retaining screws with a phillips head screwdriver.
2. Remove the lens.
3. Remove the bulb by pulling it straight out.
4. Install a new bulb.
5. Reinstall the lens securely with the lens retaining screws.
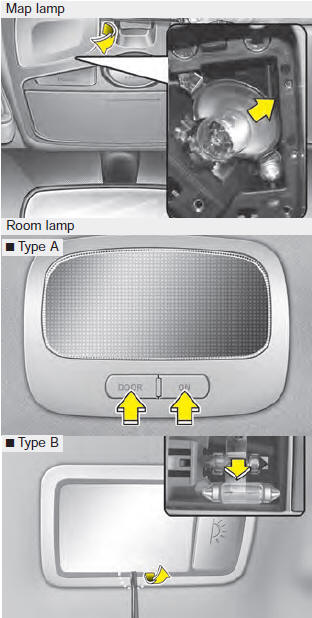
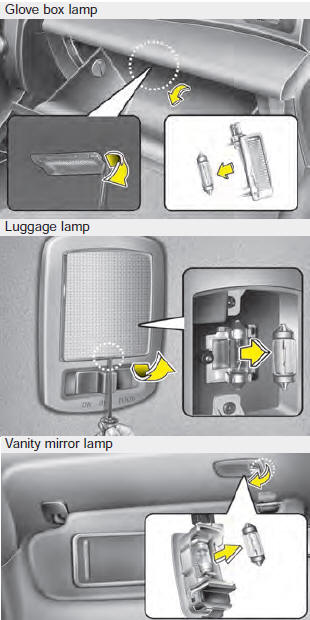
Interior light bulb replacement
1. Using a flat-blade screwdriver, gently pry the lens from the interior light housing.
2. Remove the bulb by pulling it straight out.
WARNING
Prior to working on the Interior Lights, ensure that the ŌĆ£OFFŌĆØ button is depressed to avoid burning your fingers or receiving an electric shock.
3. Install a new bulb in the socket.
4. Align the lens tabs with the interior light housing notches and snap the lens into place.
CAUTION
Be careful not to dirty or damage the lens, lens tab, and plastic housings.
 Light bulbs
WARNING - Working on the lights
Prior to working on the light, firmly apply the parking brake, ensure that
the ignition switch is turned to the LOCK position and turn off the lights to avoid
sudden ...
 Appearance care
Exterior care
Exterior general caution
It is very important to follow the label directions when using any chemical cleaner
or polish. Read all warning and caution statements that appear on the labe ...
See also:
Removal
1.
Turn the ignition switch OFF and disconnect the battery negative
(-) cable.
2.
Disconnect the engine coolant temperature sensor connecto ...
Hazard Lamp Switch Removal
ŌĆó
Put on gloves to protect your hands.
...
Occupant Detection system (ODS) Installation
1.
Install the ODS equipped seat cushion assembly. (Refer to the
Body group- Seat)
2.
Install the front passenger seat assembly.
( ...
Categories
- Home
- First Generation
- Second Generation
- Kia Sorento XM 2011-2025 Owners Manual
- Kia Sorento XM 2011-2025 Service Manual
