 Kia Sorento: Rear Bumper Replacement
Second Generation XM (2011-2025) / Kia Sorento XM 2011-2025 Service Manual / Body (Interior and Exterior) / Bumper / Rear Bumper Replacement
|

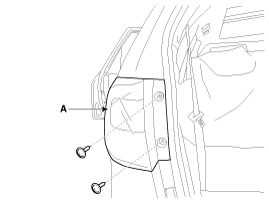
| 1. |
After loosening the mounting screws, then remove the rear combination
lamp (A).
|
| 2. |
Disconnect the rear combination lamp connector (A).
|

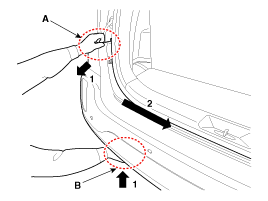
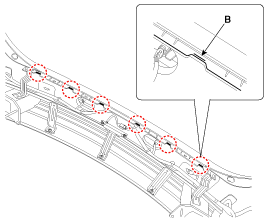
| 3. |
Loosen the rear bumper upper mounting clips and screw.
|
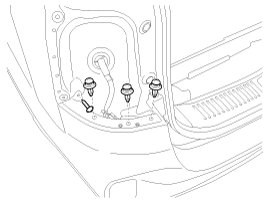
| 4. |
Loosen the rear bumper lower mounting clips.
|
| 5. |
Loosen the mounting bolts.
|
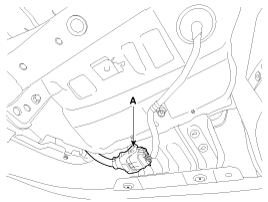
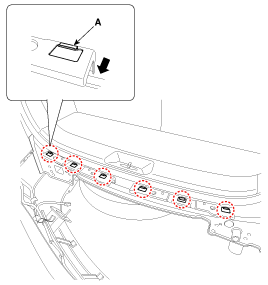
| 6. |
Disconnect the rear bumper main connector (A).
|
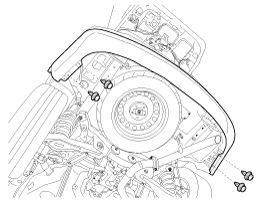
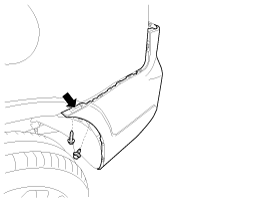
| 7. |
After loosening the mounting screws and clip, then remove the
rear mud guard (A).
|
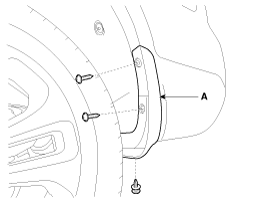
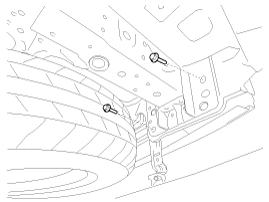
| 8. |
After loosening the rear bumper side's mounting screw and clip,
then disconnect the side's.
|
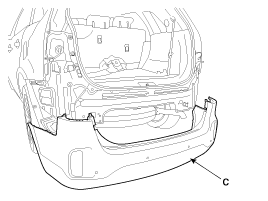
| 9. |
Remove the rear bumper assembly (C).
[LH]
[RH]
|

| 10. |
Install in the reverse order of removal.
|
 Rear Bumper Components
1. Rear bumper cover
2. Rear bumper lower bracket [RH]
3. Rear bumper lower bracket [LH]
4. Rear bumper side bracket [RH]
5. Rear bumper side bracket [LH]
...

See also:
Warning Messages
Shift to "P" position (for smart key system and automatic transaxle)
This warning message illuminates if you try to turn off the engine without
the shift lever in P (Park) position.
...
Rear Air Conditioner Unit Components
1. Rear Heater Case (LH)
2. Rear Heater Case (RH)
3. Lower Case
4. Drain Hose
5. Rear Evaporator Core
6. Refrigerant Line
7. Flange Lining
8. O-Ring
9. Rear ...
Delivery Pipe Removal
In case of removing the high pressure fuel pump, high pressure
fuel pipe, delivery pipe, and injector, there may be inju ...
Categories
- Home
- First Generation
- Second Generation
- Kia Sorento XM 2011-2025 Owners Manual
- Kia Sorento XM 2011-2025 Service Manual

Copyright ® www.ksmanual.com 2014-2025