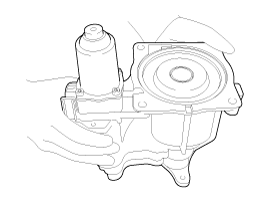
 Kia Sorento: Oil hydraulic Motor(Actuator) Removal
Second Generation XM (2011-2026) / Kia Sorento XM 2011-2026 Service Manual / 4 Wheel Drive (4WD) System / Coupling Assembly / Oil hydraulic Motor(Actuator) Removal
| 1. |
Remove the coupling assembly.
(Refer to Coupling Assembly - "Direct Electro Hydraulic Actuator
Coupling")
|
| 2. |
Keep going perpendicular state after remove the coupling assembly.
|

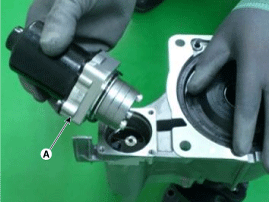
| 3. |
Remove the hydraulic motor (A) after loosening bolts with hex
wrench.
|

 Oil hydraulic Motor(Actuator) Inspection
If you have trouble code related to the oil hydraulic motor (actuator),
check oil hydraulic motor (actuator) according t ...
 Oil hydraulic Motor(Actuator) Installation
1.
Before installation, wipe the surface with a clean cloth.
2.
Check the O-rings (A) of the new hydraulic motor (actuators).
...
See also:
Operation and Leakage Check
Check all of the following items:
Component
Procedure
Brake Booster (A)
Check brake operation by applying the brakes during a test drive.
If the brakes do not ...
Trouble Symptom Charts
Trouble Symptom 1
Trouble Symptom 2
Trouble symptom
Probable cause
Remedy
The set vehicle speed varies greatly upward or downward
"Surgin ...
4WD ECU Components Location
1. 4WD ECU
...
Categories
- Home
- First Generation
- Second Generation
- Kia Sorento XM 2011-2026 Owners Manual
- Kia Sorento XM 2011-2026 Service Manual

Copyright ® www.ksmanual.com 2014-2026