
 Kia Sorento: Front Wheel Transfer Assembly Removal
Second Generation XM (2011-2026) / Kia Sorento XM 2011-2026 Service Manual / 4 Wheel Drive (4WD) System / Transfer Assembly / Front Wheel Transfer Assembly Removal
It is not recommended to overhaul the transfer assembly because
a special three-dimensional measuring instrument is required to determine
the sizes of the transfer assembly spacers when disassembling and reassembling
the transfer assembly. If putting wrong sized spacers in the transfer
assembly, it may cause noise and vibration.So, if inner parts of the
transfer assembly need to be replaced, the transfer assembly should
be replaced with new one.
|

| 1. |
Remove the following items;
|
| 2. |
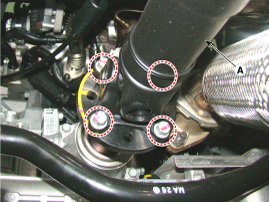
Remove the propeller shaft (A).
|
| 3. |
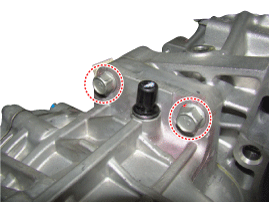
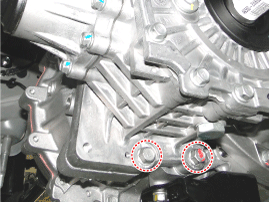
Loosen the transfer upper & lower mounting bolts. (transfer side
→ transaxle side)
|
| 4. |
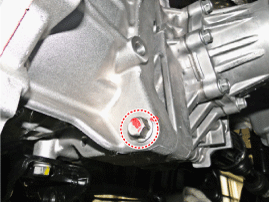
Loosen the transfer lower mounting blot. (transaxle side → transfer
side)
|
 Front Wheel Transfer Assembly Components Location
1. Under cover
2. Transaxle Assembly
3. Transfer assembly
4. Propeller shaft
5. Coupling assembly
1. Under cover
2. Transaxle Assembly
3 ...
 Front Wheel Transfer Assembly Installation
1.
Install in the reverse order of removal.
1.
...
See also:
Front Seat Belt Replacement
Front Seat Belt Replacement
•
When installing the belt, make sure not to damaged the
...
Front seat adjustment - manual
Forward and backward
To move the seat forward or backward:
1. Pull the seat slide adjustment lever up and hold it.
2. Slide the seat to the position you desire.
3. Release the lever and make sur ...
Alternator Components
1. Overrun Alternator Pully (OAP)
2. Front bracket
3. Front bearing
4. Rotor
5. Rear bearing
6. Rear bracket
7. Through bolt
8. Regulator assembly
9. Regulator b ...
Categories
- Home
- First Generation
- Second Generation
- Kia Sorento XM 2011-2026 Owners Manual
- Kia Sorento XM 2011-2026 Service Manual

Copyright © www.ksmanual.com 2014-2026