 Kia Sorento: Removal
| 1. |
Remove the air duct.
(Refer to Engine Mechanical System - "Air cleaner")
|
| 2. |
Remove the battery and the battery tray.
(Refer to Engine Electrical System - "Battery")
|
| 3. |
Remove the under cover.
(Refer to Engine Mechanical System - "Engine Room Under Cover")
|
| 4. |
Drain the coolant.
(Refer to Engine Mechanical System - "Coolant")
|
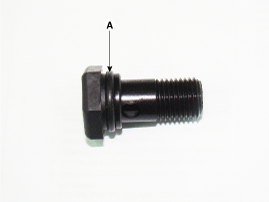
| 5. |
Remove the drain plug (A) and reinstall the drain plug after draining
ATF totally.
|


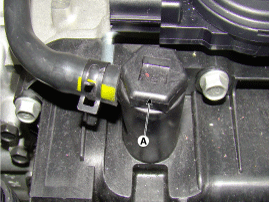
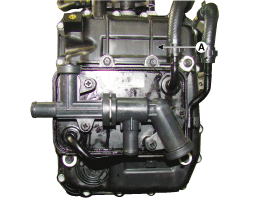
| 6. |
Remove the wiring bracket installation bolt (A).
|
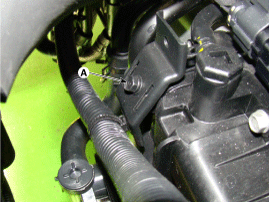
| 7. |
Remove the ATF Injection hole(eyebolt) (A).
|
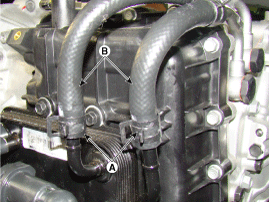
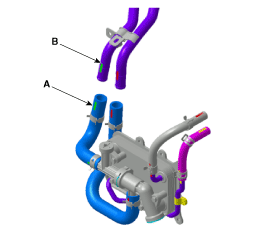
| 8. |
Disconnect the coolant hose (B) after removing the coolant hose
clamp (A).
|
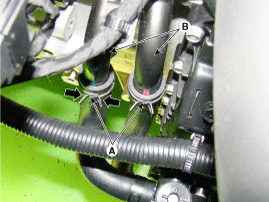
| 9. |
Disconnect the hose (B) after removing the automatic transaxle
fluid cooler hose clamp (A).
|
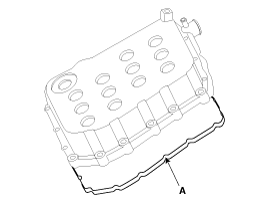
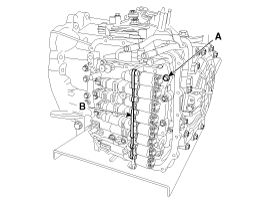
| 10. |
Remove the valve body cover (A).
|
| 11. |
Remove the bolts (C) after disconnecting the solenoid valve connector
(B) and the oil temperature sensor connector (A).
|
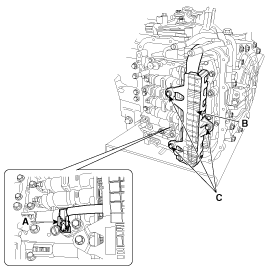
| 12. |
Remove the solenoid valve support bracket (B) and the valve body
mounting bolt (A-1ea).
|
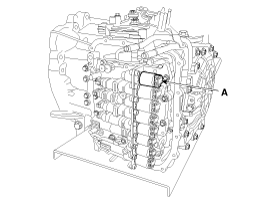
| 13. |
Remove the torque converter control solenoid valve (A).
|
 Inspection
1.
Turn ignition switch OFF.
2.
Remove the air duct.
(Refer to Engine Mechanical System - "Air cleaner")
...
 Installation
1.
Install in the reverse order of removal.
ŌĆó
...
See also:
Output Speed Sensor Installation
1.
Install in the reverse order of removal.
ŌĆó
...
Manual heating and air conditioning
The heating and cooling system can be controlled manually by pressing buttons
or turning knob(s) other than the AUTO button. In this case, the system works sequentially
according to the order of but ...
Description
The Vehicle Information System is a Telematics service that ensures comfortable
and enjoyable driving by providing safety, security, and vehicle diagnostic
information, with the option of usi ...
Categories
- Home
- First Generation
- Second Generation
- Kia Sorento XM 2011-2026 Owners Manual
- Kia Sorento XM 2011-2026 Service Manual

Copyright ® www.ksmanual.com 2014-2026