 Kia Sorento: Cooling Fan Removal and Installation
Second Generation XM (2011-2026) / Kia Sorento XM 2011-2026 Service Manual / Engine Mechanical System / Cooling System / Cooling Fan Removal and Installation
| Cooling Fan Assembly |
| 1. |
Disconnect the battery terminals.
|
| 2. |
Remove the air cleaner assembly.
(Refer to Intake And Exhaust System - "Air Cleaner")
|
| 3. |
Remove the under cover.
(Refer to Engine And Transaxle Assembly - "Engine Room Under Cover")
|
| 4. |
Remove the front bumper cover.
(Refer to Body - "Front Bumper cover")
|
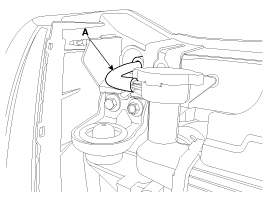
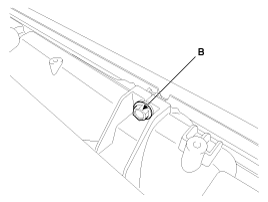
| 5. |
Disconnect the over flow hose (A) from the radiator.
|
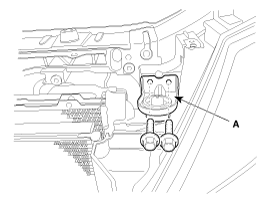
| 6. |
Remove the air intake shield (A) after loosening the screws (B).
|
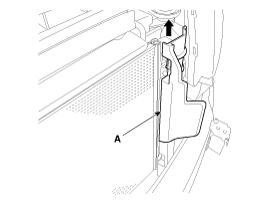
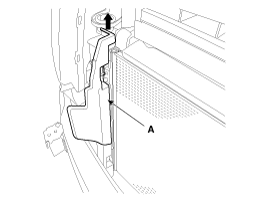
| 7. |
Remove the side air guard (A).
[LH]
[RH]
|
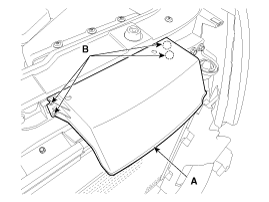
| 8. |
Remove the upper air guard(B) after loosening the mounting screws (A).
|
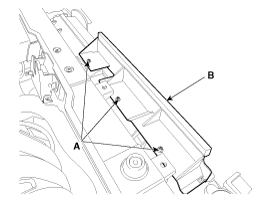
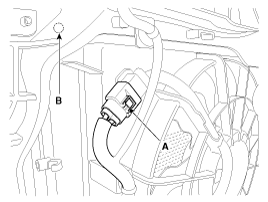
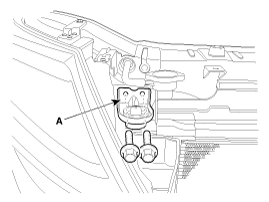
| 9. |
Disconnect the cooling motor connector (A).
|
| 10. |
Remove the cooling fan assembly mounting bolts (B).
[LH]
[RH]
|
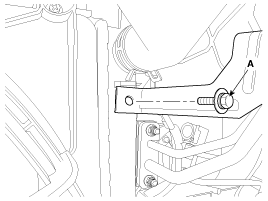
| 11. |
Remove the A/C high pressure pipe bracket mounting bolt (A).
|
| 12. |
Remove the upper bracket (A).
[LH]
[RH]
|
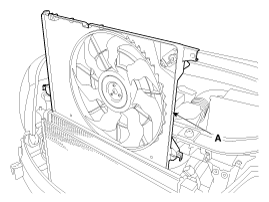
| 13. |
Loosen the cooling fan mounting bolts and then disconnect the cooling
fan assembly (A) from radiator.
|
| 14. |
Install in the reverse order of removal.
|
Cooling Fan Control Module
| 1. |
Remove the LH wheel guard.
(Refer to Body - "Front Wheel Guard")
|
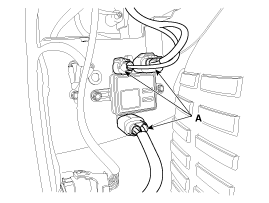
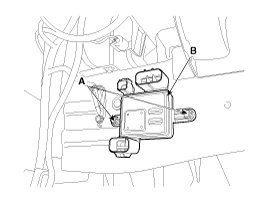
| 2. |
Disconnect the cooling fan control module connector (A).
|
| 3. |
Remove the module (B) after loosening the bolts (A).
|
| 4. |
Install in the reverse order of removal.
|

 Cooling Fan Disassembly
1.
Remove the cooling fan (A) after loosening the screws (B) from the cooling
assembly.
Tightening torque:
2.7 ~ 3.2 N.m (0.28 ~ 0.3 ...
See also:
Emission control system
The emission control system of your vehicle is covered by a written limited warranty.
Please see the warranty information contained in the Warranty & Maintenance booklet
in your vehicle.
Your v ...
Specification
Item
Specification
Coil Resistance (Ω)
19.9 ~ 22.9 [20┬░C(68┬░F)
...
Tightening Torques
Items
N.m
kgf.m
lb-ft
Compressor
19.6 ~ 33.3
2.0 ~ 3.4
14.5 ~ 24.6
Condenser - Discharge hose
4.9 ~ 7.8
0.5 ~ 0 ...
Categories
- Home
- First Generation
- Second Generation
- Kia Sorento XM 2011-2026 Owners Manual
- Kia Sorento XM 2011-2026 Service Manual

Copyright ® www.ksmanual.com 2014-2026