
 Kia Sorento: Timing Chain Repair procedures
| Removal |
| 1. |
Release the residual pressure in fuel line.
(Refer to Fuel Delivery System - "Release Residual Pressure in Fuel
Line")
|
| 2. |
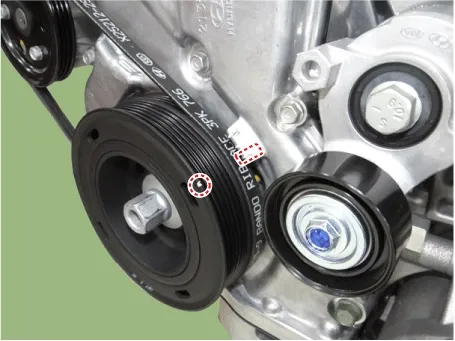
Set No.1 cylinder to TDC. Turn the crankshaft damper pulley clockwise and align its groove with the timing
mark "T" of the timing chain cover.
|
| 3. |
Remove the timing chain cover.
(Refer to Timing System - "Timing Chain Cover")
|
| 4. |
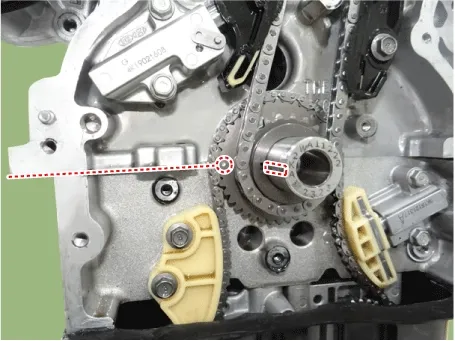
Make sure that the key of crankshaft is aligned with the mounting surface of the lower crankcase in a
straight line. Check that the No.1 piston is positioned at the TDC.
|
| 5. |
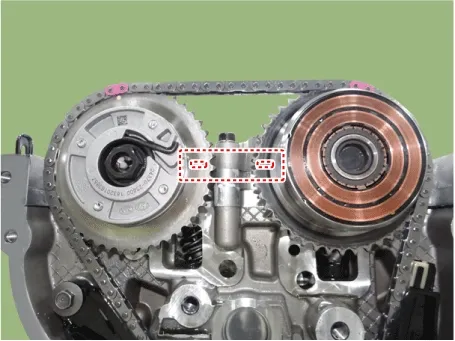
Check that the timing marks of the intake camshaft sprocket and the exhaust camshaft sprocket are in line.
|

| 6. |
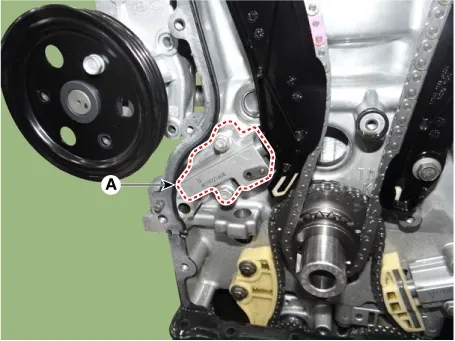
Release the ratchet by pulling the link of timing chain tensioner down using a thinscrewdriver. Compress
the piston and then insert a stopper pin into the hole to fix the piston and then remove the tensioner (A).
|
| 7. |
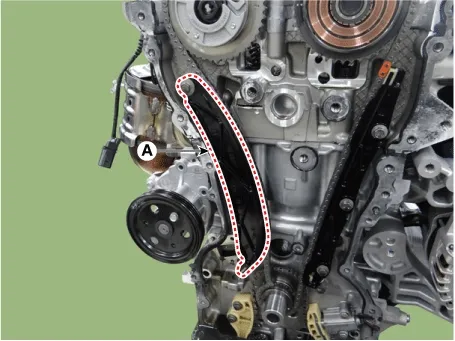
Remove the timing chain tensioner arm (A).
|
| 8. |
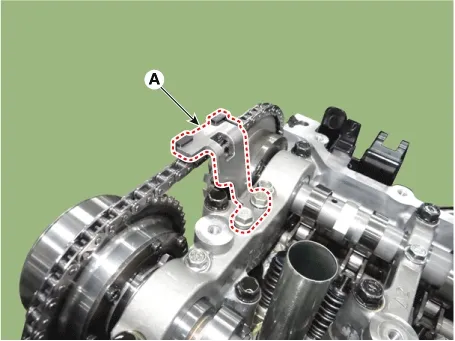
Remove the timing chain cam to cam guide (A).
|
| 9. |
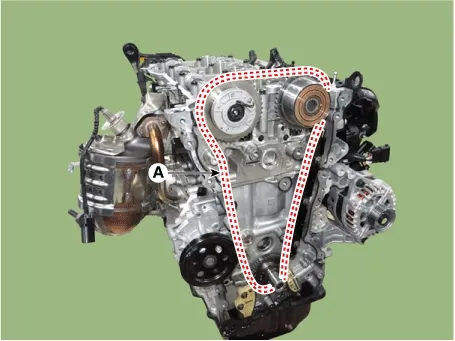
Remove the timing chain (A).
|
| 10. |
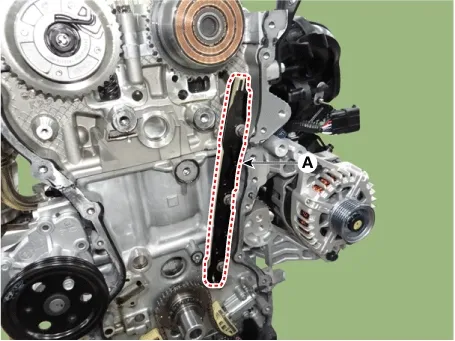
Remove the timing chain guide (A).
|
| 11. |
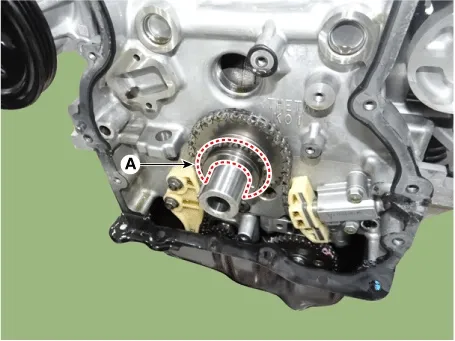
Remove the crankshaft chain sprocket (A) for the timing chain.
|
| Inspection |
| 1. |
Check the CVVT sprocket, crankshaft sprocket teeth for abnormal wear, cracks or damage.Replace if
necessary.
|
| 2. |
Check a contact surface of the chain tensioner arm and guide for abnormal wear, cracks ordamage. Replace if
necessary.
|
| 3. |
Check that the chain tensioner piston slides smoothly and inspect whether the ratchetoperates normally.
Replace if necessary.
|
| Installation |
| 1. |
Install the crankshaft chain sprocket (A) for the timing chain.
|
| 2. |
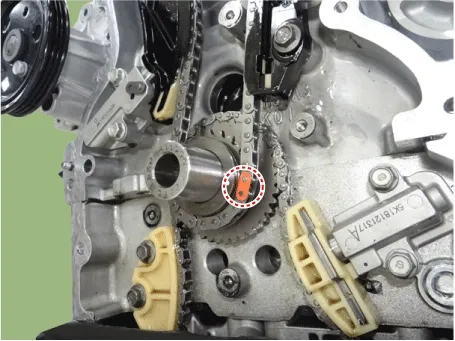
Make sure that the key of crankshaft is aligned with the mouting surface of the lower crankcase. Ensure
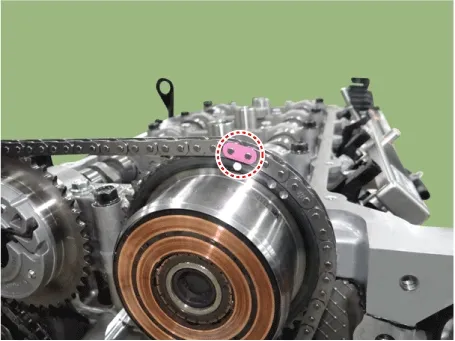
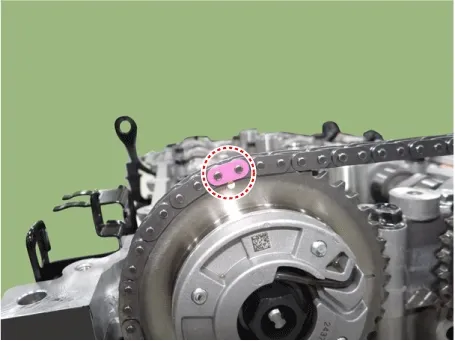
that the TDC mark on the front of the intake/exhaust CVVT sprockets match with the top of the cylinder head.
|
| 3. |
Install the timing chain guide (A).
|
| 4. |
Install the timing chain (A).
Crankshaft sprocket → Timing chain guide → Intake CVVT sprocket → Exhaust CVVT sprocket.
|
| 5. |
Install the timing chain cam to cam guide (A).
|
| 6. |
Install the timing chain tensioner arm (A)
|
| 7. |
Install the timing chain auto tensioner (A) and pull out pins.
|
| 8. |
Rotate the crankshaft 2 revolutions in clockwise direction. Ensure that the TDC mark on the front of the
intake/exhaust CVVT sprockets match with the top of the cylinder head.
|
| 9. |
Install the timing chain cover.
(Refer to Timing System - "Timing Chain Cover")
|
 Timing Chain Cover Repair procedures
 Engine Electrical System
See also:
Inspection
1.
Check the signal waveform of the CMPS and CKPS using the GDS.
Specification:
Refer to ...
Front Wheel Transfer Assembly Components Location
1. Under cover
2. Transaxle Assembly
3. Transfer assembly
4. Propeller shaft
5. Coupling assembly
1. Under cover
2. Transaxle Assembly
3 ...
Limitations of Smart Cruise Control
Advanced driver assistance features are designed to enhance your journey, but the Smart Cruise Control system in your
Kia Sorento may occasionally operate abnormally or unexpectedly under certain ...
Manuals list
- Kia Sorento MQ4 2021-2026 Owners Manual
- Kia Sorento XM 2011-2015 Owners Manual
- Kia Sorento XM 2011-2015 Service Manual
