 Kia Sorento: Rear Bumper Replacement
Second Generation XM (2011-2026) / Kia Sorento XM 2011-2026 Service Manual / Body (Interior and Exterior) / Bumper / Rear Bumper Replacement
|

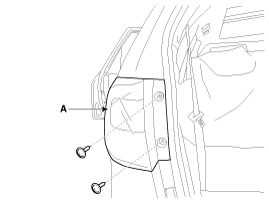
| 1. |
After loosening the mounting screws, then remove the rear combination
lamp (A).
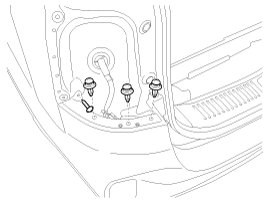
|
| 2. |
Disconnect the rear combination lamp connector (A).
|

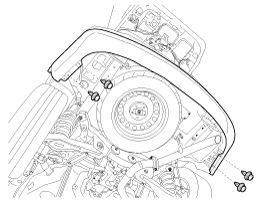
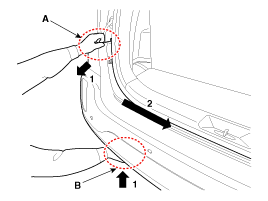
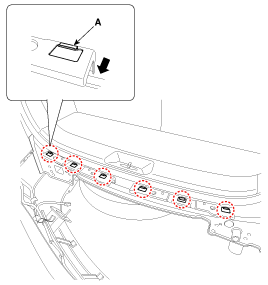
| 3. |
Loosen the rear bumper upper mounting clips and screw.
|
| 4. |
Loosen the rear bumper lower mounting clips.
|
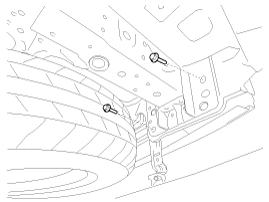
| 5. |
Loosen the mounting bolts.
|
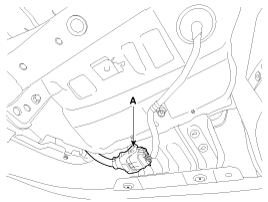
| 6. |
Disconnect the rear bumper main connector (A).
|
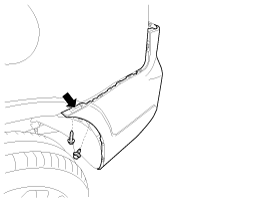
| 7. |
After loosening the mounting screws and clip, then remove the
rear mud guard (A).
|
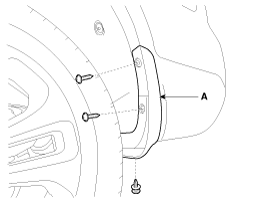
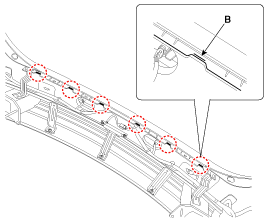
| 8. |
After loosening the rear bumper side's mounting screw and clip,
then disconnect the side's.
|
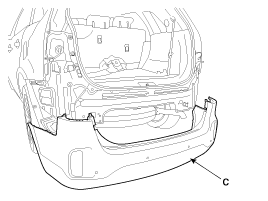
| 9. |
Remove the rear bumper assembly (C).
[LH]
[RH]
|

| 10. |
Install in the reverse order of removal.
|
 Rear Bumper Components
1. Rear bumper cover
2. Rear bumper lower bracket [RH]
3. Rear bumper lower bracket [LH]
4. Rear bumper side bracket [RH]
5. Rear bumper side bracket [LH]
...

See also:
Changing a tire with TPMS
If you have a flat tire, the Low Tire Pressure telltale will come on. Have the
flat tire repaired by an authorized Kia dealer as soon as possible or replace the
flat tire with the spare tire.
CAUTI ...
TJ Joint Inspection
1.
Check the spider assembly for roller rotation, wear or corrosion.
2.
Check the groove inside the joint case for wear or corrosion
...
Installation
1.
Install the mirror making sure the mounting bracket not to be
damaged.
2.
Install the mirror wiring cover after reconnecting the connect ...
Categories
- Home
- First Generation
- Second Generation
- Kia Sorento XM 2011-2026 Owners Manual
- Kia Sorento XM 2011-2026 Service Manual

Copyright ® www.ksmanual.com 2014-2026