
 Kia Sorento: Rear A/C Unit Removal and Installation
Kia Sorento (MQ4, 2021-2026) Service Manual / Heating,Ventilation And Air Conditioning / Rear A/C / Rear A/C Unit Removal and Installation
| Removal |
| 1. |
Recover refrigerant by using the refrigerant recovery/recycling/charging machine.
(Refer to Air conditioning System - "Refrigerant
Recovery/Recycling/Charging/Vacuum/Leak Test")
|
| 2. |
Remove the luggage side trim.
(Refer to Body - "Luggage Side Trim")
|
| 3. |
Remove the rear wheel guard.
(Refer to Body - "Rear Wheel Guard")
|
| 4. |
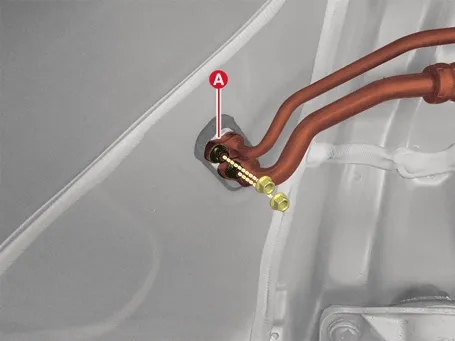
Separate the rear suction & liquid hose assembly (A) after removing the nuts.
|
| 5. |
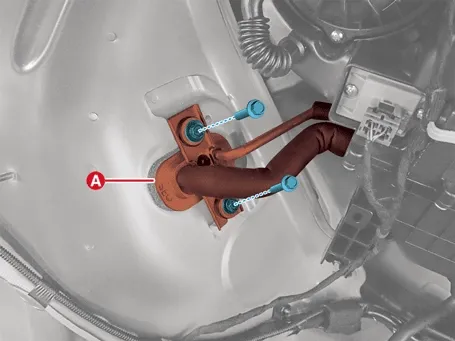
Separate the rear evaporator core pipe (A) after removing the bolts.
|
| 6. |
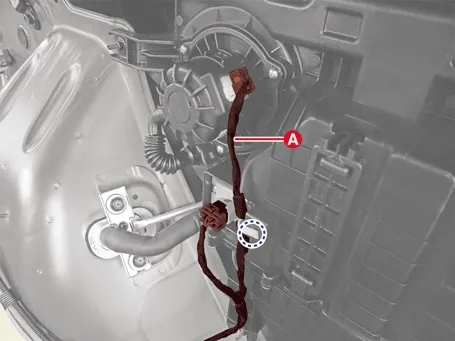
Disconnect the rear blower motor and PWM-FET connector (A).
|


| 7. |
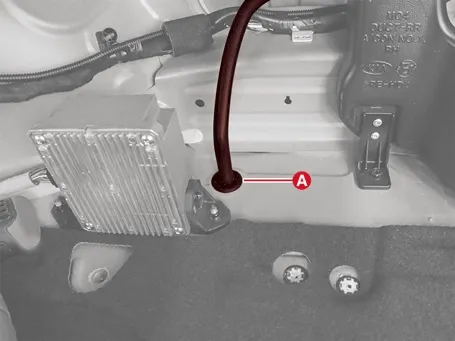
Separate the rear drain hose (A).
|
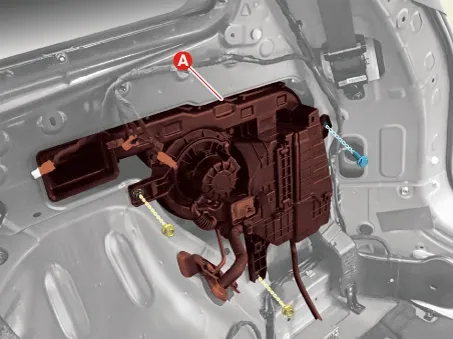
| 8. |
Remove the rear heater and A/C unit (A) after removing the nuts.
|
| Installation |
| 1. |
Install in the reverse order of removal.
|

Removal
1.
Remove the rear air filter.
(Refer to Rear A/C - "Rear Climate Control Air Filter" )
...
 Rear Evaporator Core Removal and Installation
...
 Blower
See also:
Rear Wheel Speed Sensor Repair procedures
Removal
[2WD]
1.
Disconnect the (-) battery terminal.
2.
Remove the rear whee ...
Starter Installation
1.
Install in the reverse order of removal.
Starter installation bolt:
49.0 ~ 63.7 N.m (5.0 ~ 6.5 kgf.m, 36.2 ~ 47.0 lb-ft)
...
Oil hydraulic Motor(Actuator) Removal
1.
Remove the coupling assembly.
(Refer to Coupling Assembly - "Direct Electro Hydraulic Actuator
Coupling")
2.
Keep goin ...
Manuals list
- Kia Sorento MQ4 2021-2026 Owners Manual
- Kia Sorento XM 2011-2015 Owners Manual
- Kia Sorento XM 2011-2015 Service Manual

Copyright © www.ksmanual.com 2014-2026 - 0.0611