
 Kia Sorento: Parking Brake Pedal Assembly Repair procedures
| Removal |
| 1. |
Disconnect the (-) battery terminal.
|
| 2. |
Release the parking brake.
|
| 3. |
Remove the crash pad lower panel.
(Refer to Body - "Crash Pad Lower Panel")
|
| 4. |
Remove the Body Domain Control Unit.
(Refer to Body Electrical System - "Body Domain Control
Unit")
|
| 5. |
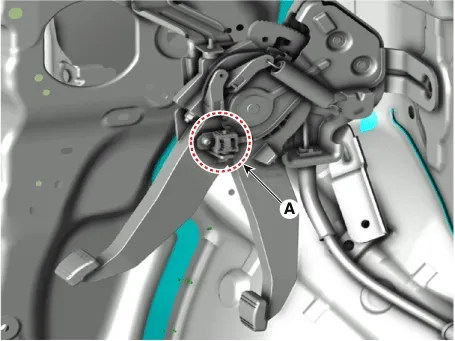
Disconnect the parking brake switch connector (A).
|
| 6. |
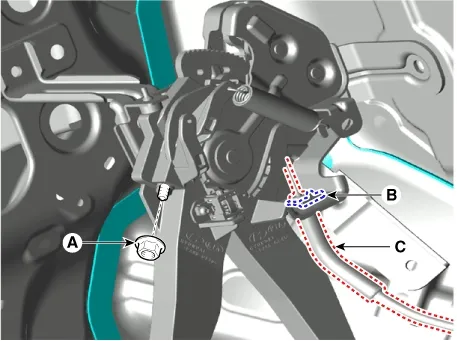
Separate the parking brake cable (C) by removing the nut (A) and retaining clip (B).
|
| 7. |
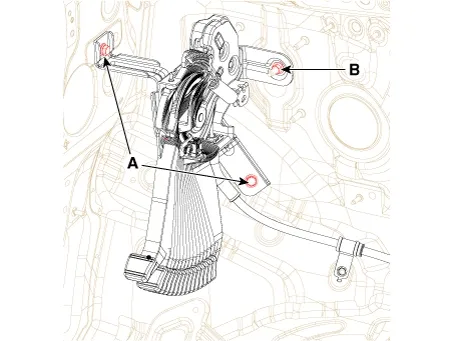
Remove the bolts (A) and nut (B) and remove the parking brake pedal assembly.
|
| Installation |
| 1. |
Install in the reverse order of removal.
|
| 2. |
After the installation, check the operation status of the parking brake and brake switch.
|
| Adjustment |
After disassembling/assembling the caliper body or replacing the caliper, parking brake cable or brake
disc, re-adjust the parking brake.
|

| 1. |
Remove the floor console assembly.
(Refer to Body - "Floor Console Assembly")
|
| 2. |
To fit the cable, follow one of these procedures.
|
| 3. |
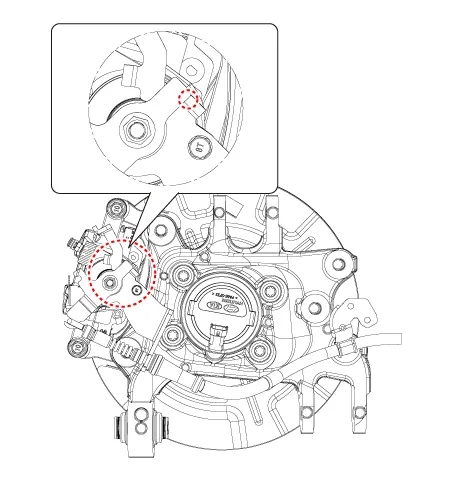
After fitting the cable, adjust the adjustment nut so that the stroke is 5 - 6 notch when operating the
pedal at 30kgf.
|
| 4. |
Make sure that there is no gap between adjustment nut and clip after adjusting the parking brake.
|
| 5. |
Make sure that the brakes do not drag.
|
| 6. |
Check whether the wheel operates smoothly.
|
| 7. |
Perform driving test.
|
| 8. |
Install the floor console assembly.
(Refer to Body - "Floor Console Assembly")
|
 Components and Components Location
 Parking Brake Cable Repair procedures
See also:
Evaporator Core Removal and Installation. Temperature Control Actuator Description and Operation
Evaporator Core Removal and Installation
Removal
1.
Remove the blower unit from the heater unit.
(Refer to Heater - "He ...
USB charger : (if equipped). Power outlet
USB charger : (if equipped)
The integrated USB charger in your Kia Sorento provides a reliable power source to efficiently recharge the batteries
of small electronic devices using a standard USB ...
Inspection
Lighting Switch Inspection
1.
With the multi function switch in each position, make sure that
continuity exists between the terminals below.
If continuity is no ...
Manuals list
- Kia Sorento MQ4 2021-2026 Owners Manual
- Kia Sorento XM 2011-2015 Owners Manual
- Kia Sorento XM 2011-2015 Service Manual
