
 Kia Sorento: Heated Oxygen Sensor (HO2S) Removal and Installation
| Special Service Tool |
| Tool Name / Number |
Illustration |
Description |
|
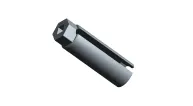
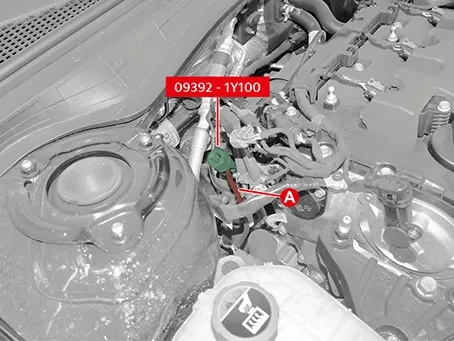
Heated oxygen sensor socket wrench 09392 - 1Y100 |
|
Used for removing / installing the heated oxygen sensor ※SST 09392 - 2H100 also can be used |
| Removal |
| Front Heated Oxygen Sensor (HO2S) |
| 1. |
Disconnect the battery negative ( - ) terminal.
|
| 2. |
Remove the engine cover.
(Refer to Engine Mechanical System - "Engine Cover")
|
| 3. |
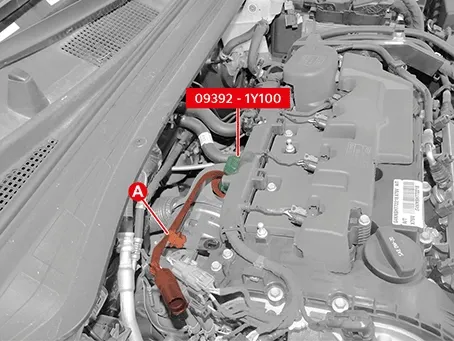
Disconnect the Heated Oxygen Sensor (HO2S) connector (A).
|
| 4. |
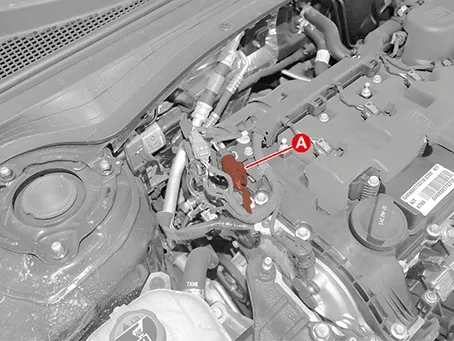
Separate the HO2S connector (A) by pulling it in the direction of arrow from the bracket.
|
| 5. |
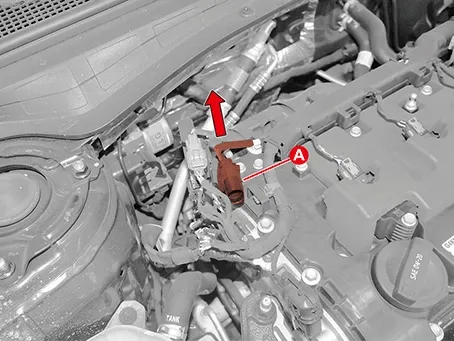
Separate the HO2S wiring (A) after removing the fastener.
|
| 6. |
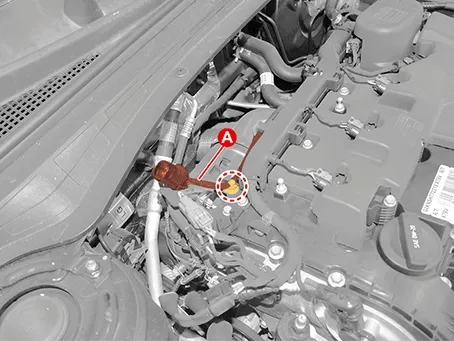
Remove the front HO2S (A) by using the SST (09392 - 1Y100 or 09392 - 2H100).
|
| Rear Heated Oxygen Sensor (HO2S) |
| 1. |
Disconnect the battery negative ( - ) terminal.
|
| 2. |
Remove the engine cover.
(Refer to Engine Mechanical System - "Engine Cover")
|
| 3. |
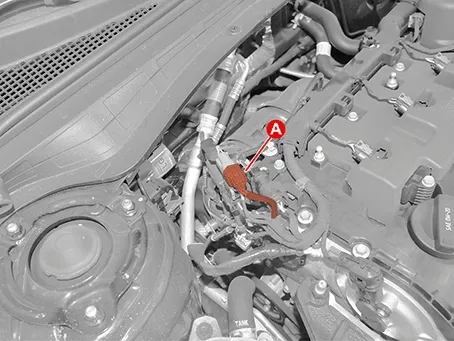
Disconnect the Heated Oxygen Sensor (HO2S) connector (A).
|
| 4. |
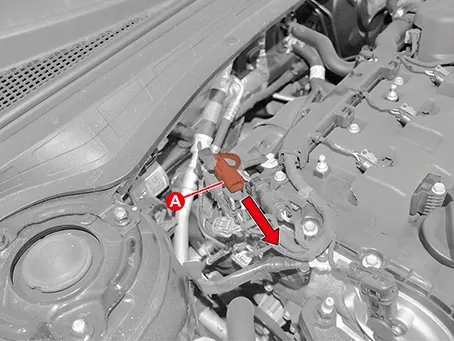
Separate the HO2S connector (A) by pulling it from the bracket in the direction of the arrow.
|
| 5. |
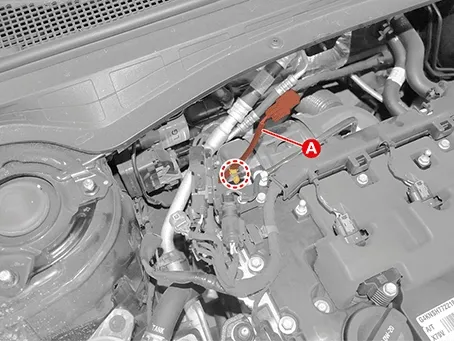
Separate the HO2S wiring (A) after removing the fastener.
|
| 6. |
Remove the rear HO2S (A) by using the SST (09392 - 1Y100 or 09392 - 2H100).
|
| Installation |
| 1. |
Install in the reverse order of removal.
|

 Heated Oxygen Sensor (HO2S) On Vehicle Inspection
 Knock Sensor (KS) Specifications. Knock Sensor (KS) Components and Components Location. Knock Sensor (KS) Description and Operation
See also:
Rear Door Weatherstrip Repair Procedures
Removal
Rear Door Side Weatherstrip
1.
Separate the rear door checker (A) after removing the bolt.
...
Inside rearview mirror
Adjust the interior rearview mirror so that you enjoy an unobstructed, centered field of view directly through the
rear window. Always complete this adjustment before setting your vehicle in moti ...
Front Disc Brake Inspection
Front brake disc thickness check
1.
Check the brake pads for wear and fade.
2.
Check the brake disc for damage and cracks.
...
Manuals list
- Kia Sorento MQ4 2021-2026 Owners Manual
- Kia Sorento XM 2011-2015 Owners Manual
- Kia Sorento XM 2011-2015 Service Manual
