 Kia Sorento: Front Lower Arm Repair procedures
| 1. |
Disconnect the (-) battery terminal.
|
| 2. |
Remove the front wheel and tire.
(Refer to Tires/Wheels - "Wheel")
|
| 3. |
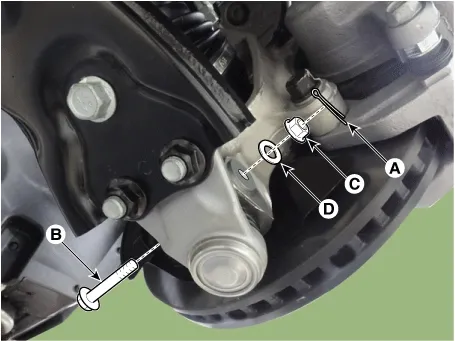
Remove the lower arm mounting nut (A).
| (1)
|
Remove the split pin (A).
|
| (2)
|
Remove the lower arm mounting bolt (B), nut (C) and washer (D).
Tightening torque :
98.1 - 117.7 N·m (10.0 - 12.0 kgf·m, 72.3 - 86.8 lb·ft)
|
|
To remove the nut (C), fix the bolt (B) on the opposite side to prevent it from turning.
|
|
|
| 4. |
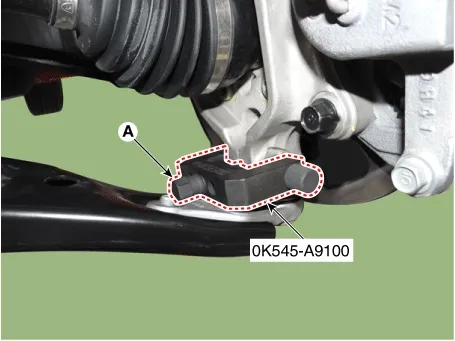
Disconnect lower arm ball joint from the knuckle by using the SST (0K545-A9100).
| (1)
|
After removing bolts from the front knuckle, install and tighten the sub body bolt (A)
|
| (2)
|
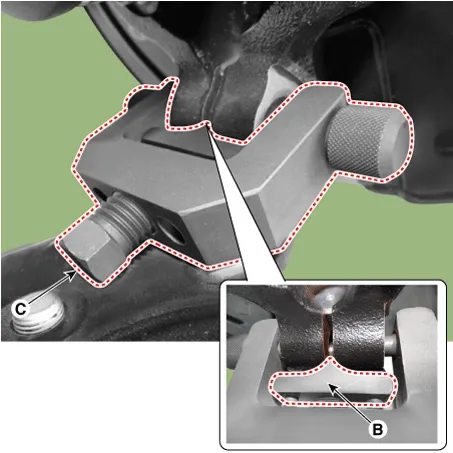
Input the sub body (B) between the front knuckle and the sub body bolt.
|
| (3)
|
Tighten the bolt (C) of the sub body to broaden the gap of the front knuckle.
|
| (4)
|
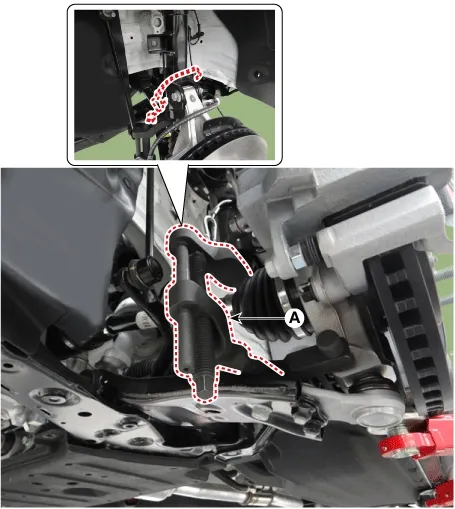
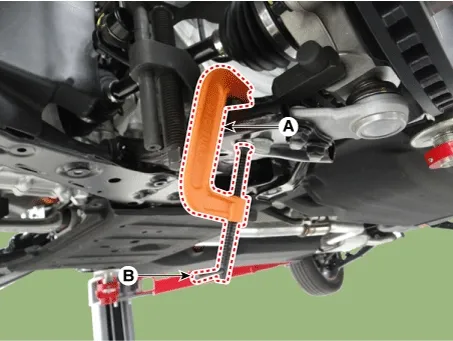
Install the safety wire and main body (A) between the front strut and the lower arm.
|
| (5)
|
After installing a body (A), rotate the handle (B) clockwise until the clamp is fixed on the lower
arm.
|
| (6)
|
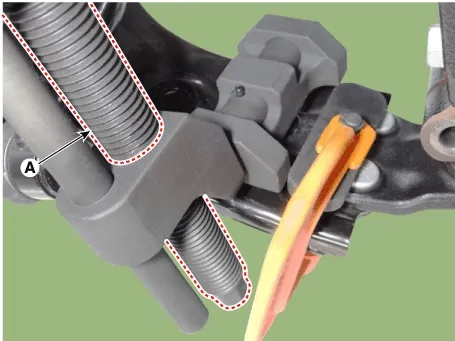
Tighten the main body bolt (A) slowly and remove the lower arm from the front knuckle.
|
|
| 5. |
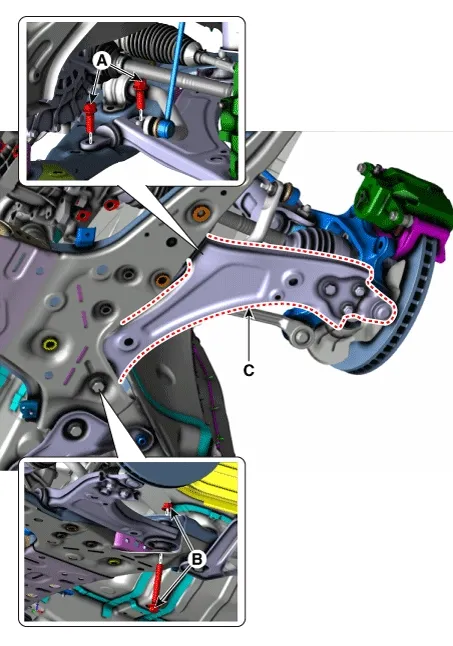
Remove the bolts (A), (B) and remove the lower arm (C) from the sub frame.
Tightening torque :
156.9 - 176.5 N·m (16.0 - 18.0 kgf·m, 115.7 - 130.2 lb·ft)
|
|
| 1. |
Check the bushing for wear and deterioration.
|
| 2. |
Check the lower arm for bending or breakage.
|
| 3. |
Check the lower arm for deformation.
|
| 4. |
Check the all bolts and nuts.
|
| 1. |
Install in the reverse order of removal.
|
| 2. |
Check the alignment.
(Refer to Suspension System - "Alignment")
|
Removal
1.
Disconnect the (-) battery terminal.
2.
Remove the front strut upper mounting nuts (A...
Special Service Tool
Tool Name / Number
Illustration
Description
Lower arm 'G' bushing...


 Front Strut Assembly Repair procedures
 Front Lower Arm Replacement - Lower Arm 'G' Bushing
