
 Kia Sorento: Front Brake Disc Repair procedures
| Removal |
| 1. |
Disconnect the (-) battery terminal.
|
| 2. |
Remove the front wheel and tire.
(Refer to Suspension System - "Wheel")
|
| 3. |
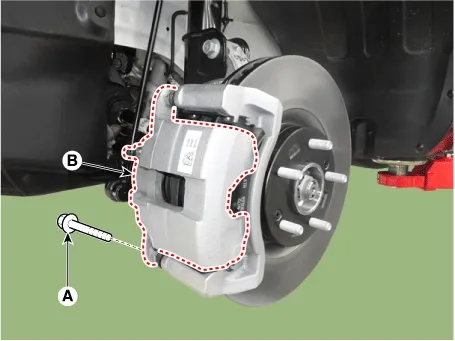
Remove the guide rod bolt (A) and then pivot the caliper body (B) up out of the way.
|
| 4. |
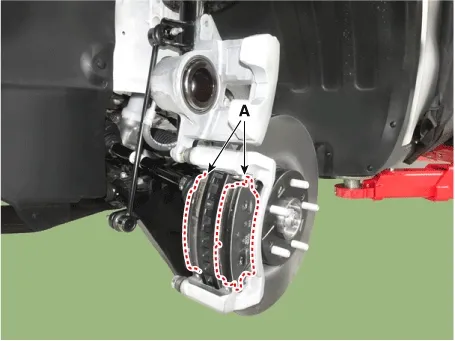
Remove the brake pad (A).
|
| 5. |
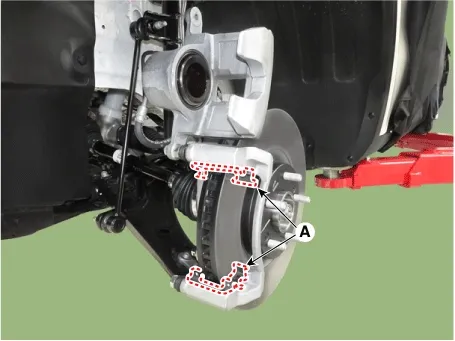
Remove the pad retainer (A).
|
| 6. |
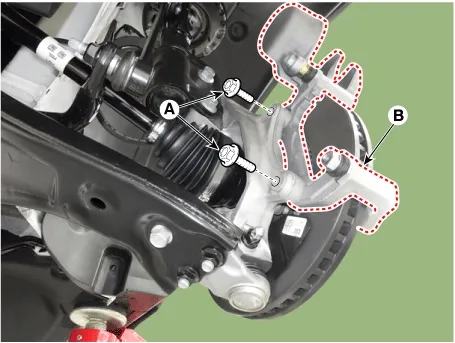
Remove the caliper carrier (B) by removing the flange bolts (A).
|

| 7. |
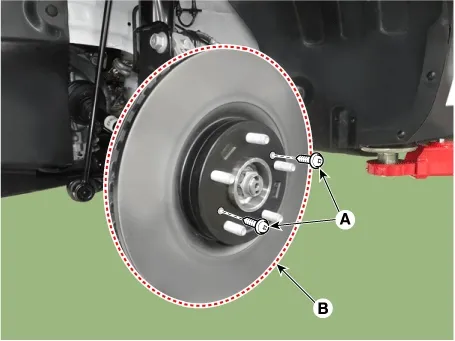
Remove the front brake disc (B) by removing the screws (A).
|
| Inspection |
| 1. |
Check the brake disc for rust.
|
| 2. |
Spray the cleaing solution on rusted surface of disc.
|
| 3. |
Drive the vehicle up to 30 MPH and depress the brake up to stop for complete repeat more than 5 cycles.
|
| 4. |
Clean the disc with water.
|
| 5. |
Visually verify that rust is completely removed.
|
| 6. |
If rust has not been removed, repeat the procedure above.
|
| 1. |
Check the brake pads for wear and fade.
|
| 2. |
Check the brake disc for damage and cracks.
|
| 3. |
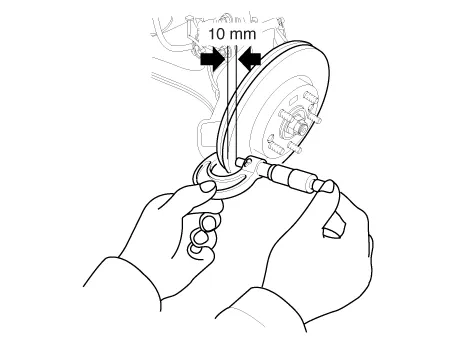
Remove all rust and contamination from the surface, and measure the disc thickness at 24 points, at least,
at the same distance (10 mm, 0.4 in.) apart from the brake disc outer circle.
|
| 4. |
if the measured DTV larger than the limit and thickness thicker than the service limit of the disc, skim
the brake disc.
|
| 5. |
If the brake disc is thinner than the service limit, replace the brake disc.
|
| 1. |
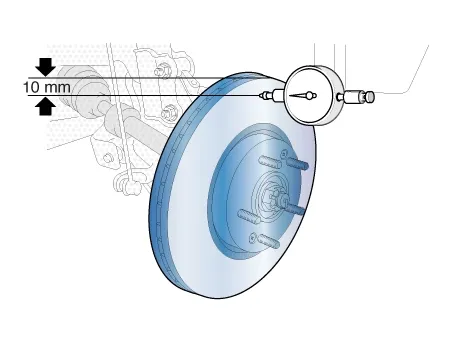
Place a dial gauge about 10 mm (0.4 in.) from the outer circumference of the brake disc, and measure the
runout of the disc.
|
| 2. |
if the measured disc runout larger than the limit and thickness thicker than the service limit of the disc,
skim the brake disc and measure the runout again.
|
| 3. |
If the runout of the brake disc still exceeds the limit specification, replace the disc, and then measure
the runout again.
|
| Installation |
| 1. |
Install in the reverse order of removal.
|
| 2. |
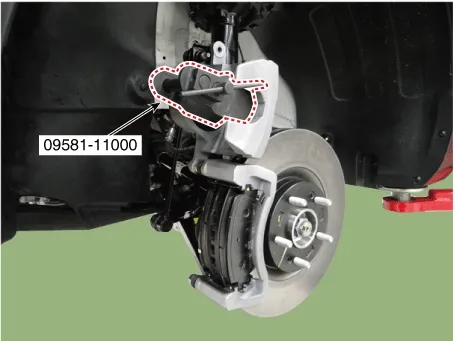
Use a SST (09581-11000) when installing the brake caliper assembly.
|
| 3. |
Check the brake oil leakage and pedal operating condition.
|
 Front Brake Disc Components and Components Location
 Rear Brake Caliper Components and Components Location
See also:
Oil Pressure & Oil Temperature Sensor (OPTS) Removal and Installation
Removal
1.
Disconnect the battery negative ( - ) terminal.
2.
Remove the intak ...
Exterior Overview. Interior overview
Exterior Overview
Figure 1. Front view diagram showing external components of the Kia Sorento.
The actual shape, trim details, and feature locations of your Kia Sorento may vary slightly from the ...
Erasing programmed HomeLink buttons
To erase the three programmed buttons (individual buttons cannot be erased):
Press and hold the left and center buttons simultaneously, until the indicator
light begins to flash (approximately 20 ...
Manuals list
- Kia Sorento MQ4 2021-2026 Owners Manual
- Kia Sorento XM 2011-2015 Owners Manual
- Kia Sorento XM 2011-2015 Service Manual
