 Kia Sorento: Transaxle Oil Temperature Sensor Removal
Second Generation XM (2011-2025) / Kia Sorento XM 2011-2025 Service Manual / Automatic Transaxle System / Automatic Transaxle Control System / Transaxle Oil Temperature Sensor Removal
| 1. |
Remove the battery and the battery tray.
(Refer to Engine Electrical System - "Battery")
|
| 2. |
Remove the under cover.
(Refer to Engine Mechanical System - "Engine Room Under Cover")
|
| 3. |
Drain the coolant.
(Refer to Engine Mechanical System - "Coolant")
|
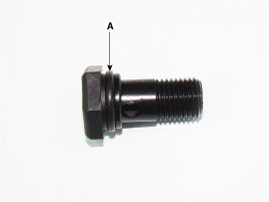
| 4. |
Remove the drain plug (A) and reinstall the drain plug after draining
ATF totally.
|


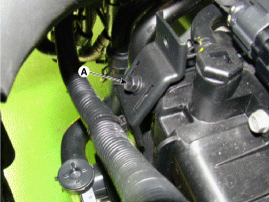
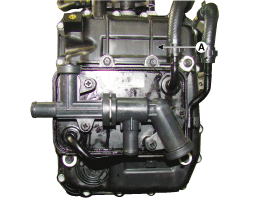
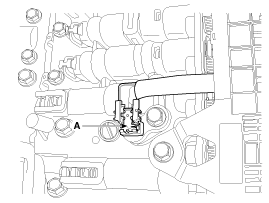
| 5. |
Remove the wiring bracket installation bolt (A).
|
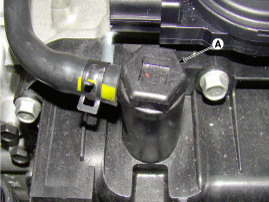
| 6. |
Remove the ATF Injection hole(eyebolt) (A).
|
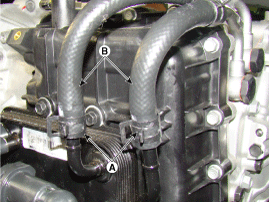
| 7. |
Disconnect the coolant hose (B) after removing the coolant hose
clamp (A).
|
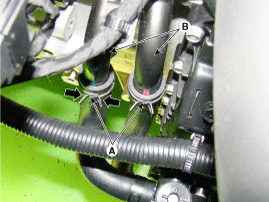
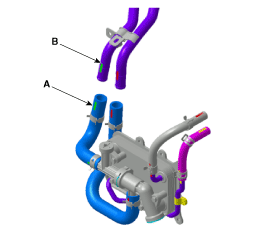
| 8. |
Disconnect the hose (B) after removing the automatic transaxle
fluid cooler hose clamp (A).
|
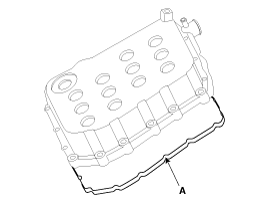
| 9. |
Remove the valve body cover (A).
|
| 10. |
Disconnect the oil temperature sensor connector (A).
|
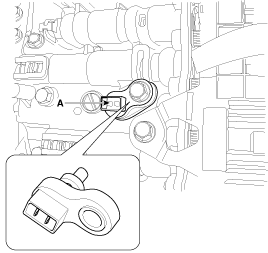
| 11. |
Remove the oil temperature sensor (A) after removing a bolt.
|
 Transaxle Oil Temperature Sensor Inspection
1.
Turn ignition switch OFF.
2.
Remove the air duct.
(Refer to Engine Mechanical System - "Air cleaner")
...
 Transaxle Oil Temperature Sensor Installation
1.
Install in the reverse order of removal.
ŌĆó
...
See also:
Output Speed Sensor Signal Waveform
...
Cooling Fan Disassembly
1.
Remove the cooling fan (A) after loosening the screws (B) from the cooling
assembly.
Tightening torque:
2.7 ~ 3.2 N.m (0.28 ~ 0.3 ...
Blower Motor Inspection
1.
Connect the battery voltage and check the blower motor rotation.
2.
If the blower motor does not operate well, substitute with a know ...
Categories
- Home
- First Generation
- Second Generation
- Kia Sorento XM 2011-2025 Owners Manual
- Kia Sorento XM 2011-2025 Service Manual

Copyright ® www.ksmanual.com 2014-2025