 Kia Sorento: Head Lamps Replacement
Second Generation XM (2011-2025) / Kia Sorento XM 2011-2025 Service Manual / Body Electrical System / Lighting System / Head Lamps Replacement
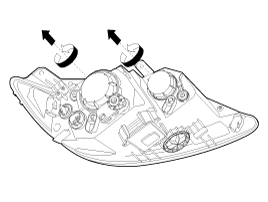
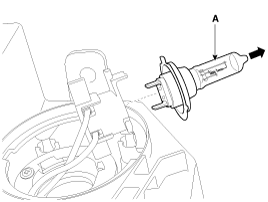
Bulb (HID)
| 1. |
Turn the head lamp switch off.
|
| 2. |
Disconnect the power connector from the lamp.
|
| 3. |
Remove the lamp assembly.
|
| 4. |
Remove the dust cover.
|
| 5. |
Remove the ignitor clip (A) from the lamp assembly.
|
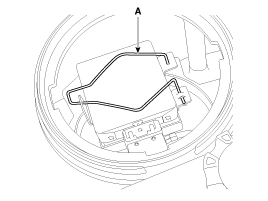
| 6. |
Disconnect the ignitor connector.
|
| 7. |
Remove the ignitor and bulb (A).
|
| 8. |
Installation is the reverse of removal.
|

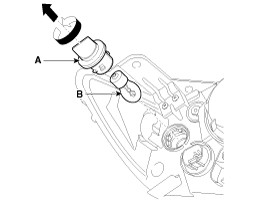
Bulb (high/low)
| 1. |
Turn the head lamp switch off.
|
| 2. |
Disconnect the power connector from the lamp.
|
| 3. |
Remove the lamp assembly
|
| 4. |
Remove the dust cover.
|
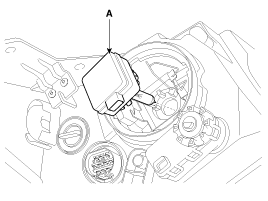
| 5. |
Turn the bulb socket (A) counterclockwise and then remove it.
|
| 6. |
Remove the bulb (A) from socket.
|
| 7. |
Installation is the reverse of removal.
|
Turn signal lamp
| 1. |
Turn the head lamp switch off.
|
| 2. |
Remove the lamp assembly
|
| 3. |
Turn the bulb socket (A) counterclockwise and then remove the
turn signal lamp bulb (B).
|
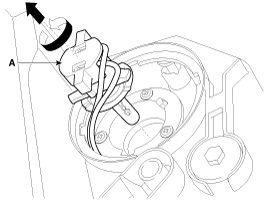
Ballast
| 1. |
Turn the head lamp switch off.
|
| 2. |
Disconnect the power connector from the lamp.
|
| 3. |
Remove the head lamp assembly.
|
| 4. |
Remove the ballast (A) after loosening the screws (4EA).
|
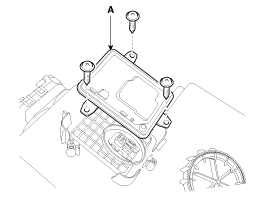
| 5. |
Installation is the reverse of removal.
|

 Head Lamps Installation
1.
Install the head lamp bulbs.
2.
Reassemble the head lamp bulb covers.
3.
Reassemble the head lamp assembly a ...
 Head Lamps Adjustment
Head Lamp Aiming Instructions
The head lamps should be aimed with the proper beam-setting equipment,
and in accordance with the equipment manufacturer's instructions.
...
See also:
Temperature Control Actuator Inspection
1.
Turn the ignition switch OFF.
2.
Disconnect the temperature control actuator connector.
3.
Verify that the t ...
Power Door Lock Switch Diagnosis With GDS
1.
It will be able to diagnose defects of door lock with GDS quickly.
GDS can operates actuator forcefully, input/output value monitoring
and self diagnosis.
...
4WD ECU Components Location
1. 4WD ECU
...
Categories
- Home
- First Generation
- Second Generation
- Kia Sorento XM 2011-2025 Owners Manual
- Kia Sorento XM 2011-2025 Service Manual

Copyright ® www.ksmanual.com 2014-2025