 Kia Sorento: Audio Unit Removal
Second Generation XM (2011-2025) / Kia Sorento XM 2011-2025 Service Manual / Body Electrical System / Audio / Audio Unit Removal
Put on gloves to protect your hands.
|

|

| 1. |
Disconnect the negative (-) battery terminal.
|
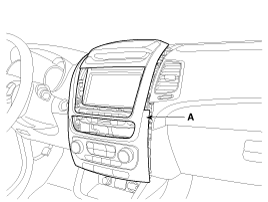
| 2. |
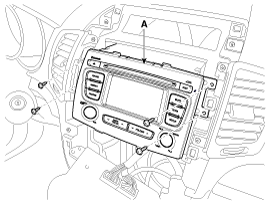
Remove the center fascia panel (A).
(Refer to Body - "Crash pad")
|
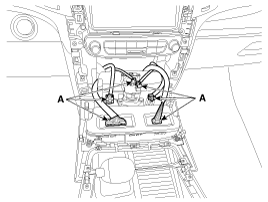
| 3. |
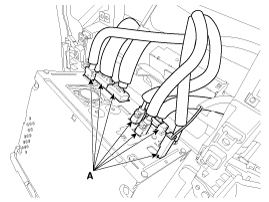
Disconnect the connectors and cables (A) from center fascia panel.
|
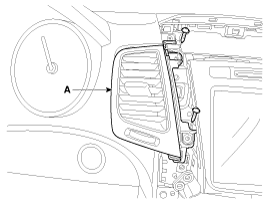
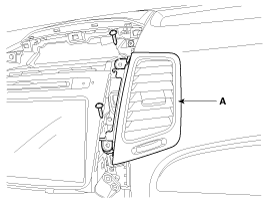
| 4. |
Remove the crash pad center air vent (A).
|
| 5. |
Remove the audio head unit (A) from crash pad after loosening
the screws (4EA).
|
| 6. |
Disconnect the connectors and cables (A) from head unit.
|

 Audio Unit Components
Connector Pin Information
No
Connector A
Connector B
1
Rear left speaker (+)
CAN high
2
Front left speaker (+)
-
...
 Audio Unit Installation
1.
Connect the audio unit connectors and cable.
2.
Install the audio unit.
3.
Install the center facia panel.
...
See also:
Reservoir Tank Removal and Installation
1.
Remove the over flow hose(A).
2.
Remove the reservoir tank(B) after loosening the bolts.
Tightening torque:
...
Underdrive Brake Control Solenoid Valve(UD/B_VFS)
Underdrive brake control solenoid valve(UD/B) is attached to the valve
body. This variable force solenoid valve directly controls the hydraulic pressure
inside the underdrive brake.
...
Description of ESC
Electronic Stability Control (ESC) recognizes critical driving conditions,
such as panic reactions in dangerous situations, and stabilizes the vehicle
by wheel-individual braking and engine c ...
Categories
- Home
- First Generation
- Second Generation
- Kia Sorento XM 2011-2025 Owners Manual
- Kia Sorento XM 2011-2025 Service Manual

Copyright ® www.ksmanual.com 2014-2025