 Kia Sorento: Rear Differential Carrier Reassembly
Second Generation XM (2011-2026) / Kia Sorento XM 2011-2026 Service Manual / Driveshaft and axle / Differential Carrier Assembly / Rear Differential Carrier Reassembly
Pinion drive gear height adjustment
Adjust the height of the drive pinion in the following order.
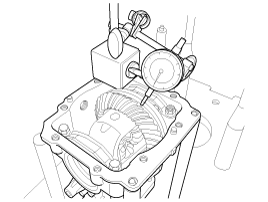
| 1. |
Below are the special tools to measure the pinion height
|
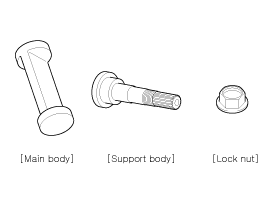
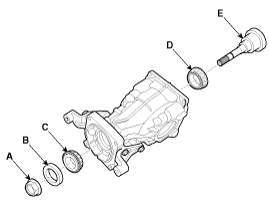
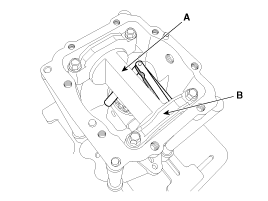
| 2. |
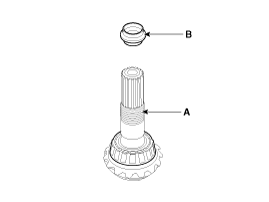
The special tool lock nut (A), pinion oil seal (B), pinion front
bearing (C), inner bearing (D) and special tool support body (E) are
mounted as follows.
|
| 3. |
Put the main body (A) on the Differential Case (B).
|
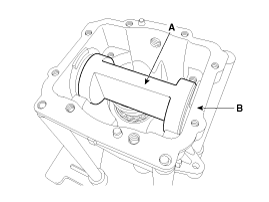
| 4. |
The bearing cap (B) is mounted on the main body (A).
|
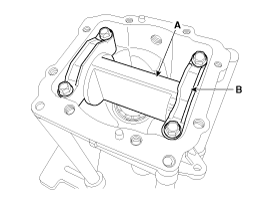
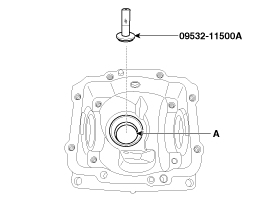
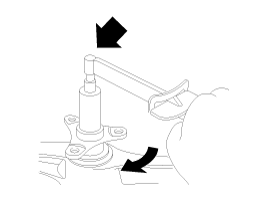
| 5. |
Using the feeler gage, measure the gap between the main body (A)
and bearing cap (B). And then select the inner bearing adjustment shim.
|
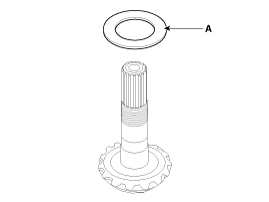
| 6. |
Install the selected inner bearing (A) adjustment shim.
Inner bearing adjustment shim
|
Rear differential carrier reassembly
| 1. |
Using the SST (09530-3T100), install the inner pinion bearing
outer race (A).
|
| 2. |
Using the SST (09530-3T100), install the outer pinion bearing
outer race.
|

| 3. |
Using the round pipe (A), press in the pinion rear bearing (B).
|
| 4. |
Install the pinion bearing spacer (B) on the pinion drive gear
(A).
|

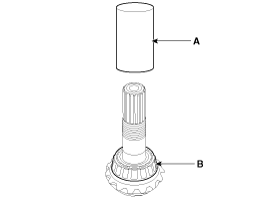
| 5. |
Using the round pipe (A), press the front bearing (B).
|

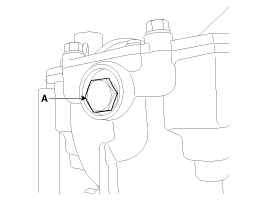
| 6. |
Using the SST (09530-3T600), install the pinion oil seal.
|
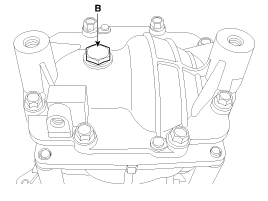
| 7. |
Using the SST(09530-3T300), install the pinion lock nut (A).
|

| 8. |
tighten the lock nut.
|

Gear carrier assembly reassembly
| 1. |
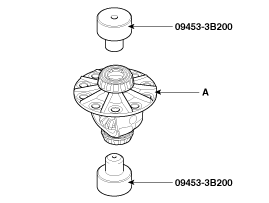
Using the SST (09453-3B200), install the front/rear bearing (A).
|
| 2. |
Install the gear carrier and ring gear.
|

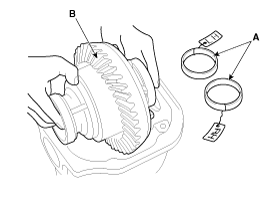
| 3. |
Install the left and right side bearing outer race (A) to the
gear carrier.
|

| 4. |
Fix the left and right side bearing outer race (A) with both hands
and install it on the differential case.
|
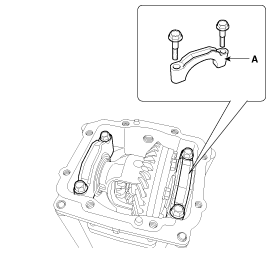
| 5. |
Insert the left and right adjustment spacer between the differential
side bearing and carrier. And than install the bearing cap (A) with
mark.
|
| 6. |
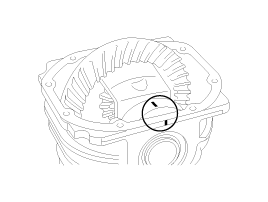
Adjust the differential shim and confirm the standard of the backlash.
|
| 7. |
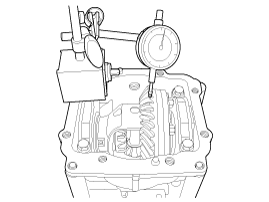
Adjust gear assembly run out backlash.
|
| 8. |
Measures the preload.
|
| 9. |
Coat sealant (A) on the rear cover surface.
|
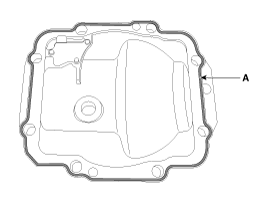
| 10. |
Install the differential rear cover (A).
|
| 11. |
Install the drain plug (A) and filler plug (B).
|
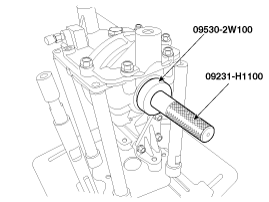
| 12. |
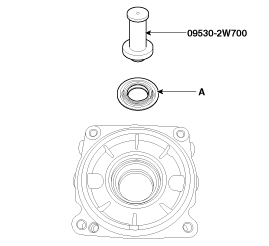
Using the SST (09530-2W100, 09231-H1100), install the left and
right side oil seal.
|
| 13. |
Reassemble the rear differential assembly to the vehicle and inject
oil.
|
 Rear Differential Carrier Disassembly
Rear differential carrier disassembly
1.
Drain oil by removing the drain plug (A) and filler plug (B) before
disassembling the rear differential carrier.
...

See also:
Shift Lever Removal
1.
Remove the floor console.
(Refer to Body - "Floor console")
2.
Remove the air duct.
3.
Dis ...
Evaporator Core Replacement
1.
Disconnect the negative (-) battery terminal.
2.
Remove the heater and blower assembly.
(Refer to Heater -"Heater Unit")
...
BJ Boot Components
1. BJ assembly
2. BJ circlip
3. BJ boot band
4. BJ boot
5. Dynamic damper band
6. Dynamic damper
7. Shaft
8. TJ boot band
9. TJ boot
10. Spider assembly
...
Categories
- Home
- First Generation
- Second Generation
- Kia Sorento XM 2011-2026 Owners Manual
- Kia Sorento XM 2011-2026 Service Manual

Copyright ® www.ksmanual.com 2014-2026