 Kia Sorento: Rear Hub - Carrier Removal
Second Generation XM (2011-2026) / Kia Sorento XM 2011-2026 Service Manual / Driveshaft and axle / Rear Axle Assembly / Rear Hub - Carrier Removal
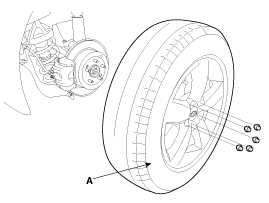
| 1. |
Remove the front wheel and tire (A) from front hub.
|

| 2. |
Remove the rear brake caliper.
(Refer to Brake System - "Rear Disc Brake")
|
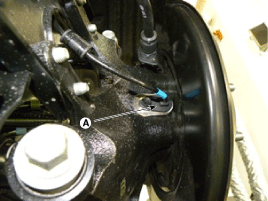
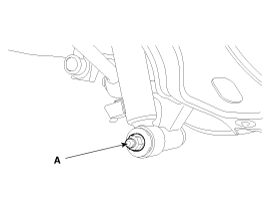
| 3. |
Remove the wheel speed sensor (A), from the knuckle.
|
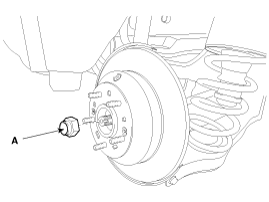
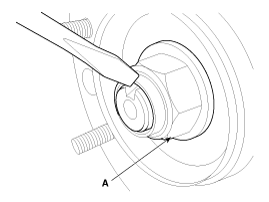
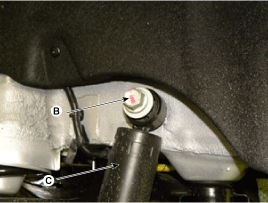
| 4. |
Remove the coking nut (A).
|
| 5. |
Remove the parking brake cable.
(Refer to Brake System - "Parking Brake Cable")
|
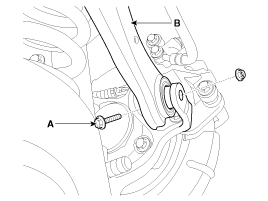
| 6. |
Remove the rear upper arm (A) after loosen the bolt (B).
[2WD]
[4WD]
|
| 7. |
Remove the rear strut assembly (C) after loosen the bolt (B) and
nut (A).
|
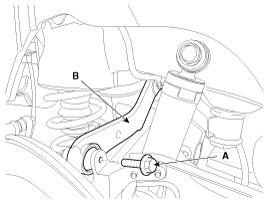
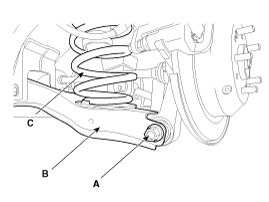
| 8. |
Remove the rear lower arm (B), spring (C) as loosening bolt (A)
after supporting rear lower arm (B) with jack.
|
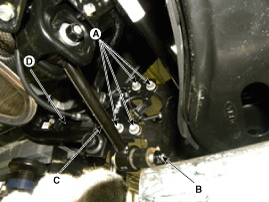
| 9. |
Remove the rear assist arm (C), trailing arm (D) as loosening
bolt (A), nut (B).
[2WD]
[4WD]
|

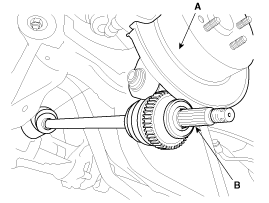
| 10. |
Separate the end (B) of rear driveshaft on rear axle assembly
(A).
|
| 11. |
Install in the reverse order of removal.
|

| 12. |
Check the wheel alignment.
(Refer to Suspension System - "Alignment")
|
 Rear Hub - Carrier Components
1. Rear carrier assembly
2. Parking brake assembly
3. Rear hub assembly
4. Rear brake disc
...
 Rear Hub - Carrier Disassembly
1.
Remove the hub assembly mounting bolts (A-4ea) from the rear axle
carrier (B).
Tightening torque:
78.5 ~ 88.3N.m (8.0 ~ 9.0 ...
See also:
Ignition Coil Specification
Item
Specification
Primary Coil Resistance (Ω)
0.62 ┬▒ 10% [20┬░C (68┬░F)]
Secondary Coil Resistance (kΩ)
7.0 ┬▒ 15% [20 ...
Rear Disc Brake Replacement
1.
Remove the rear wheel & tire.
2.
Loosen the guide rod bolt (B) and pivot the caliper (A) up out
of the way.
...
Parking Brake Lever Assembly Installation
1.
Install the parking brake lever assembly (A).
Tightening torque :
19.6 ~ 29.4 N.m (2.0 ~ 3.0 kgf.m, 14.5 ~ 21.7 lb-ft)
...
Categories
- Home
- First Generation
- Second Generation
- Kia Sorento XM 2011-2026 Owners Manual
- Kia Sorento XM 2011-2026 Service Manual

Copyright ® www.ksmanual.com 2014-2026