 Kia Sorento: Cylinder Head Cover Installation
Second Generation XM (2011-2026) / Kia Sorento XM 2011-2026 Service Manual / Engine Mechanical System / Cylinder Head Assembly / Cylinder Head Cover Installation
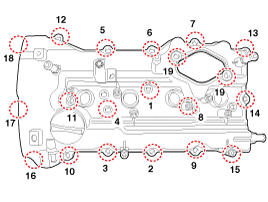
| 1. |
Install cylinder head cover.
|
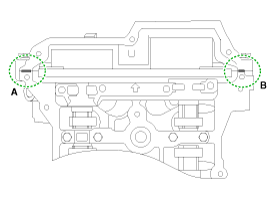
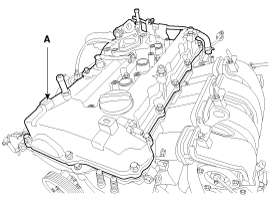

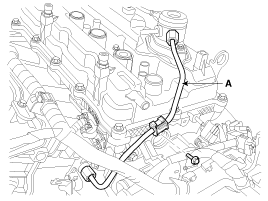
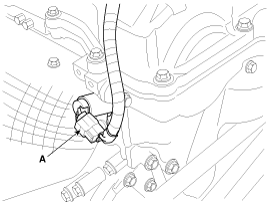
| 2. |
Install the front engine hanger (A).
|
| 3. |
Connect the PCV (Positive crankcase ventilation) hose (A).
|

| 4. |
Install the high pressure fuel pump.
(Refer to Engine Control/Fuel System - "High Pressure Fuel Pump")
|
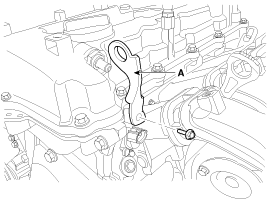
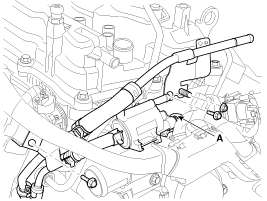
| 5. |
Install the high pressure pipe (A).
|

| 6. |
Connect PCSV (Purge control solenoid valve) connector (A) and tighten
the vacuum & PCSV (Purge control solenoid valve) pipe assembly mounting
bolts and nut.
|
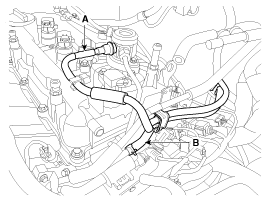
| 7. |
Connect the fuel hose (A) and PCSV (Purge control solenoid valve) hose
(B).
|
| 8. |
Install the ignition coils.
(Refer to Engine Electrical System - "Ignition Coil")
|
| 9. |
Connect the ignition coil connectors (A) and fuel pump connector (B)
after installing the wiring protector (C).
|
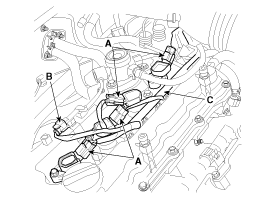
| 10. |
Connect the exhaust OCV (Oil control valve) connector (A).
|
| 11. |
Install the air cleaner assembly.
(Refer to Intake And Exhaust System - "Air Cleaner")
|
| 12. |
Install the engine cover.
|
 Cylinder Head Cover Removal
1.
Disconnect the battery negative terminal.
2.
Remove the engine cover.
3.
Remove the air duct and air cleaner ...
 CVVT & Camshaft Components
1. Camshaft bearing cap
2. Camshaft front bearing cap
3. Exhaust camshaft
4. Intake camshaft
5. Exhaust CVVT assembly
6. Intake CVVT assembly
7. Exhaust camshaft upper ...
See also:
Front Driveshaft Removal and Installation
1.
Remove the front wheel and tire (A) from front hub .
Tightening torque:
88.2 ~ 107.8 N.m (9.0 ~ 11.0 kgf.m, 65.0 ~ 79.5 lb-ft)
...
Direct Electro Hydraulic Actuator Coupling Inspection
All units are filled up with coupling fluid (ultra-low viscosity
ATF) prior to shipping. Inspection, fill-up, and replac ...
Categories
- Home
- First Generation
- Second Generation
- Kia Sorento XM 2011-2026 Owners Manual
- Kia Sorento XM 2011-2026 Service Manual

Copyright ® www.ksmanual.com 2014-2026