 Kia Sorento: Transaxle Oil Temperature Sensor Removal
Second Generation XM (2011-2024) / Kia Sorento XM 2011-2024 Service Manual / Automatic Transaxle System / Automatic Transaxle Control System / Transaxle Oil Temperature Sensor Removal
| 1. |
Remove the battery and the battery tray.
(Refer to Engine Electrical System - "Battery")
|
| 2. |
Remove the under cover.
(Refer to Engine Mechanical System - "Engine Room Under Cover")
|
| 3. |
Drain the coolant.
(Refer to Engine Mechanical System - "Coolant")
|
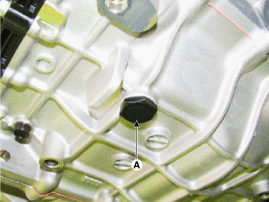
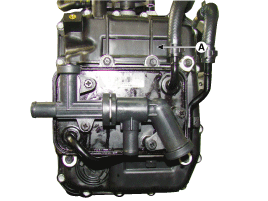
| 4. |
Remove the drain plug (A) and reinstall the drain plug after draining
ATF totally.
|

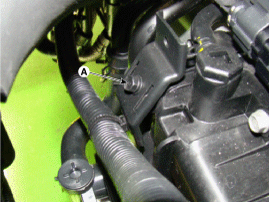
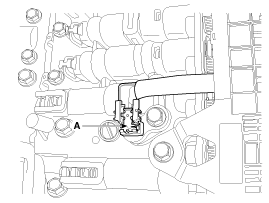
| 5. |
Remove the wiring bracket installation bolt (A).
|
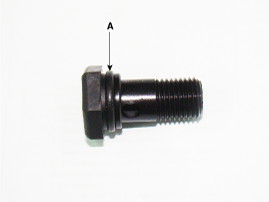
| 6. |
Remove the ATF Injection hole(eyebolt) (A).
|
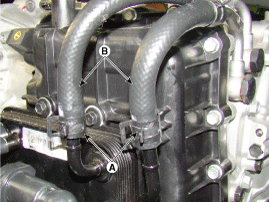
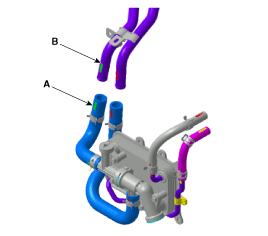
| 7. |
Disconnect the coolant hose (B) after removing the coolant hose
clamp (A).
|
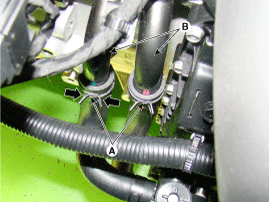
| 8. |
Disconnect the hose (B) after removing the automatic transaxle
fluid cooler hose clamp (A).
|
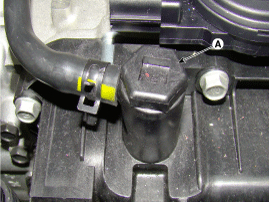
| 9. |
Remove the valve body cover (A).
|

| 10. |
Disconnect the oil temperature sensor connector (A).
|
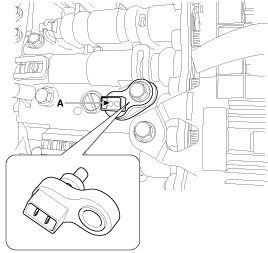
| 11. |
Remove the oil temperature sensor (A) after removing a bolt.
|
 Transaxle Oil Temperature Sensor Inspection
1.
Turn ignition switch OFF.
2.
Remove the air duct.
(Refer to Engine Mechanical System - "Air cleaner")
...
 Transaxle Oil Temperature Sensor Installation
1.
Install in the reverse order of removal.
•
...
See also:
BJ Boot Components
1. BJ assembly
2. BJ circlip
3. BJ boot band
4. BJ boot
5. Dynamic damper band
6. Dynamic damper
7. Shaft
8. TJ boot band
9. TJ boot
10. Spider assembly
...
Antenna Removal
1.
Remove the rear roof trim.
(Refer to Body - "Roof trim")
2.
Disconnect the power cable (A).
3. ...
Overdrive Clutch Control Solenoid Valve(OD/C_VFS)
Overdrive clutch control solenoid valve(OD/C) is attached to the valve
body. This variable force solenoid valve directly controls the hydraulic pressure
inside the overdrive clutch.
...
Copyright © www.ksmanual.com 2014-2024