 Kia Sorento: Steering Gear box Removal
Second Generation XM (2011-2024) / Kia Sorento XM 2011-2024 Service Manual / Steering System / Electric Power Steering / Steering Gear box Removal
| 1. |
Remove the front wheel and tire (A) from front hub.
|

| 2. |
Disconnect the stabilizer link(B) with the front strut assembly(A)
after loosening the nut.
|
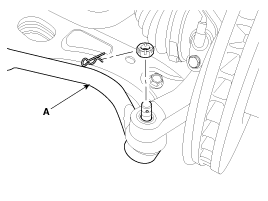
| 3. |
Remove the sprit pin and castle nut and then disconnect the tie-rod
end (A) from the front knuckle.
|
| 4. |
Loosen the bolt & nut and then remove the lower arm (A).
|
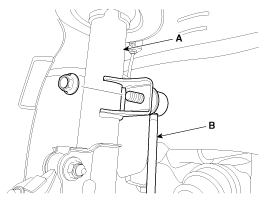
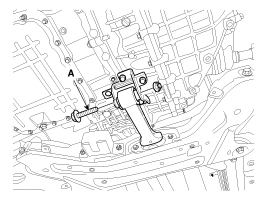
| 5. |
Loosen the bolt (A) and then disconnect the universal joint assembly
from the pinion of the steering gear box.
|
| 6. |
Remove the under cover.
(Refer to Engine Mechanical System - "Engine Room Under Cover")
|
| 7. |
Loosen the bolt (A,B) and then remove the upper roll rod bracket.
|

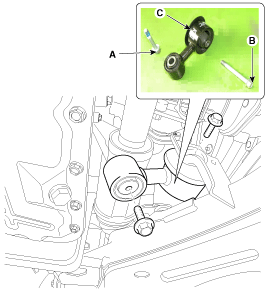
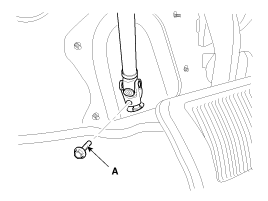
| 8. |
Remove the roll rod stopper bolt (A).
|
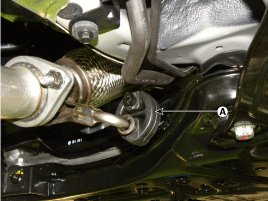
| 9. |
Disconnect the muffler rubber hanger (A).
|
| 10. |
Loosen the bolts & nuts and then remove the sub frame.
|
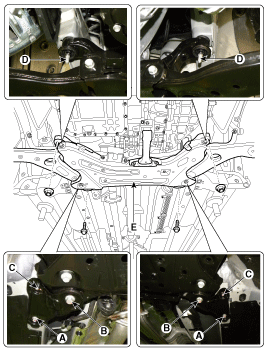
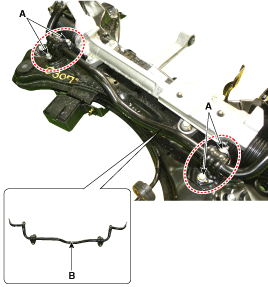
| 11. |
Loosen the bolt (A-4ea) and then remove the stabilizer bar (B)
from the sub frame.
|
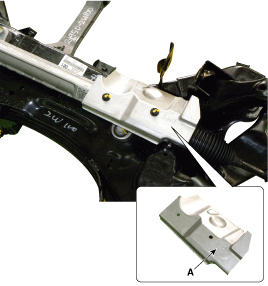
| 12. |
Loosen the bolt and then remove the protector (A).
|
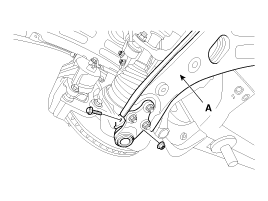
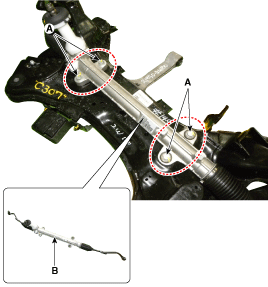
| 13. |
Remove the steering gearbox (B) from the cross member by loosening
the mounting bolt (A-4ea).
|
| 14. |
Installation is the reverse of removal.
|
| 15. |
Check the wheel Alignment.
(Refer to Suspension System - "Alignment")
|
 Steering Column and Shaft Inspection
1.
Check the steering column for damage and deformation.
2.
Check the joint bearing for damage and wear.
3.
Che ...
 Restraint
...
See also:
Description
Back view camera will activate when the backup light is ON with the ignition
switch ON and the shift lever in the R position.
This system is a supplemental system that shows behind the vehic ...
Power Door Mirror Switch Installation
Driver Door Mirror Switch
1.
Install the driver door module and connectors.
2.
Install the front door trim.
...
Alternator Description
The Alternator has eight built-in diodes, each rectifying AC current to
DC current.
Therefore, DC current appears at alternator "B" terminal.
In addition, the charging voltage ...
Copyright © www.ksmanual.com 2014-2024