 Kia Sorento: Rear Cross Member Replacement
Second Generation XM (2011-2024) / Kia Sorento XM 2011-2024 Service Manual / Suspension System / Rear Suspension System / Rear Cross Member Replacement
| 1. |
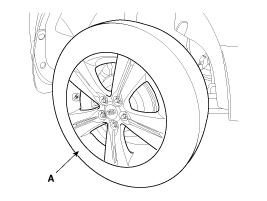
Remove the rear wheel & tire.
|

| 2. |
Remove the parking brake cable.
(Refer to "Parking Brake System" in BR group)
|
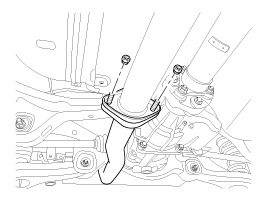
| 3. |
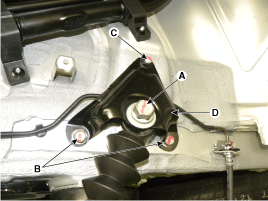
Loosen the bolt and then remove the trailing arm (A).
|
| 4. |
Remove the shock absorber upper mounting.
[2WD]
[4WD]
|
| 5. |
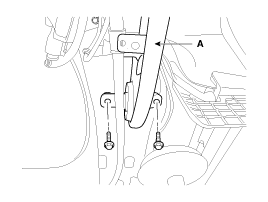
Remove the rear muffler.
|
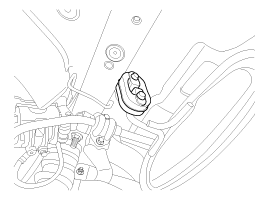
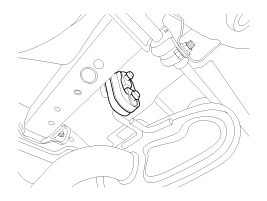
| 6. |
Loosen the bolt and then remove the propellar shaft (A).
|
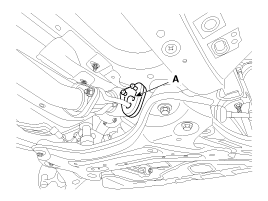
| 7. |
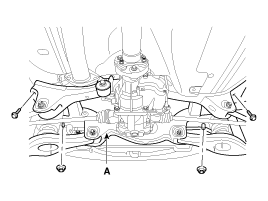
Loosen the mounting bolts and then remove the rear cross member
(A) with the frame.
|
| 8. |
Remove the rear lower arm.
(Refer to the lower arm)
|
| 9. |
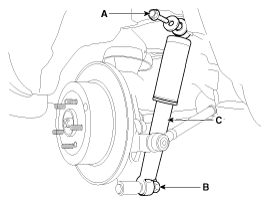
Remove the rear shock absorber.
(Refer to the rear shock absorber)
|
| 10. |
Remove the rear upper arm.
(Refer to the rear upper arm)
|
| 11. |
Remove the trailing arm.
(Refer to the trailing arm)
|
| 12. |
Remove the rear assist arm.
(Refer to the rear assist arm)
|
| 13. |
Remove the drive shaft.
(Refer to "Rear Drive Shaft" in DS group)
|
| 14. |
Remove the differential carrier.
(Refer to "Differential Carrier" in DS group)
|
| 15. |
Installation is the reverse of removal.
|
 Rear Stabilizer Bar Inspection
1.
Check the rear stabilizer bar for deformation.
2.
Check the rear stabilizer link ball joint for damage.
...
 Tires/Wheels
•
Using tires and wheel other than the recommended sizes
could cause unusual handling ...
See also:
User Settings Mode
Description
On this mode, you can change setting of the doors, lamps, and so on.
Door
Auto Door Lock (if equipped)
• Off:
The auto door lock operation will be deactivated.
• Speed: ...
TPMS Sensor Description
1.
Mode
(1)
Configuration State
A.
All sensors should be in the Low Line state.
...
Auto Head lamp leveling Unit Inspection with GDS
Initialization and diagnosis sequence by using GDS equipment.
Below content summarize the procedure for A/S using GDS.
No.
Procedure
1
Locate vehicle to flat ...
Copyright © www.ksmanual.com 2014-2024