 Kia Sorento: Piston and Connecting Rod Inspection
Connecting Rod
|
1. |
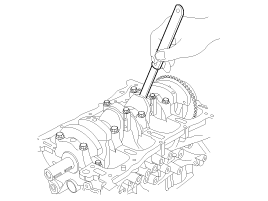
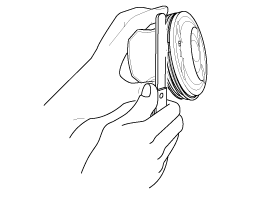
Check the connecting rod end play.
Using a feeler gauge, measure the end play while moving the connecting
rod back and forth.
End play :
Standard : 0.10~ 0.25 mm (0.0039 ~ 0.0098 in.)
Limit : 0.35 mm (0.0138 in.)
|

| A. |
If out-of-tolerance, install a new connecting rod.
|
| B. |
If still out-of-tolerance, replace the crankshaft.
|
|
|
2. |
Check the connecting road bearing oil clearance.
|
(1) |
Check the matchmarks on the connecting rod and cap are aligned
to ensure correct reassembly.
|
|
(2) |
Remove 2 connecting rod cap bolts.
|
|
(3) |
Remove the connecting rod cap and bearing half.
|
|
(4) |
Clean the crank pin and bearing.
|
|
(5) |
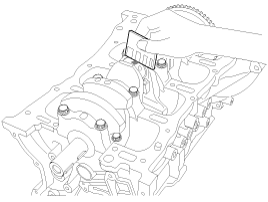
Place plastigage across the crank pin.
|
|
(6) |
Reinstall the bearing half and cap, and torque the bolts.
Tightening torque
17.7~21.6 N.m (1.8 ~ 2.2 kgf.m, 13.0 ~ 15.9 lb-ft) +
78 ~ 82°
|
|
• |
Do not turn the crankshaft.
|
|
• |
Always use new connecting rod cap bolts. Connecting
rod cap bolts are toque-to-yield bolts designed
to be permanently elongated beyond the state
of elasticity when torqued, so if the bolts
are removed and reused, it may cause the bolts
to break or fail to maintain clamping force.
|
|
|
|
(7) |
Remove 2 bolts, connecting rod cap and bearing half.
|
|
(8) |
Measure the plastigage at its widest point.
Standard oil clearance
:
0.033 ~ 0.051 mm (0.00130 ~ 0.00201 in.)
|

|
|
(9) |
If the plastigage measures too wide or too narrow, remove the
upper half of the bearing, install a new, complete bearing with
the same color mark (select the color as shown in the next column),
and recheck the clearance.
|
Do not file, shim, or scrape the bearings or the caps
to adjust clearance.
|
|
|
(10) |
If the plastigage shows the clearance is still incorrect, try
the next larger or smaller bearing (the color listed above or
below that one), and check clearance again.
|
If the proper clearance cannot be obtained by using
the appropriate larger or smaller bearings, replace
the crankshaft and start over.
|
|
If the marks are indecipherable because of an accumulation
of dirt and dust, do not scrub them with a wire brush
or scraper. Clean them only with solvent or detergent.
|
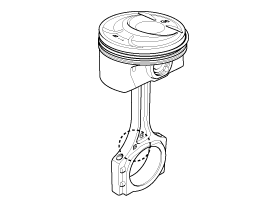
Connecting Rod Identification Mark

Connecting Rod Specifications
Class
|
Mark
|
Inside Diameter
|
a
|
A
|
51.000 ~ 51.006 mm
(2.00787 ~ 2.00811 in.)
|
b
|
B
|
51.006 ~ 51.012 mm
(2.00811 ~ 2.00834 in.)
|
c
|
C
|
51.012 ~ 51.018 mm
(2.00834 ~ 2.00858 in.)
|
|
|
Piston And Rings
|
1. |
Clean piston
|
(1) |
Using a gasket scraper, remove the carbon from the piston top.
|
|
(2) |
Using a groove cleaning tool or broken ring, clean the piston
ring grooves.
|
|
(3) |
Using solvent and a brush, thoroughly clean the piston.
|
|
|
2. |
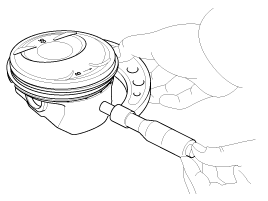
The standard measurement of the piston outside diameter is taken 17
mm (0.67 in.) from the top land of the piston.
Standard diameter :
87.970 ~ 88.000 mm (3.46338 ~ 3.46456 in.)
|

|
|
3. |
Calculate the difference between the cylinder bore diameter and the
piston diameter.
Piston-to-cylinder clearance
:
0.020 ~ 0.040 mm (0.00079 ~ 0.00157 in.)
|
|
|
4. |
Inspect the piston ring side clearance.
Using a feeler gauge, measure the clearance between new piston ring
and the wall of the ring groove.
Piston ring side clearance
Standard
No.1 : 0.050 ~ 0.080 mm (0.00197 ~ 0.00315 in.)
No.2 : 0.040 ~ 0.080 mm (0.00157 ~ 0.00315 in.)
Oil ring : 0.020 ~ 0.055 mm (0.00079 ~ 0.00217 in.)
Limit
No.1 : 0.100 mm (0.00394 in.)
No.2 : 0.100 mm (0.00394 in.)
Oil ring : 0.60 mm (0.0236 in.)
|

If the clearance is greater than maximum, replace the piston.
|
|
5. |
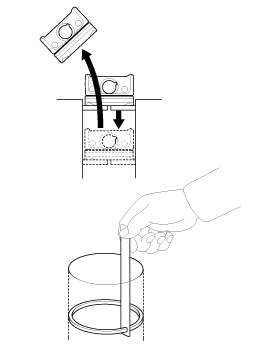
Inspect piston ring end gap.
To measure the piston ring end gap, insert a piston ring into the cylinder
bore. Position the ring at right angles to the cylinder wall by gently
pressing it down with a piston. Measure the gap with a feeler gauge.
If the gap exceeds the service limit, replace the piston ring. If the
gap is too large, recheck the cylinder bore diameter against the wear
limits, If the bore is over the service limit, the cylinder block must
be replaced.
Piston ring end gap
Standard
No.1 : 0.15 ~ 0.25 mm (0.0059 ~ 0.0098 in.)
No.2 : 0.37 ~ 0.47 mm (0.0145 ~ 0.0185 in.)
Oil ring : 0.20 ~ 0.50 mm (0.0079 ~ 0.0197 in.)
Limit
No.1 : 0.60 mm (0.0236 in.)
No.2 : 0.70 mm (0.0275 in.)
Oil ring : 0.80 mm (0.0315 in.)
|

|
Piston Pins
|
1. |
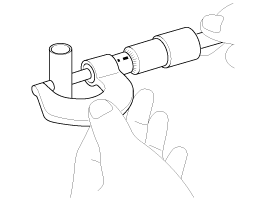
Measure the diameter of the piston pin.
Piston pin diameter :
21.997 ~ 22.000 mm (0.86602 ~ 0.86614 in.)
|

|
|
2. |
Measure the piston pin-to-piston clearance.
Piston pin-to-piston clearance
:
0.003 ~ 0.010 mm (0.00012 ~ 0.00039 in.)
|
|
|
3. |
Check the difference between the piston pin diameter and the connecting
rod bushing oil clearance.
Piston pin-to-connecting rod
interference :
0.005 ~ 0.014 mm (0.00020 ~ 0.00055 in.)
|
|
•
Use fender covers to avoid damaging painted surfaces.
•
...
•
Thoroughly clean all parts to be assembled.
•
...
 Kia Sorento: Piston and Connecting Rod Inspection
 Piston and Connecting Rod Disassembly
 Piston and Connecting Rod Reassembly
