 Kia Sorento: Rheostat Inspection
Second Generation XM (2011-2024) / Kia Sorento XM 2011-2024 Service Manual / Body Electrical System / Lighting System / Rheostat Inspection
| 1. |
Disconnect the negative (-) battery terminal.
|
| 2. |
Remove the crash pad side cover.
|
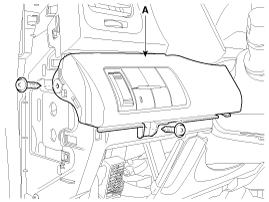
| 3. |
Remove the lower crash pad switch assembly (A) after loosening
the screws.
|
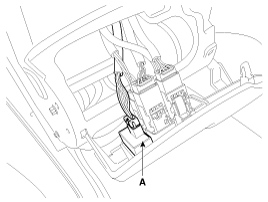
| 4. |
Remove the rheostat switch connector (A).
|
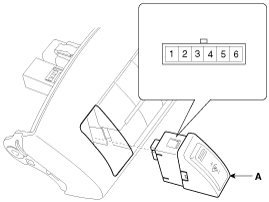
| 5. |
Remove the rheostat switch (A) from lower crash pad switch assembly.
|
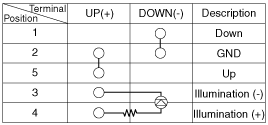
| 6. |
Check for intensity of new rheostat switch. If the light intensity
of the lamps changes smoothly without any flickering when the rheostat
is turned, it can be assumed that the rheostat is normal.
|
 Hazard Lamp Switch Inspection
Diagnosis With GDS
1.
It will be able to diagnose defects of IPM with GDS quickly. GDS
can operates actuator forcefully, input/output value monitoring and
self dia ...
 Front Fog Lamps Inspection
1.
With the fog lamp switch in each position, make sure that continuity
exists between the terminals below. If continuity is not as specified,
replace the multifunctio ...
See also:
Auto Head lamp leveling Unit Operation
Operating Procedure
1.
Suspension angle change resulted from vehicle's load change.
2.
Height sensor signal change
...
Front Wiper Motor Installation
1.
Install the wiper motor.
2.
Install the crank arm.
Torque :
12.7-17.6Nm (1.3-1.8, kgf.m, 9.4-13.0 lbf. ...
Intake Manifold Components
1. Intake manifold assembly
2. Electronic throttle body
3. Intake manifold stay
4. Intake manifold gasket
...
Copyright © www.ksmanual.com 2014-2024