Kia Sorento: Ultrasonic Sensor Removal and Installation - Advanced Driver Assistance System (Parking) - Advanced Driver Assistance System (ADAS)Kia Sorento: Ultrasonic Sensor Removal and Installation

Kia Sorento (MQ4, 2021-2026) Service Manual / Advanced Driver Assistance System (ADAS) / Advanced Driver Assistance System (Parking) / Ultrasonic Sensor Removal and Installation

Removal
Information
For failures such as PDW false warnings or non-warning, first check the surface condition of the ultrasonic sensor and contamination by foreign substances.
Ultrasonic Sensor [Front]
1.
Remove the front bumper assembly.
(Refer to Body - "Front Bumper Assembly")
2.
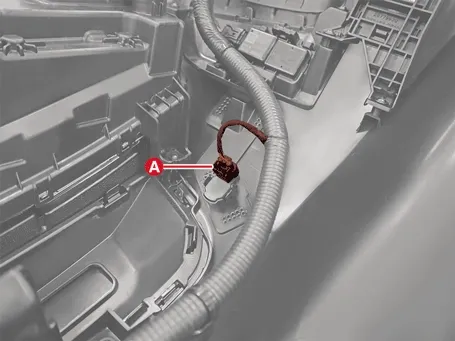
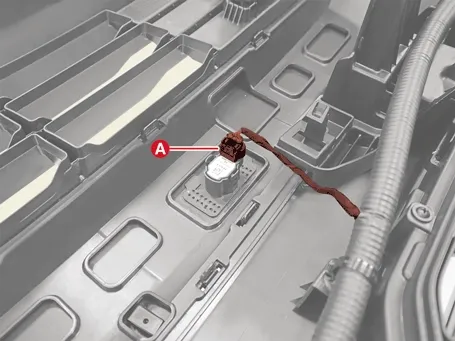
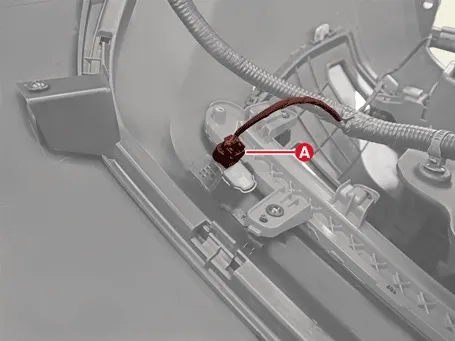
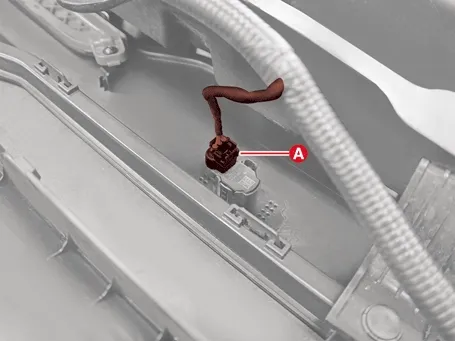
Disconnect the ultrasonic sensor connector (A).

Advanced Driver Assistance System (ADAS) — Advanced Driver Assistance System (Parking) / Ultrasonic Sensor / Removal and Installation / Removal illustration

Advanced Driver Assistance System (ADAS) — Advanced Driver Assistance System (Parking) / Ultrasonic Sensor / Removal and Installation / Removal illustration

3.
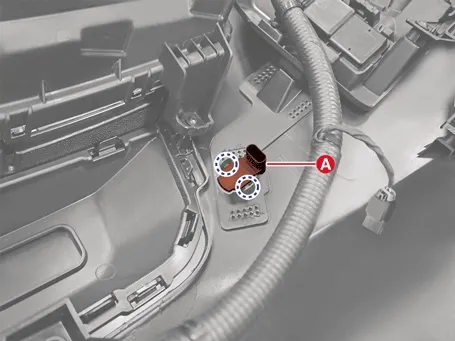
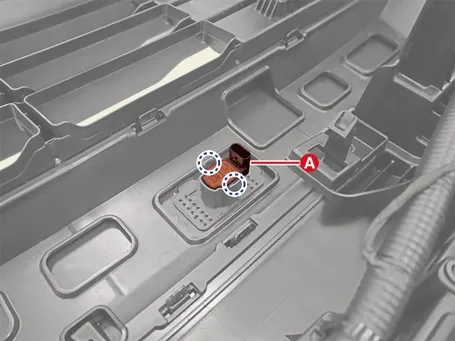
Remove the ultrasonic sensor (A).

Advanced Driver Assistance System (ADAS) — Advanced Driver Assistance System (Parking) / Ultrasonic Sensor / Removal and Installation / Removal illustration

Advanced Driver Assistance System (ADAS) — Advanced Driver Assistance System (Parking) / Ultrasonic Sensor / Removal and Installation / Removal illustration

Information
Clip position :

Advanced Driver Assistance System (ADAS) — Advanced Driver Assistance System (Parking) / Ultrasonic Sensor / Removal and Installation / Removal illustration

Ultrasonic Sensor [Rear]
1.
Remove the rear bumper assembly.
(Refer to Body - "Rear Bumper Assembly")
2.
Disconnect the ultrasonic sensor connector (A).

Advanced Driver Assistance System (ADAS) — Advanced Driver Assistance System (Parking) / Ultrasonic Sensor / Removal and Installation / Removal illustration

Advanced Driver Assistance System (ADAS) — Advanced Driver Assistance System (Parking) / Ultrasonic Sensor / Removal and Installation / Removal illustration

3.
Remove the ultrasonic sensor (A).

Advanced Driver Assistance System (ADAS) — Advanced Driver Assistance System (Parking) / Ultrasonic Sensor / Removal and Installation / Removal illustration

Advanced Driver Assistance System (ADAS) — Advanced Driver Assistance System (Parking) / Ultrasonic Sensor / Removal and Installation / Removal illustration

Information
Clip position :

Advanced Driver Assistance System (ADAS) — Advanced Driver Assistance System (Parking) / Ultrasonic Sensor / Removal and Installation / Removal illustration

Front / Rear Corner Ultrasonic Sensor
1.
Remove the front bumper assembly.
(Refer to Body - "Front Bumper Assembly")
2.
Remove the rear bumper assembly.
(Refer to Body - "Rear Bumper Assembly")
3.
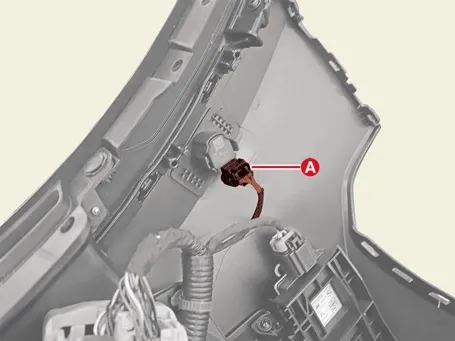
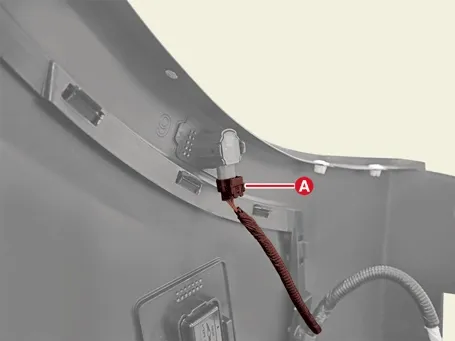
Disconnect the ultrasonic sensor connector (A).
[Front]

Advanced Driver Assistance System (ADAS) — Advanced Driver Assistance System (Parking) / Ultrasonic Sensor / Removal and Installation / Removal illustration

[Rear]

Advanced Driver Assistance System (ADAS) — Advanced Driver Assistance System (Parking) / Ultrasonic Sensor / Removal and Installation / Removal illustration

4.
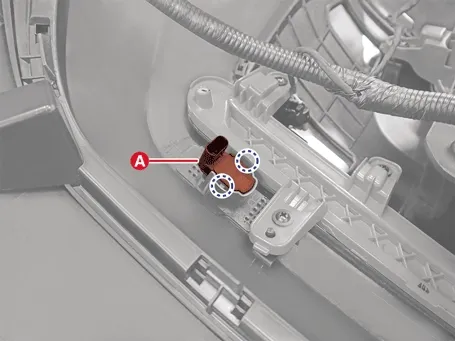
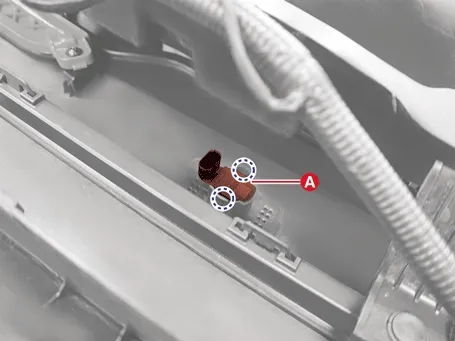
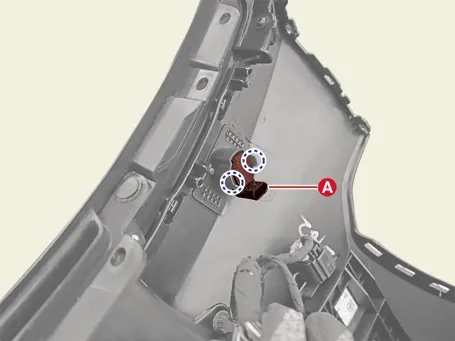
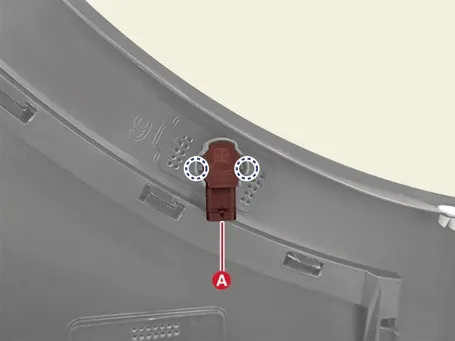
Remove the ultrasonic sensor (A).
[Front]

Advanced Driver Assistance System (ADAS) — Advanced Driver Assistance System (Parking) / Ultrasonic Sensor / Removal and Installation / Removal illustration

[Rear]

Advanced Driver Assistance System (ADAS) — Advanced Driver Assistance System (Parking) / Ultrasonic Sensor / Removal and Installation / Removal illustration

Information
Clip position :

Advanced Driver Assistance System (ADAS) — Advanced Driver Assistance System (Parking) / Ultrasonic Sensor / Removal and Installation / Removal illustration

Installation
1.
Install in the reverse order of removal.
Ultrasonic Sensor On Vehicle Inspection

On Vehicle Inspection Visual inspection If there is a problem with PDW, PCA or RSPA check the items below. 1. Checking bumper cleanliness ...
Advanced Driver Assistance System (Driving)
...
See also:

Heater Unit Replacement
1. Disconnect the negative (-) battery terminal. 2. Recover the refrigerant with a recovery/recycling/charging station. 3. ...

Auto Defogging Actuator Replacement
1. Disconnect the negative (-) battery terminal. 2. Remove the cowl side trim. (Refer to Body - "Crash Pad") ...

Engine compartment. Maintenance services
Engine compartment The actual engine compartment layout in your specific Kia Sorento model may differ slightly from the provided illustration based on regional specifications. ...

Copyright © www.ksmanual.com 2014-2026 - 0.0596