 Kia Sorento: Timing Chain Removal
Second Generation XM (2011-2026) / Kia Sorento XM 2011-2026 Service Manual / Engine Mechanical System / Timing System / Timing Chain Removal
| 1. |
Remove the cylinder head cover.
(Refer to Cylinder Head Assembly - "Cylinder Head Cover")
|
| 2. |
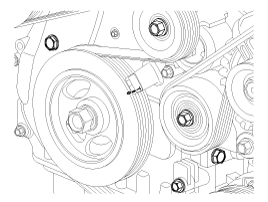
Turn the crankshaft pulley and align its groove with the timing mark
of the timing chain cover to set the piston of No.1 cylinder to the
top dead center on compression stroke.
|
| 3. |
Remove the timing chain cover.
(Refer to Timing System - "Timing Chain Cover")
|
| 4. |
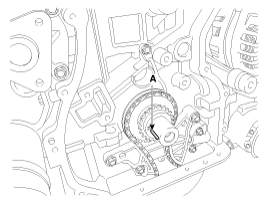
Make sure that the key (A) of crankshaft is aligned with the mating
surface of main bearing cap. As a result of this, the piston of No.1
cylinder is placed at the top dead center on compression stroke.
|
| 5. |
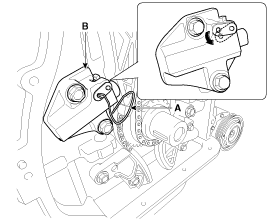
Release the ratchet by pulling the link down using a thin rod. Compress
the piston and then insert a stopper pin (A) into the hole on the ratchet
to hold the compressed piston. Remove the timing chain tensioner (B).
|
| 6. |
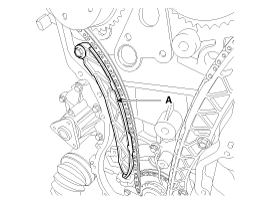
Remove the timing chain tensioner arm (A).
|
| 7. |
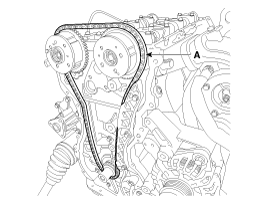
Remove the timing chain (A).
|
| 8. |
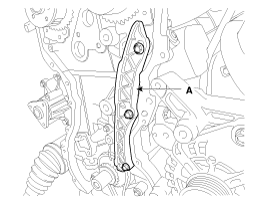
Remove the timing chain guide (A).
|
| 9. |
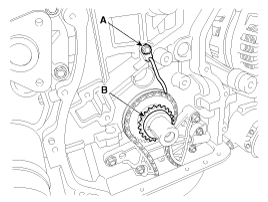
Remove the timing chain oil jet (A) and the crankshaft chain sprocket
(B).
|
| 10. |
Remove the balance shaft chain.
(Refer to Lubrication system - "Balance Shaft & Oil Pump")
|
 Timing Chain Components
1. Timing chain
2. Timing chain guide
3. Timing chain tension arm
4. Timing chain tension
5. Balance shaft chain
6. Balance shaft chain tension arm
7. Balance shaft ch ...
 Timing Chain Inspection
Sprockets, Hydraulic Tensioner, Chain Guide, Tensioner Arm, Timing Chain
1.
Check the CVVT sprocket, crankshaft sprocket teeth for abnormal wear,
cracks or damage. Replace ...
See also:
Auto Defogging Sensor Inspection
To inspect and diagnose the sensor, refer to Self-Diagnosis procedure
and DTC guide. ...
Oil hydraulic Motor(Actuator) Inspection
If you have trouble code related to the oil hydraulic motor (actuator),
check oil hydraulic motor (actuator) according t ...
Parking Assist Sensor Removal
1.
Disconnect the negative (-) battery terminal.
2.
Remove the rear bumper cover.
(Refer to Body - "Rear Bumper Cover")
...
Copyright ® www.ksmanual.com 2014-2026

