Kia Sorento: Rear Driveshaft Repair procedures - Rear Driveshaft Assembly - Driveshaft and axleKia Sorento: Rear Driveshaft Repair procedures

Kia Sorento (MQ4, 2021-2026) Service Manual / Driveshaft and axle / Rear Driveshaft Assembly / Rear Driveshaft Repair procedures

Removal
1.
Disconnect the (-) battery terminal.
2.
Remove the rear wheel and tire.
(Refer to Suspension System - "Wheel")
3.
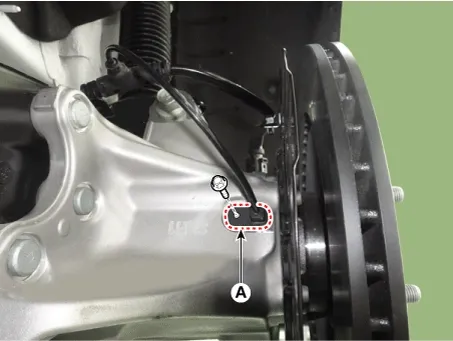
Disconnect the rear wheel speed sensor connector (A).

Tightening torque :
8.8 - 13.7 N·m (0.9 - 1.4 kgf·m, 6.5 - 10.1 lb·ft)

Driveshaft and axle — Rear Driveshaft Assembly / Rear Driveshaft / Repair procedures / Removal illustration

4.
Remove the rear brake caliper.
(Refer to Brake System - "Rear Brake Caliper")
5.
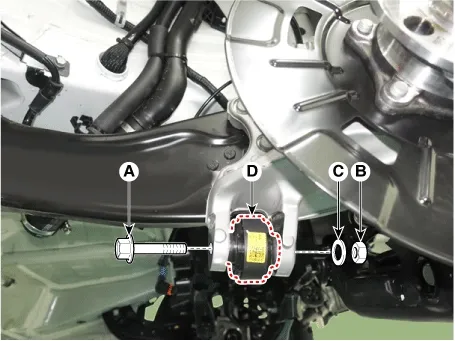
Remove the bolt (A), nut (B) and washer (C) to separate the rear assist arm (D) from the rear carrier.

Tightening torque :
156.9 - 176.5 N·m (16.0 - 18.0 kgf·m, 115.7 - 130.1 lb·ft)

Driveshaft and axle — Rear Driveshaft Assembly / Rear Driveshaft / Repair procedures / Removal illustration

Note
•
When removing the bolt, install the transmission jack and remove it under no load.
•
Mark the bolt, nut and washer in advance so that they do not change position and orientation.
6.
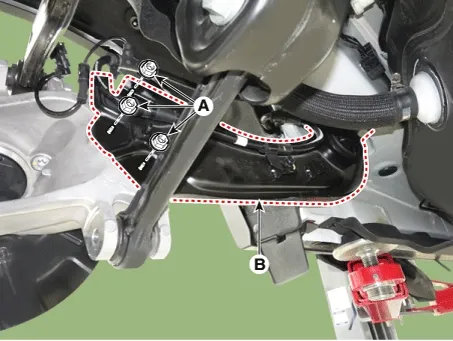
Remove the nut (A) and remove the trailing arm (B) from the rear carrier.

Tightening torque :
98.1 - 117.7 N·m (10.0 - 12.0 kgf·m, 72.3 - 86.8 lb·ft)

Driveshaft and axle — Rear Driveshaft Assembly / Rear Driveshaft / Repair procedures / Removal illustration

Note
•
When removing the bolt, install the transmission jack and remove it under no load.
•
Mark the bolt, nut and washer in advance so that they do not change position and orientation.
7.
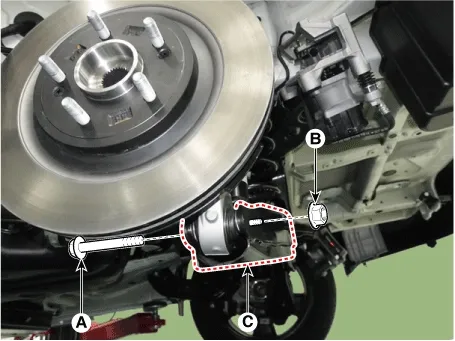
Remove the bolt (A) and nut (B) and separate the rear lower arm (C) from the rear hub carrier.

Tightening torque :
156.9 - 176.5 N·m (16.0 - 18.0 kgf·m, 115.7 - 130.1 lb·ft)

Driveshaft and axle — Rear Driveshaft Assembly / Rear Driveshaft / Repair procedures / Removal illustration


Note
•
When removing the bolt, install the transmission jack and remove it under no load.
•
Mark the bolt, nut and washer in advance so that they do not change position and orientation.
8.
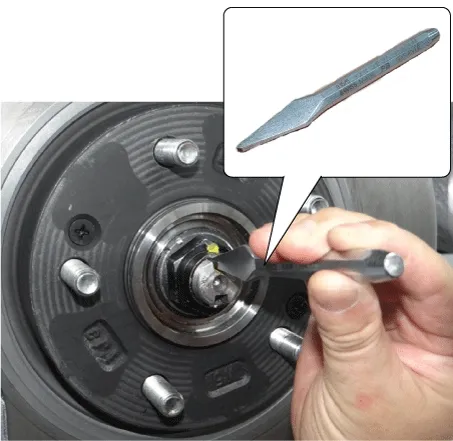
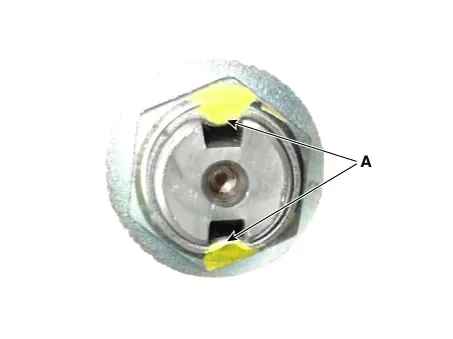
By hammering on a chisel, unlock the driveshaft lock hub nut caulking.

Driveshaft and axle — Rear Driveshaft Assembly / Rear Driveshaft / Repair procedures / Removal illustration

Note
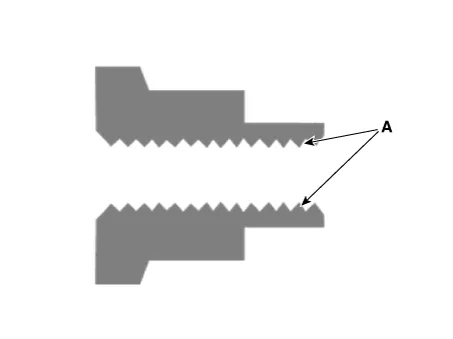
If there is screw thread (A) on the end of the nut, unlock the caulking by using a chisel and then remove the nut to prevent damaging driveshaft screw thread.

Driveshaft and axle — Rear Driveshaft Assembly / Rear Driveshaft / Repair procedures / Removal illustration

9.
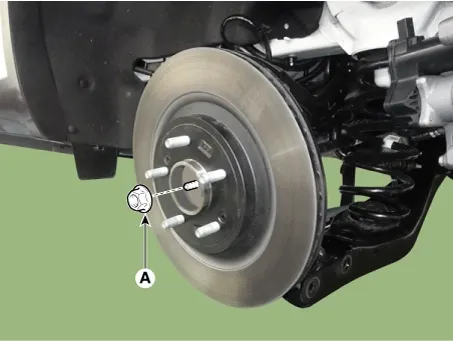
Remove the caulking nut (A) from the rear axle.

Tightening torque :
294.2 - 313.8 N·m (30.0 - 32.0 kgf·m, 217.0 - 231.5 lb·ft)

Driveshaft and axle — Rear Driveshaft Assembly / Rear Driveshaft / Repair procedures / Removal illustration

Note
•
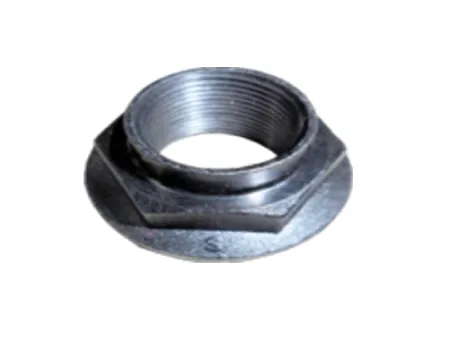
The driveshaft lock nut must be replaced with new one. When replacing the drive lock hub nut, use only the nut with screw thread (A) on the end.

Driveshaft and axle — Rear Driveshaft Assembly / Rear Driveshaft / Repair procedures / Removal illustration

•
When replacing the drive lock hub nut, use only the nut with screw thread (A) on the end.

Driveshaft and axle — Rear Driveshaft Assembly / Rear Driveshaft / Repair procedures / Removal illustration

•
Tighten the driveshaft lock hub nut to the specified tightening torque, and caulk by using a chisel and hammer.
•
If there are two key seats, perform on all two seats.

Caulking depth (A) : 1.5 mm (0.0591 in)

Driveshaft and axle — Rear Driveshaft Assembly / Rear Driveshaft / Repair procedures / Removal illustration

10.
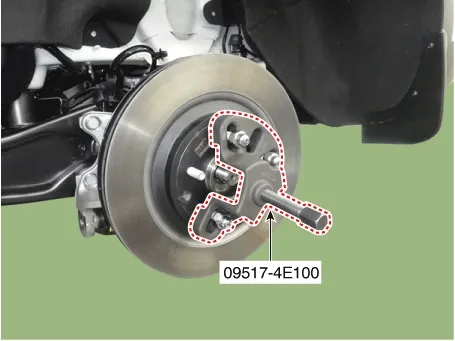
Disconnect the driveshaft from the axle hub by using the SST (09517-4E000).

Driveshaft and axle — Rear Driveshaft Assembly / Rear Driveshaft / Repair procedures / Removal illustration

Note
Removing the driveshaft, do not force pull or over deflect the axle.
11.
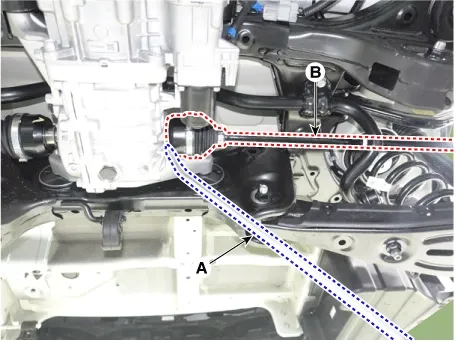
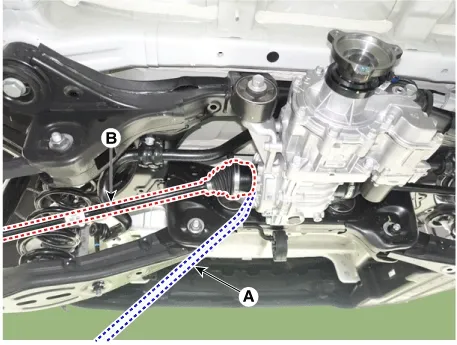
Remove the driveshaft (B) by using a pry bar (A).
[LH]

Driveshaft and axle — Rear Driveshaft Assembly / Rear Driveshaft / Repair procedures / Removal illustration

[RH]

Driveshaft and axle — Rear Driveshaft Assembly / Rear Driveshaft / Repair procedures / Removal illustration

Note
•
Do not insert the pry bar too deep, as this may damage the oil seal.
•
Do not pull the driveshaft by excessive force as it may cause components inside the joint kit to dislodge resulting in a torn boot or a damaged bearing.
•
When using the pry bar, be careful not to damage the transaxle and joint.
•
Plug the hole of the transaxle case with the oil seal cap to prevent contamination.
Installation
1.
Install in the reverse order of removal.
Rear Driveshaft Components and Components Location

Components 1. Rear driveshaft (LH) 3. Rear driveshaft (RH)...
Propeller Shaft Assembly
...
See also:

Inspection
   ...

37R Clutch Control Solenoid Valve (37R/C_VFS) On Vehicle Inspection
Inspection 1. The automatic transaxle system can be more quickly diagnosed for problems by using the vehicle diagnostic sys ...

Engine coolant
The high-pressure cooling system has a reservoir filled with year round antifreeze coolant. The reservoir is filled at the factory. Check the antifreeze protection and coolant level at least once a ...

Copyright © www.ksmanual.com 2014-2026 - 0.0457