
 Kia Sorento: Rear Brake Disc Repair procedures
Kia Sorento (MQ4, 2021-2026) Service Manual / Brake System / Brake System / Rear Brake Disc Repair procedures
| Removal |
| 1. |
Release the parking brake.
|

| 2. |
Disconnect the (-) battery terminal.
|
| 3. |
Remove the rear wheel and tire.
(Refer to Suspension System - "Wheel")
|
| 4. |
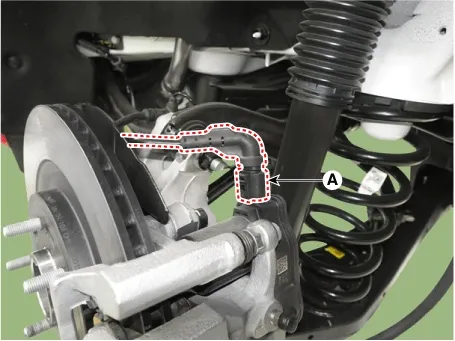
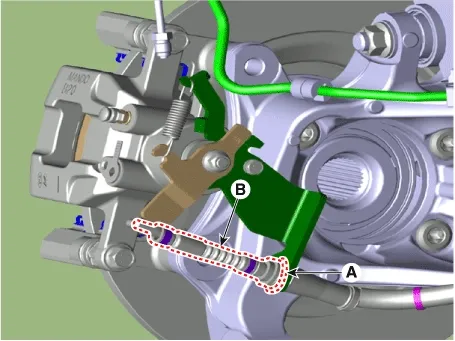
Disconnect the EPB connector or parking brake cable.
|
| 5. |
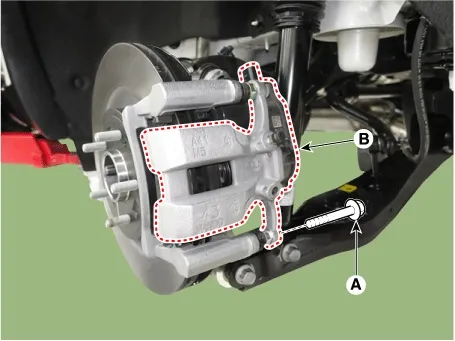
Remove the guide rod bolt (A) and then pivot the caliper body (B) up out of the way.
|
| 6. |
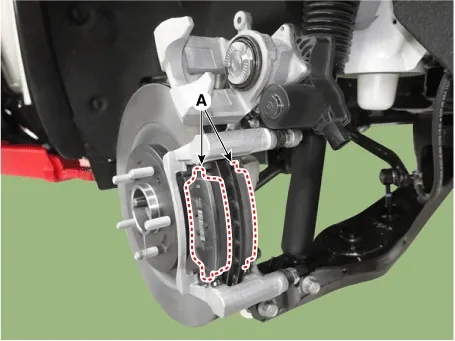
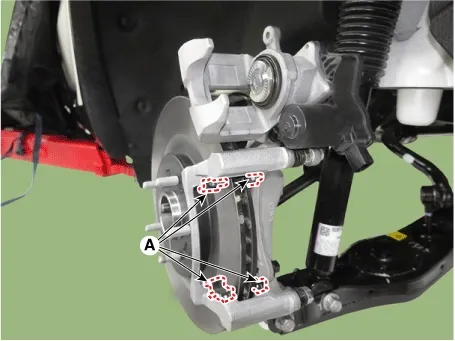
Remove the brake pad (A).
|
| 7. |
Remove the pad retainer (A).
|
| 8. |
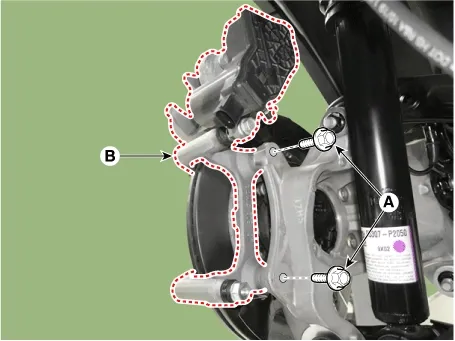
Remove the caliper carrier (B) by removing the flange bolts (A).
|

| 9. |
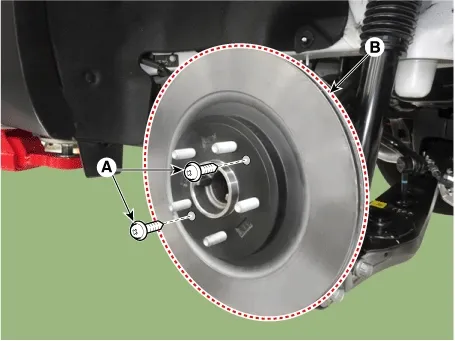
Remove the rear brake disc (B) by removing the screws (A).
|
| Inspection |
Disc cleaning before inspection
| 1. |
Check the brake disc for rust.
|
| 2. |
Spray the cleaing solution on rusted surface of disc.
|
| 3. |
Drive the vehicle up to 30 MPH and depress the brake up to stop for complete repeat more than 5 cycles.
|
| 4. |
Clean the disc with water.
|
| 5. |
Visually verify that rust is completely removed.
|
| 6. |
If rust has not been removed, repeat the procedure above.
|
Rear Brake Disc Thickness Check
| 1. |
Check the brake pads for wear and fade.
|
| 2. |
Check the brake disc for damage and cracks.
|
| 3. |
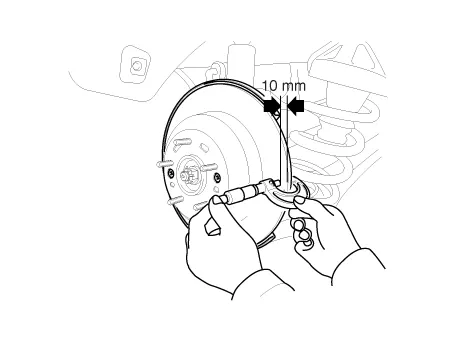
Remove all rust and contamination from the surface, and measure the disc thickness at 24 points, at least,
at the same distance apart (10 mm) from the brake disc outer circle.
|
| 4. |
if the measured DTV larger than the limit and thickness thicker than the service limit of the disc, skim
the brake disc.
|
| 5. |
If the brake disc is thinner than the service limit, replace the brake disc.
|
Rear Brake Disc Runout Check
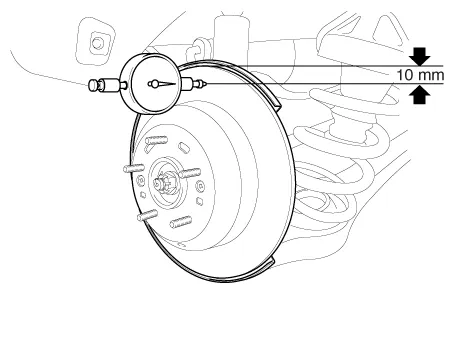
| 1. |
Place a dial gauge about 10 mm (0.4 in.) from the outer circumference of the brake disc, and measure the
runout of the disc.
|
| 2. |
if the measured disc runout larger than the limit and thickness thicker than the service limit of the disc,
skim the brake disc and measure the runout again.
|
| 3. |
If the runout of the brake disc still exceeds the limit specification, replace the disc, and then measure
the runout again.
|
| Installation |
| 1. |
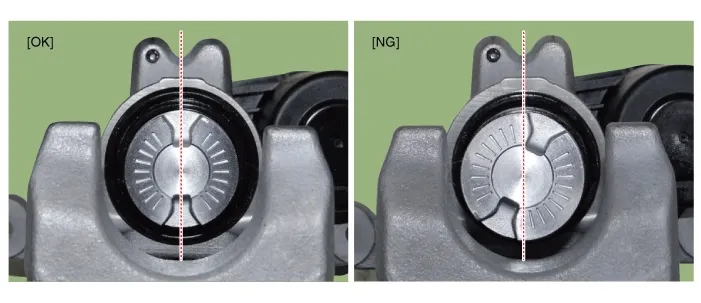
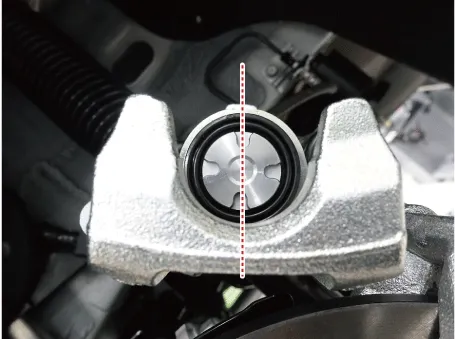
Install in the reverse order of removal.
|
| 2. |
After installing the rear caliper, perform “Brake Pad Replacement Mode” using the KDS.
|
| 3. |
Apply the parking brake several times and check for normal operation.
|
| 4. |
Check if the parking brake is operating normally.
|
Components
[EPB Apply]
1. Rear brake disc2. Rear hub carrier
3. Rear brake caliper
[EPB None Apply]
1. Rear brake disc2. ...
 Rear Brake Disc Components and Components Location
Replacement
Front Brake Pad
1.
Disconnect the (-) battery terminal.
2.
Remove the front wheel a...
 Brake Pad Repair procedures
See also:
Inspection
1.
Turn the ignition switch OFF.
2.
Remove the ECTS (Refer to "Removal").
3.
After immersing the ther ...
SS-A Solenoid Valve (SS-A_ON/OFF) Installation
Installation
1.
Install in the reverse order of removal.
...
Inspection
1.
Turn ignition switch OFF.
2.
Remove the air duct.
(Refer to Engine Mechanical System - "Air cleaner")
...
Manuals list
- Kia Sorento MQ4 2021-2026 Owners Manual
- Kia Sorento XM 2011-2015 Owners Manual
- Kia Sorento XM 2011-2015 Service Manual

Copyright © www.ksmanual.com 2014-2026 - 0.044