
 Kia Sorento: Radiator Repair procedures
| Removal and Installation |
| 1. |
Disconnect the battery negative ( - ) terminal.
|
| 2. |
Remove the engine room under cover.
(Refer to Engine and Transaxle Assembly - "Engine Room Under
Cover")
|
| 3. |
Drain the engine coolant.
(Refer to Cooling System - "Coolant")
|
| 4. |
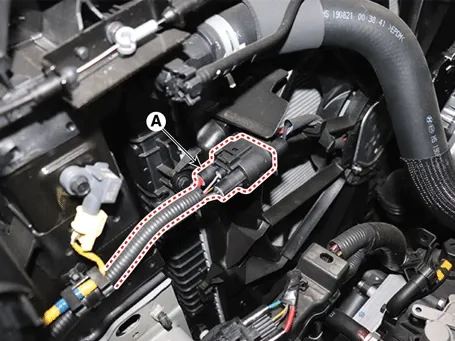
Disconnect the cooling fan connector (A).
|
| 5. |
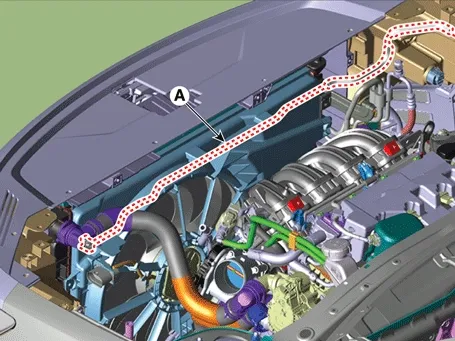
Disconnect the degassing hose (A).
|
| 6. |
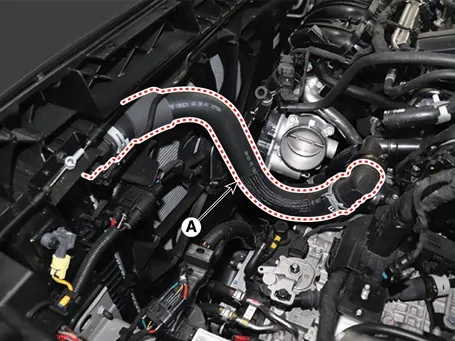
Disconnect the radiator upper quick connector (A).
|
| 7. |
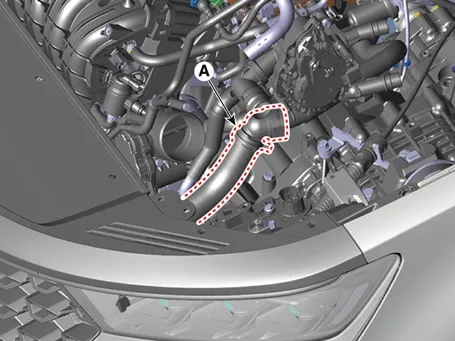
Disconnect the radiator lower quick connector (A).
|
| 8. |
Remover the front bumper assembly.
(Refer to Body (Interior and Exterior) - "Front Bumper
Assembly")
|
| 9. |
Remover the front bumper beam assembly.
(Refer to Body (Interior and Exterior) - "Front Bumper Beam
Assemblys")
|
| 10. |
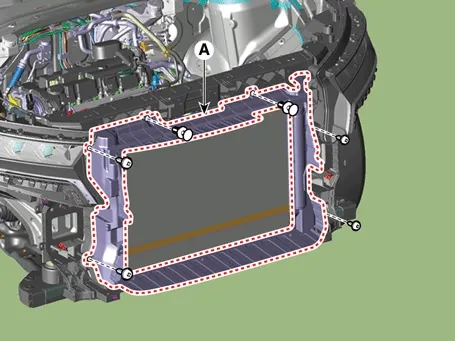
Remove the air guide (A).
|
| 11. |
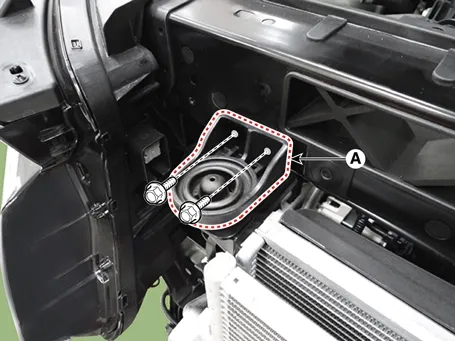
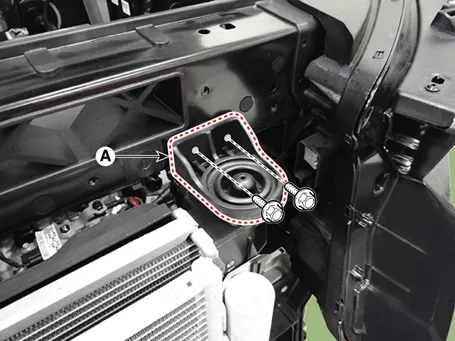
Remove the radiator upper mounting bracket (A).
[RH]
[LH]
|
| 12. |
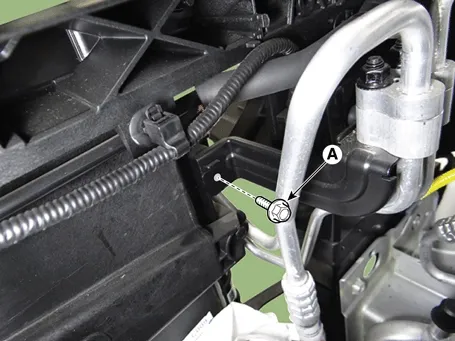
Remover the bracket bolt (A).
|
| 13. |
Separate the condenser from the radiator.
(Refer to Heating,Ventilation And Air Conditioning -
"Condenser")
|
| 14. |
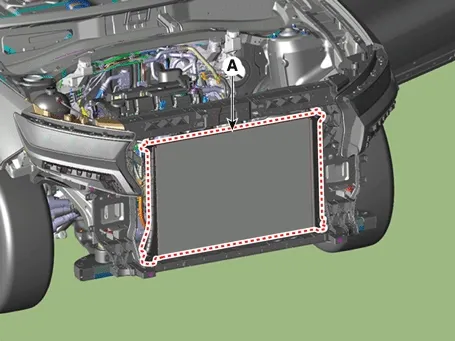
Remove the radiator (A) from the vehicle.
|
| 15. |
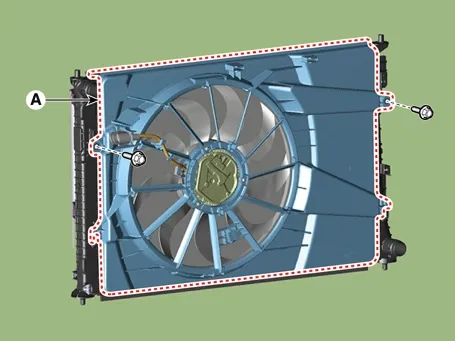
Remove the cooling fan (A) from the radiator.
|
| 16. |
Install in the reverse order of removal.
|
| 17. |
Fill with engine coolant.
(Refer to Cooling System - "Coolant")
|

| 18. |
Start engine and check for leaks.
|
| 19. |
Recheck engine coolant level.
|
| Inspection |
| 1. |
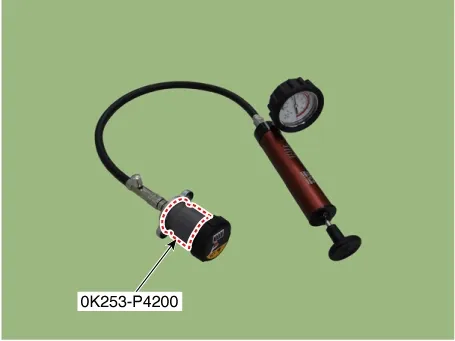
Install the pressure cap and pressure tester on a SST (0K253-P4200).
|
| 2. |
Apply a pressure of 125.53 - 154.95 kPa (1.28 - 1.58 kg/cm², 18.21 - 22.47 psi).
|
| 3. |
Check for a drop in pressure.
|
| 4. |
If the pressure drops, replace the cap.
|
| 1. |
Wait until engine is cool, then carefully remove the pressure cap and fill the reservoir tank with engine
coolant, then install it on the pressure tester.
|
| 2. |
Apply a pressure tester to the radiator and apply a pressure of 125.53 - 154.95 kPa (1.28 - 1.58 kg/cm²,
18.21 - 22.47 psi).
|
| 3. |
Inspect for engine coolant leaks and a drop in pressure.
|
| 4. |
Remove the tester and reinstall the pressure cap.
|
 Radiator Components and Components Location
 Integrated Thermal Management Module (ITM) Components and Components Location. Integrated Thermal Management Module (ITM) Description and Operation
See also:
Radiator Removal and Installation
1.
Disconnect the battery terminals.
2.
Remove the air cleaner assembly.
(Refer to Intake And Exhaust System - "Air Cleaner" ...
Cylinder Block Reassembly
1.
Install the oil jet (A).
Tightening torque :
24.5 ~ 29.4 N.m (2.5 ~ 3.0 kgf.m, 18.1 ~ 21.7 lb-ft)
...
Timing Chain Inspection
Sprockets, Hydraulic Tensioner, Chain Guide, Tensioner Arm, Timing Chain
1.
Check the CVVT sprocket, crankshaft sprocket teeth for abnormal wear,
cracks or damage. Replace ...
Manuals list
- Kia Sorento MQ4 2021-2026 Owners Manual
- Kia Sorento XM 2011-2015 Owners Manual
- Kia Sorento XM 2011-2015 Service Manual
