Kia Sorento: Propeller Shaft Repair procedures - Propeller Shaft Assembly - Driveshaft and axleKia Sorento: Propeller Shaft Repair procedures

Kia Sorento (MQ4, 2021-2026) Service Manual / Driveshaft and axle / Propeller Shaft Assembly / Propeller Shaft Repair procedures

Removal
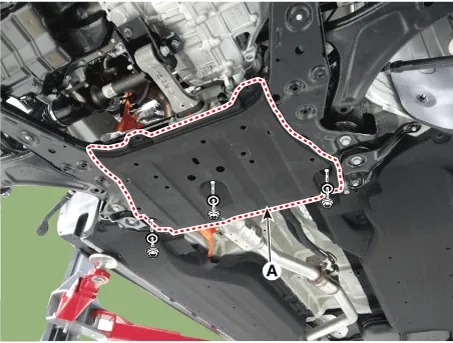
1.
Remove the nut and remove the sub frame under cover (A).

Tightening torque :
7.8 - 11.7 N·m (0.8 - 1.2 kgf·m, 5.7 - 8.6 lb·ft)

Driveshaft and axle — Propeller Shaft Assembly / Propeller Shaft / Repair procedures / Removal illustration

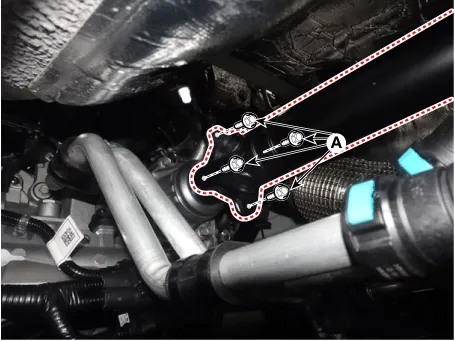
2.
After making a match mark on the flange yoke and transaxle companion, remove the propeller shaft mounting bolts (A).

Tightening torque :
53.9 - 68.6 N·m (5.5 - 7.0 kgf·m, 39.8 - 50.6 lb·ft)

Driveshaft and axle — Propeller Shaft Assembly / Propeller Shaft / Repair procedures / Removal illustration

Note
•
Do not reuse mounting bolts.
•
When retightening the propeller shaft mounting bolts after removing them, each bolt and washer must be placed in its original position and bolt insertion direction must be the same as before, so make marks not to allow the bolts and washers to be mixed up before removing the propeller shaft.
•
If abnormal vibration and noise occur at high vehicle speeds after replacing propeller shaft with a new one, balance the propeller shaft with a balancing machine.
•
When removing the propeller shaft, after removing the transfer assembly side or the rear differential side, if the propeller shaft is left down, the internal parts may be damaged.
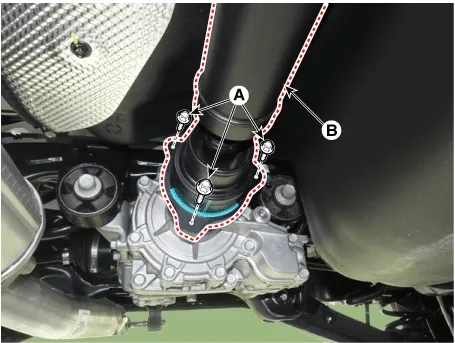
3.
Make the alignment marks on the rubber coupling of the propeller and companion, and the corresponding marks on the differential carrier, and then remove the propeller shaft tightening bolt.

Tightening torque :
53.9 - 68.6 N·m (5.5 - 7.0 kgf·m, 39.8 - 50.6 lb·ft)

Driveshaft and axle — Propeller Shaft Assembly / Propeller Shaft / Repair procedures / Removal illustration

Note
•
Do not reuse mounting bolts.
•
When retightening the propeller shaft mounting bolts after removing them, each bolt and washer must be placed in its original position and bolt insertion direction must be the same as before, so make marks not to allow the bolts and washers to be mixed up before removing the propeller shaft.
•
If abnormal vibration and noise occur at high vehicle speeds after replacing propeller shaft with a new one, balance the propeller shaft with a balancing machine.
•
When removing the propeller shaft, after removing the transfer assembly side or the rear differential side, if the propeller shaft is left down, the internal parts may be damaged.
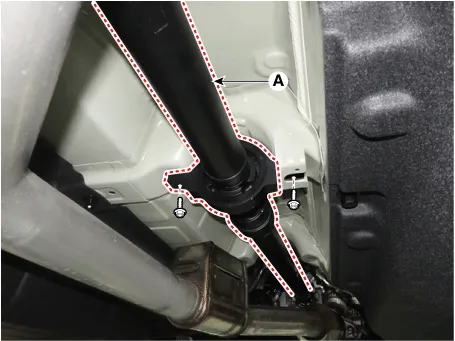
4.
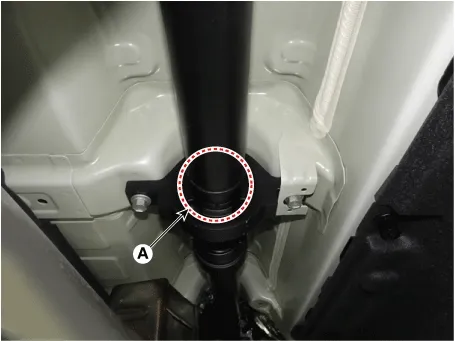
Remove the center bearing bracket (A) mounting bolts.

Tightening torque :
53.9 - 68.6 N·m (5.5 - 7.0 kgf·m, 39.8 - 50.6 lb·ft)

Driveshaft and axle — Propeller Shaft Assembly / Propeller Shaft / Repair procedures / Removal illustration

Inspection
1.
Place the transmission in neutral or N.
2.
Raise the vehicle, and make sure it is securely supported.
3.
Check the CV joint boot (A). If the CV joint boot is damaged, replace the propeller shaft assembly.

Driveshaft and axle — Propeller Shaft Assembly / Propeller Shaft / Repair procedures / Inspection illustration

4.
Check the excessive movement of CV joint.
If has that, should be replaced the propeller shaft.
Installation
1.
Install in the reverse order of removal.
Propeller Shaft Components and Components Location
Components 1. Center bearing bracket2. Front propeller shaft 3. Rear propeller shaft...

Differential Carrier Assembly
...
See also:

Specifications
Item Specification Master cylinder ...

Windshield Glass Installtion
1. With a knife, scrape the old adhesive smooth to a thickness of about 2mm (0.08 in.) on the bonding surface around the entire windshield opening flange : ...

Engine compartment
1. Engine coolant reservoir 2. Engine oil filler cap 3. Brake fluid reservoir 4. Air cleaner 5. Fuse box 6. Positive battery terminal 7. Negative battery terminal 8. Windshield washer fluid r ...

Copyright © www.ksmanual.com 2014-2026 - 0.0814