Kia Sorento: Oil hydraulic Motor(Actuator) Repair procedures - Coupling Assembly - All Wheel Drive (AWD) SystemKia Sorento: Oil hydraulic Motor(Actuator) Repair procedures

Kia Sorento (MQ4, 2021-2026) Service Manual / All Wheel Drive (AWD) System / Coupling Assembly / Oil hydraulic Motor(Actuator) Repair procedures

Inspection
Information
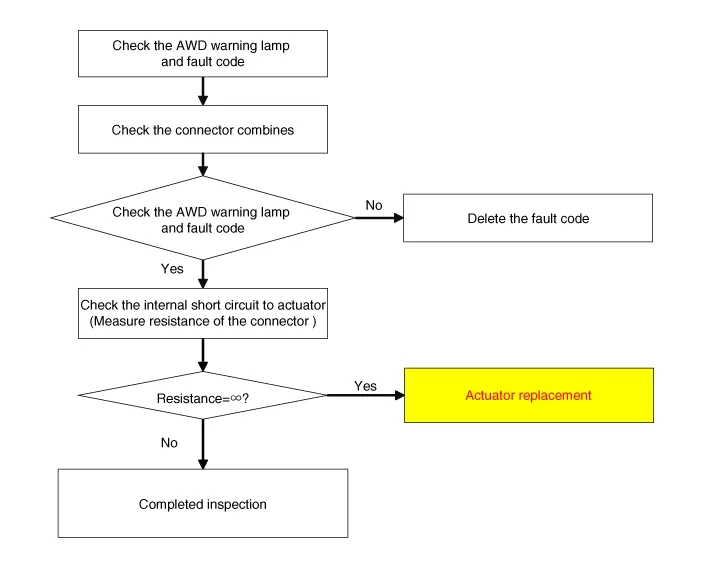
If you have trouble code related to the oil hydraulic motor (actuator), check oil hydraulic motor (actuator) according to the inspection process.
Oil Hydraulic Motor (Actuator) Inspection Procedure

All Wheel Drive (AWD) System — Coupling Assembly / Oil hydraulic Motor(Actuator) / Repair procedures / Inspection illustration

Removal
1.
Remove the coupling assembly.
(Refer to Coupling Assembly - "Direct Electro Hydraulic Actuator Coupling")
2.
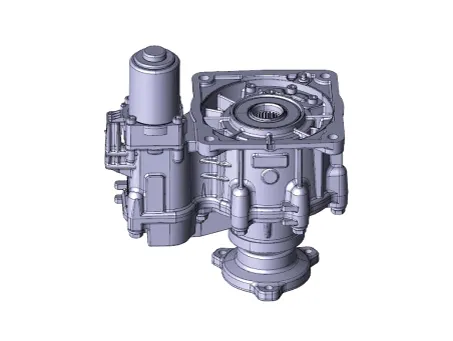
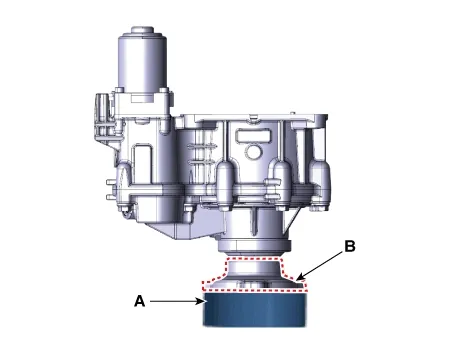
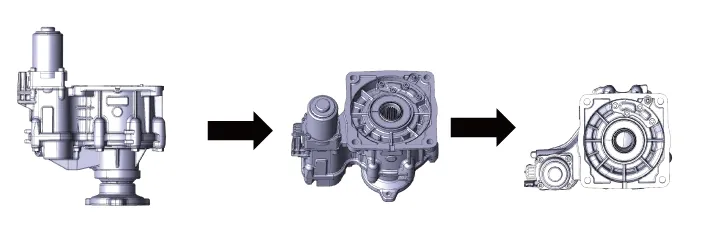
Keep going perpendicular state after remove the coupling assembly.
Note
•
Keep going perpendicular state during remove (install) the hydraulic motor (actuators).

All Wheel Drive (AWD) System — Coupling Assembly / Oil hydraulic Motor(Actuator) / Repair procedures / Removal illustration

•
Use a tool (A) that allows the auxiliary operator to hold or seat the coupling in a vertical position.
•
So that the input shaft side (B) is not damaged.

All Wheel Drive (AWD) System — Coupling Assembly / Oil hydraulic Motor(Actuator) / Repair procedures / Removal illustration

All Wheel Drive (AWD) System — Coupling Assembly / Oil hydraulic Motor(Actuator) / Repair procedures / Removal illustration

Precautions for Hydraulic Motor Service to Prevent Coupling Oil Leakage (Play ▶)All Wheel Drive (AWD) System — Coupling Assembly / Oil hydraulic Motor(Actuator) / Repair procedures / Removal illustration
Notes When Refering Video
This video provides guidance for understanding complex or hard-to-follow procedures by showing each step clearly.
As needed, the video also provides clear guidance on essential procedural steps, including adjustment and diagnostic processes, the use of SSTs, and precautions to avoid component damage.
•
This video is created using common specifications and may differ from the actual vehicle.
•
The location and repair procedures of the parts may vary depending on vehicle model, model year, region, and specifications.
•
Check the KDS guide for detailed information on how to use the KDS.
•
Check the manual for detailed maintenance procedures.
•
Unauthorized reproduction, distribution, or sharing of this video is prohibited.
3.
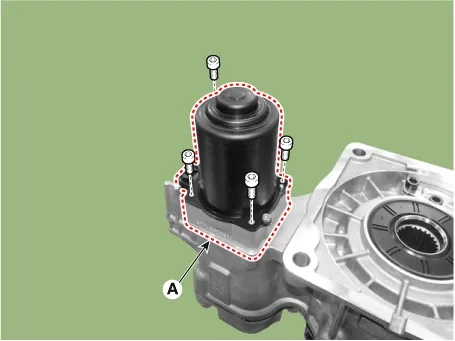
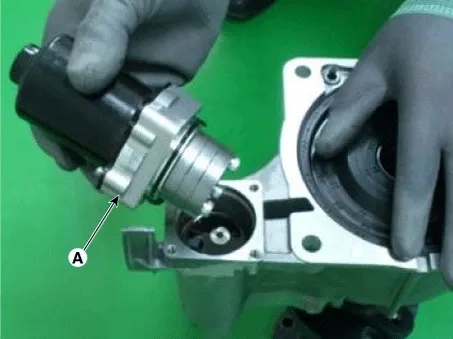
Remove the hydraulic motor (A) after removing bolts with hex wrench.

All Wheel Drive (AWD) System — Coupling Assembly / Oil hydraulic Motor(Actuator) / Repair procedures / Removal illustration

Note
Remove the hydraulic motor (actuators) after dropping residual oil as much as possible inside the coupling. (abut 5-10 sec)

All Wheel Drive (AWD) System — Coupling Assembly / Oil hydraulic Motor(Actuator) / Repair procedures / Removal illustration

Installation
1.
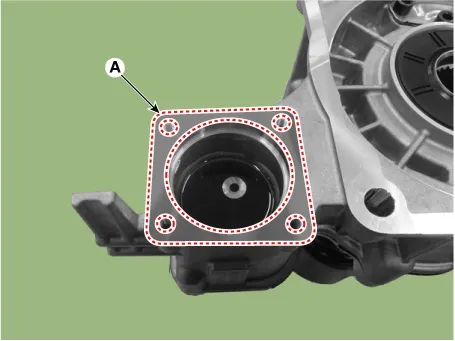
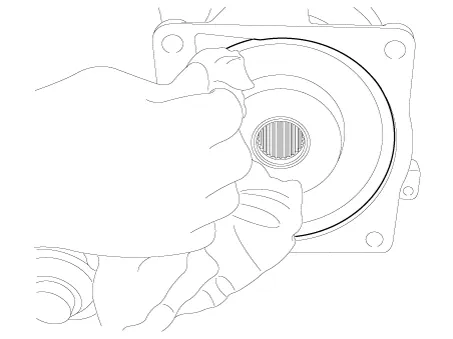
Before installation, wipe the surface (A) with a clean cloth.

All Wheel Drive (AWD) System — Coupling Assembly / Oil hydraulic Motor(Actuator) / Repair procedures / Installation illustration

2.
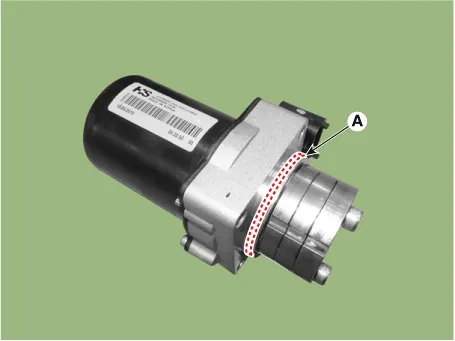
Check the O-rings (A) of the new hydraulic motor (actuators).

All Wheel Drive (AWD) System — Coupling Assembly / Oil hydraulic Motor(Actuator) / Repair procedures / Installation illustration

Note
You have to prevent any dust from entering inside hydraulic motors (actuators) and housing.
3.
After mounting the hydraulic motor (actuator) (A), tighten the bolts.

Tightening torque :
9.8 - 11.7 N·m (1.0 - 1.2 kgf·m, 7.2 - 8.6 lb·ft)

All Wheel Drive (AWD) System — Coupling Assembly / Oil hydraulic Motor(Actuator) / Repair procedures / Installation illustration

Note
•
Motor connector has to toward in the direction of outside of the coupling when installing the motor.
•
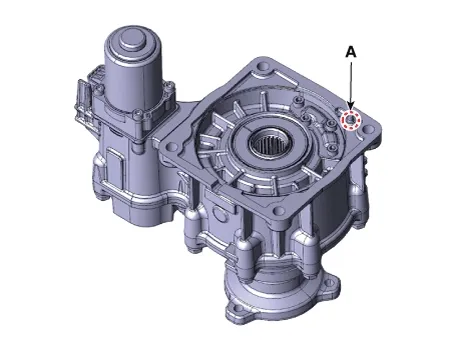
Oil can be reflux by the pressure in air breather hole (A) when installing the motor .

All Wheel Drive (AWD) System — Coupling Assembly / Oil hydraulic Motor(Actuator) / Repair procedures / Installation illustration

•
Change direction in the direction of the arrow and lay on the floor as shown in the illustration.
※ The reflux oil will flow to the bottom.
•
You have to prevent additional backflow in according to order as shown in the illustration.

All Wheel Drive (AWD) System — Coupling Assembly / Oil hydraulic Motor(Actuator) / Repair procedures / Installation illustration

4.
Wipe the flowed oil to around the surface with a clean cloth.

All Wheel Drive (AWD) System — Coupling Assembly / Oil hydraulic Motor(Actuator) / Repair procedures / Installation illustration

5.
Install the coupling assembly.
(Refer to Coupling Assembly - "Direct Electro Hydraulic Actuator Coupling")
Oil hydraulic Motor(Actuator) Description and Operation

Description The AWD ECM controls the Pump Motor Pump (Actuator) to generating an oil pressure. The pressure engages a multiple disk clutch to transfer torque to the rear wheels. The to...
Pressure Sensor Description and Operation
Description The AWD ECU makes a Motor Pump (Actuator) turn round for generating an oil pressure. And then it presses a multiple disk clutch and transfers the generated torque into rear...
See also:

Special Service Tools. Work Safety Precautions
Special Service Tools Special Service Tools Tool Name / Number Illustration Description ...

Installation
1. Check that the shift lever is placed in the "N" position 2. Install the inhibitor switch (A). ...

Rear Wiper Motor Removal
1. Detach the rear wiper cap (A). 2. Remove the rear wiper arm & blade (A) after removing rear wiper HEX nut (B). ...

Copyright © www.ksmanual.com 2014-2026 - 0.0492