Kia Sorento: Heater Unit Removal and Installation - Heater - Heating,Ventilation And Air ConditioningKia Sorento: Heater Unit Removal and Installation

Kia Sorento (MQ4, 2021-2026) Service Manual / Heating,Ventilation And Air Conditioning / Heater / Heater Unit Removal and Installation

Removal
Information
If the air conditioner is operational, run it for a few minutes.
1.
Recover the refrigerant with Recovery/Recycling/Charging equipment.
(Refer to Air conditioning System - "Refrigerant Recovery/Recycling/Charging/Vacuum/Leak Test")
2.
When the engine is cooled, drain the engine coolant from the radiator.
(Refer to Engine Mechanical System - "Coolant")
3.
Remove the main crash pad assembly.
(Refer to Body - "Main Crash Pad Assembly")
4.
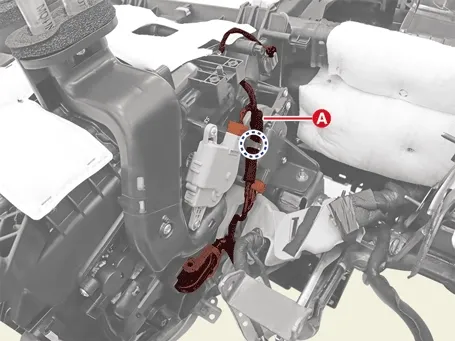
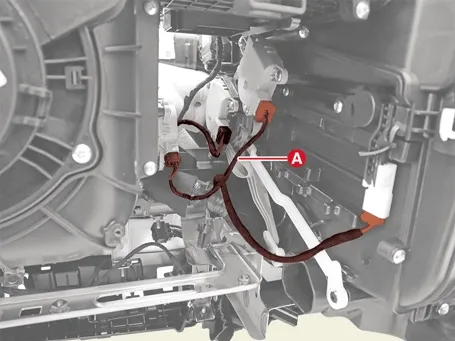
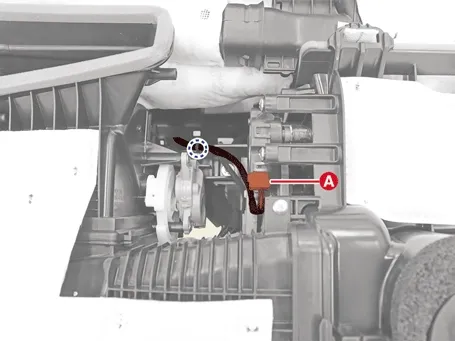
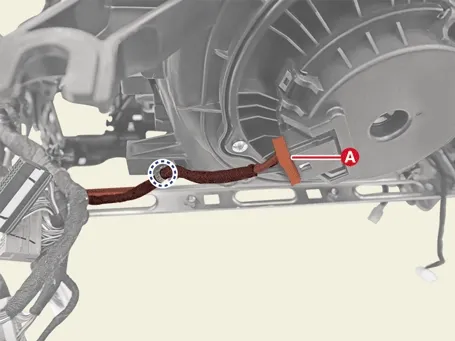
Disconnect the each connector of the heater and blower unit and remove the wiring clips.
[Driver's side]

Heating,Ventilation And Air Conditioning — Heater / Heater Unit / Removal and Installation / Removal illustration

Information
Clip position :

Heating,Ventilation And Air Conditioning — Heater / Heater Unit / Removal and Installation / Removal illustration

[Passenger's side]

Heating,Ventilation And Air Conditioning — Heater / Heater Unit / Removal and Installation / Removal illustration

Heating,Ventilation And Air Conditioning — Heater / Heater Unit / Removal and Installation / Removal illustration

Heating,Ventilation And Air Conditioning — Heater / Heater Unit / Removal and Installation / Removal illustration

Information
Clip position :

Heating,Ventilation And Air Conditioning — Heater / Heater Unit / Removal and Installation / Removal illustration

5.
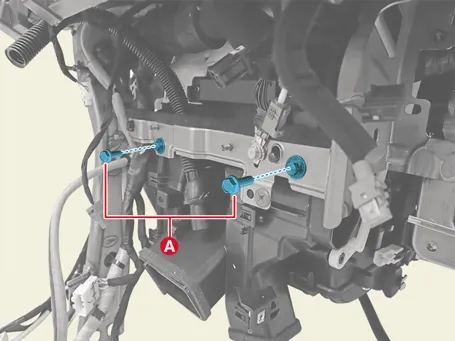
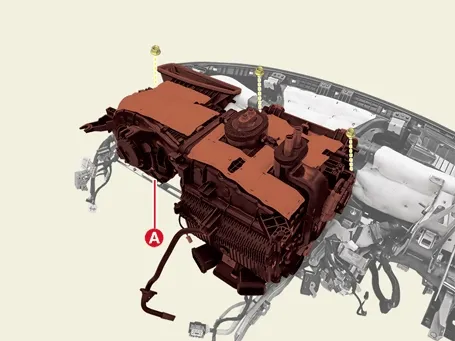
Remove the heater and blower unit.
(1)
Remove the bolt (A).

Tightening torque :
3.9 - 5.9 N·m (0.4 - 0.6 kgf·m, 2.9 - 4.3 lb·ft, 34.7 - 52.1 lb·in)

Heating,Ventilation And Air Conditioning — Heater / Heater Unit / Removal and Installation / Removal illustration

(2)
Remove the heater and blower unit (A) after removing the nuts.

Tightening torque :
3.9 - 5.9 N·m (0.4 - 0.6 kgf·m, 2.9 - 4.3 lb·ft, 34.7 - 52.1 lb·in)

Heating,Ventilation And Air Conditioning — Heater / Heater Unit / Removal and Installation / Removal illustration

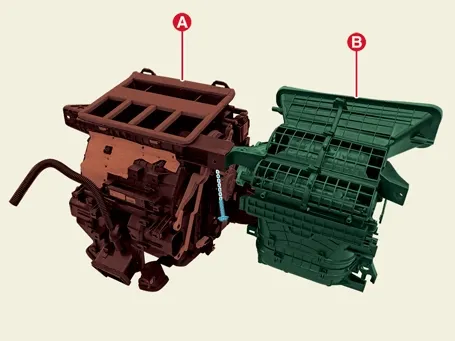
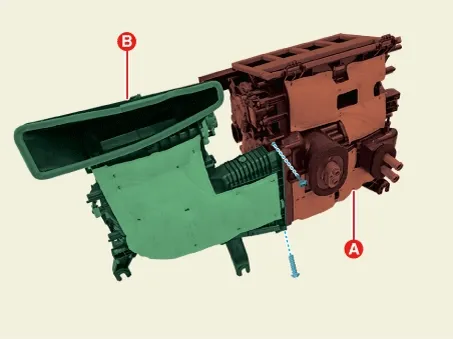
6.
Separate the heater unit (A) and the blower unit (B) after removing the screws.

Heating,Ventilation And Air Conditioning — Heater / Heater Unit / Removal and Installation / Removal illustration

Heating,Ventilation And Air Conditioning — Heater / Heater Unit / Removal and Installation / Removal illustration

Installation
1.
Install in the reverse order of removal.
Note
•
Be sure to inject the specified refrigerant and refrigeration oil by using the refrigerant recovery/charging equipment dedicated.
•
Perform the refrigerant leak test/vacuum/charging by using the refrigerant recovery/recycling/charging machine.
(Refer to Air conditioning System - "Refrigerant Recovery/Recycling/Charging/Vacuum/Leak Test")
•
Perform the compressor oil inspection.
(Refer to Air conditioning System - "Compressor Oil")
On Vehicle Inspection
On Vehicle Inspection Diagnostic with KDS 1. The heater system can be more quickly diagnosed for problems with the KDS (R...
Heater Core Removal and Installation
Removal 1. Remove the blower unit from the heater unit. (Refer to Heater - "Heater Unit") 2. ...
See also:

Blower Unit Replacement
1. Disconnect the negative (-) battery terminal. 2. Recover the refrigerant with a recovery/recycling/charging station. 3. ...

Parking Assist Sensor Installation
1. Install the rear ultra sensor after connecting the connector. 2. Install the rear bumper cover. 3. Connect t ...

IPM Description
IPM (Intelligent intergrated Platform Module) receives various input switch signals ling time and alarm fuctions for fr washer interlocking wiper, fr intermittent wiper, mist wiper, rea ...

Copyright © www.ksmanual.com 2014-2026 - 0.058